S
9
WARNING
bar. Then, loosen
ock the axle in place
tightene s in
, door may raise or
resulting in serious
.
Springs can cause serious injury
. Open the door until the marked
re do r.
not installed on a corrugation as shown.
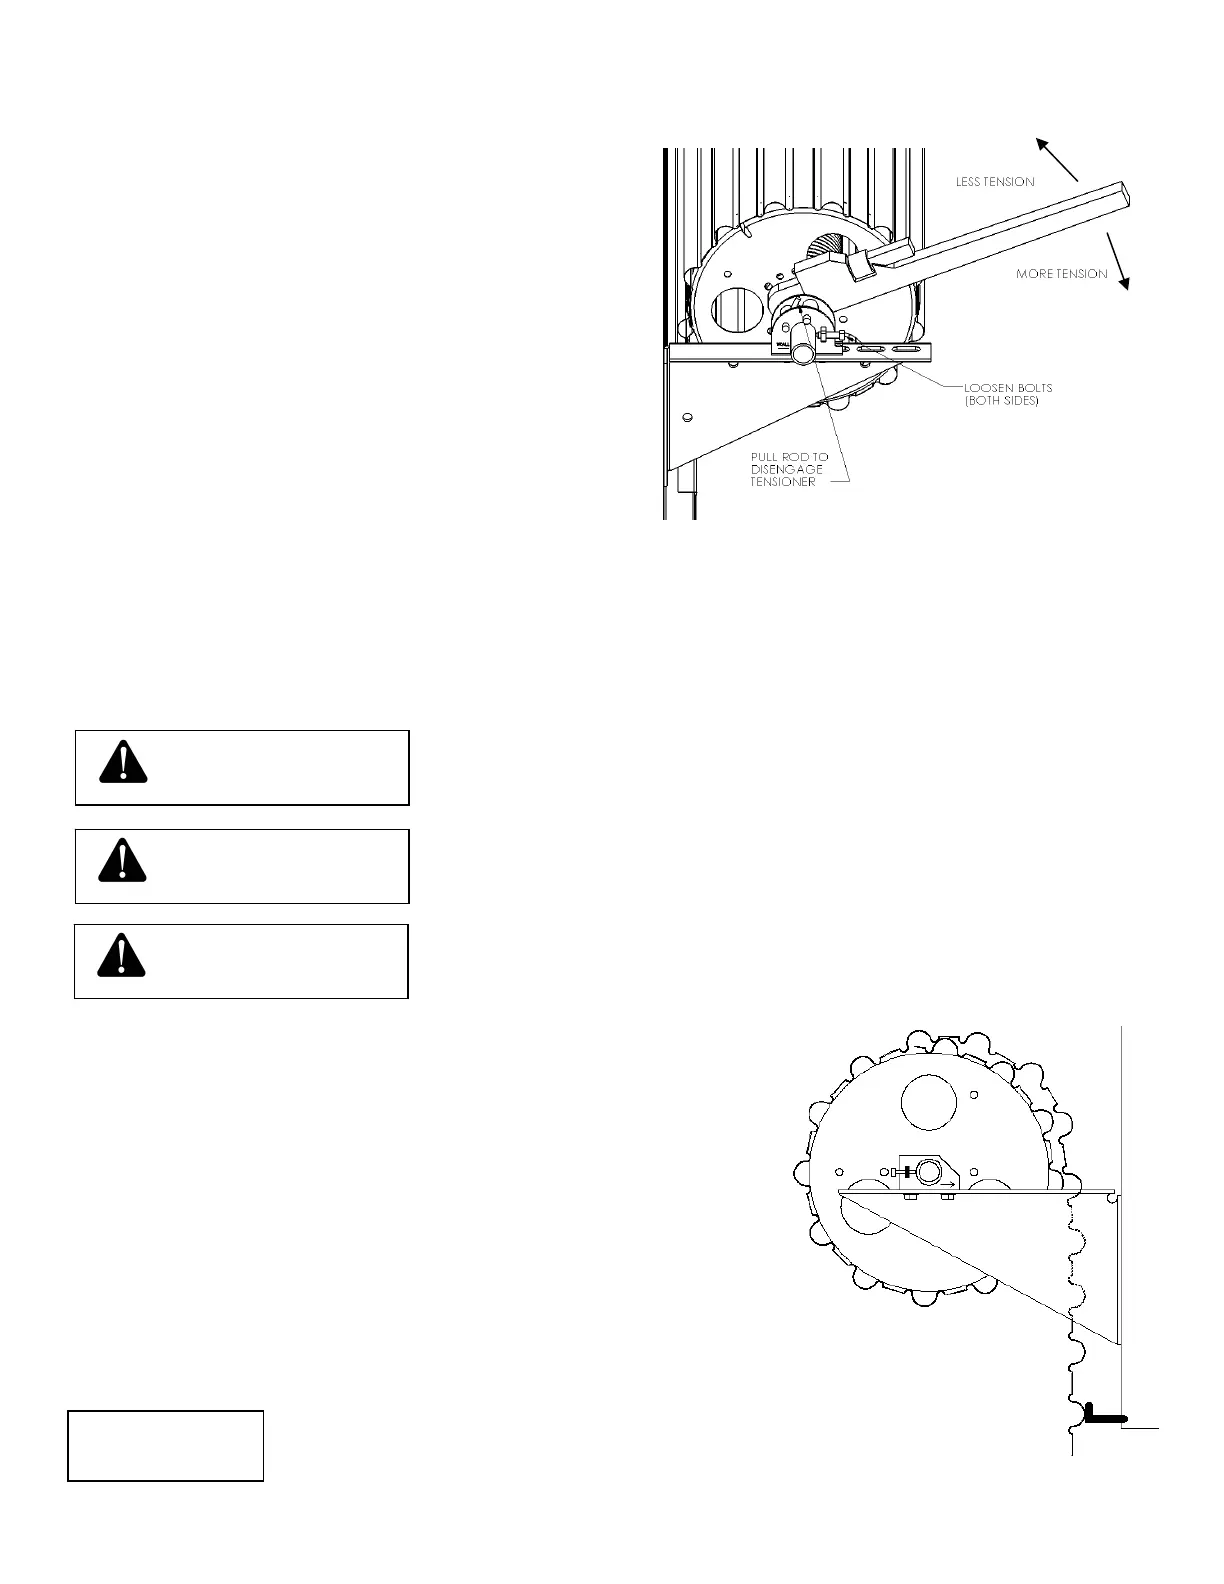
TEP 10 CHECK AND ADJUST SPRING BAL
Lower and raise the door to check the counterbalance. If
the door lowers easily and raises hard, more spring tension
is required. If the door lowers hard and raises easily, less
spring tension is required. First, open the door fully and
sten vise grips to guides below bottom
ANCE
fa
the set screws on both tensioners.
To remove tension, slightly pull down on the pipe wrench
to unlock the tensioner. Then, pull and hold the small rod
on the top of the tensioner to completely disengage the
tensioner. Slowly release tension by allowing the wrench
rotate. Release the tensioner rod to lto
while re-adjusting the pipe wrench.
efore operating the door, re-tighten the set screws on the tensioners. Remember to tighten all 3 square-headed B
locking bolts on the tensioner devices when finished to maintain desired adjustment.
Repeat the above procedure if further adjustments are required. Once all adjustments have been made and the door
is operating properly, recheck all fasteners and bolted connections to ensure that they are in place and properly
d. Verify that all set screw the components installed in step #4 have been tightened.
Securely hold door curtain until bottom bar stop fasteners
have been tightened. If not securely held
drop, possibly causing injury or death.
Never remove bottom bar stops when adjusting tension,
therwise, door can spin uncontrollably
WARNING
o
injury or death.
nce the tensioner rod is disengaged, hold wrench securelyO
if not controlled properly.
STEP 11 INSTALLATION OF TOP DRAFT STOP
Close the door and secure it in the down position. Use a pencil to mark the
door panel corrugation that is parallel with the bottom of the header/lintel
from the outside of the opening. If this corrugation protrudes below the
eader, mark the one just aboveh
corrugation is accessible.
Stretch the top draft stop across the door and attach it to the curtain on the
marked corrugation using the #8 x ½” self-drilling screws, locating the
screws every 12" on center. Trim the Top Draft Stop to clear the guides if
quired. When the or is closed, the draft-stop should seal on the heade
Top Draft Stop may not seal on header if
NOTE:
WARNING