Tools Needed:
24
Please Do Not Return This Product To The Store. Contact your local Wayne-Dalton dealer.
To find your Wayne-Dalton dealer; refer to your local yellow pages / business listings or go to Find a dealer area online at www.wayne-dalton.com
Positioning Support Bracket
23
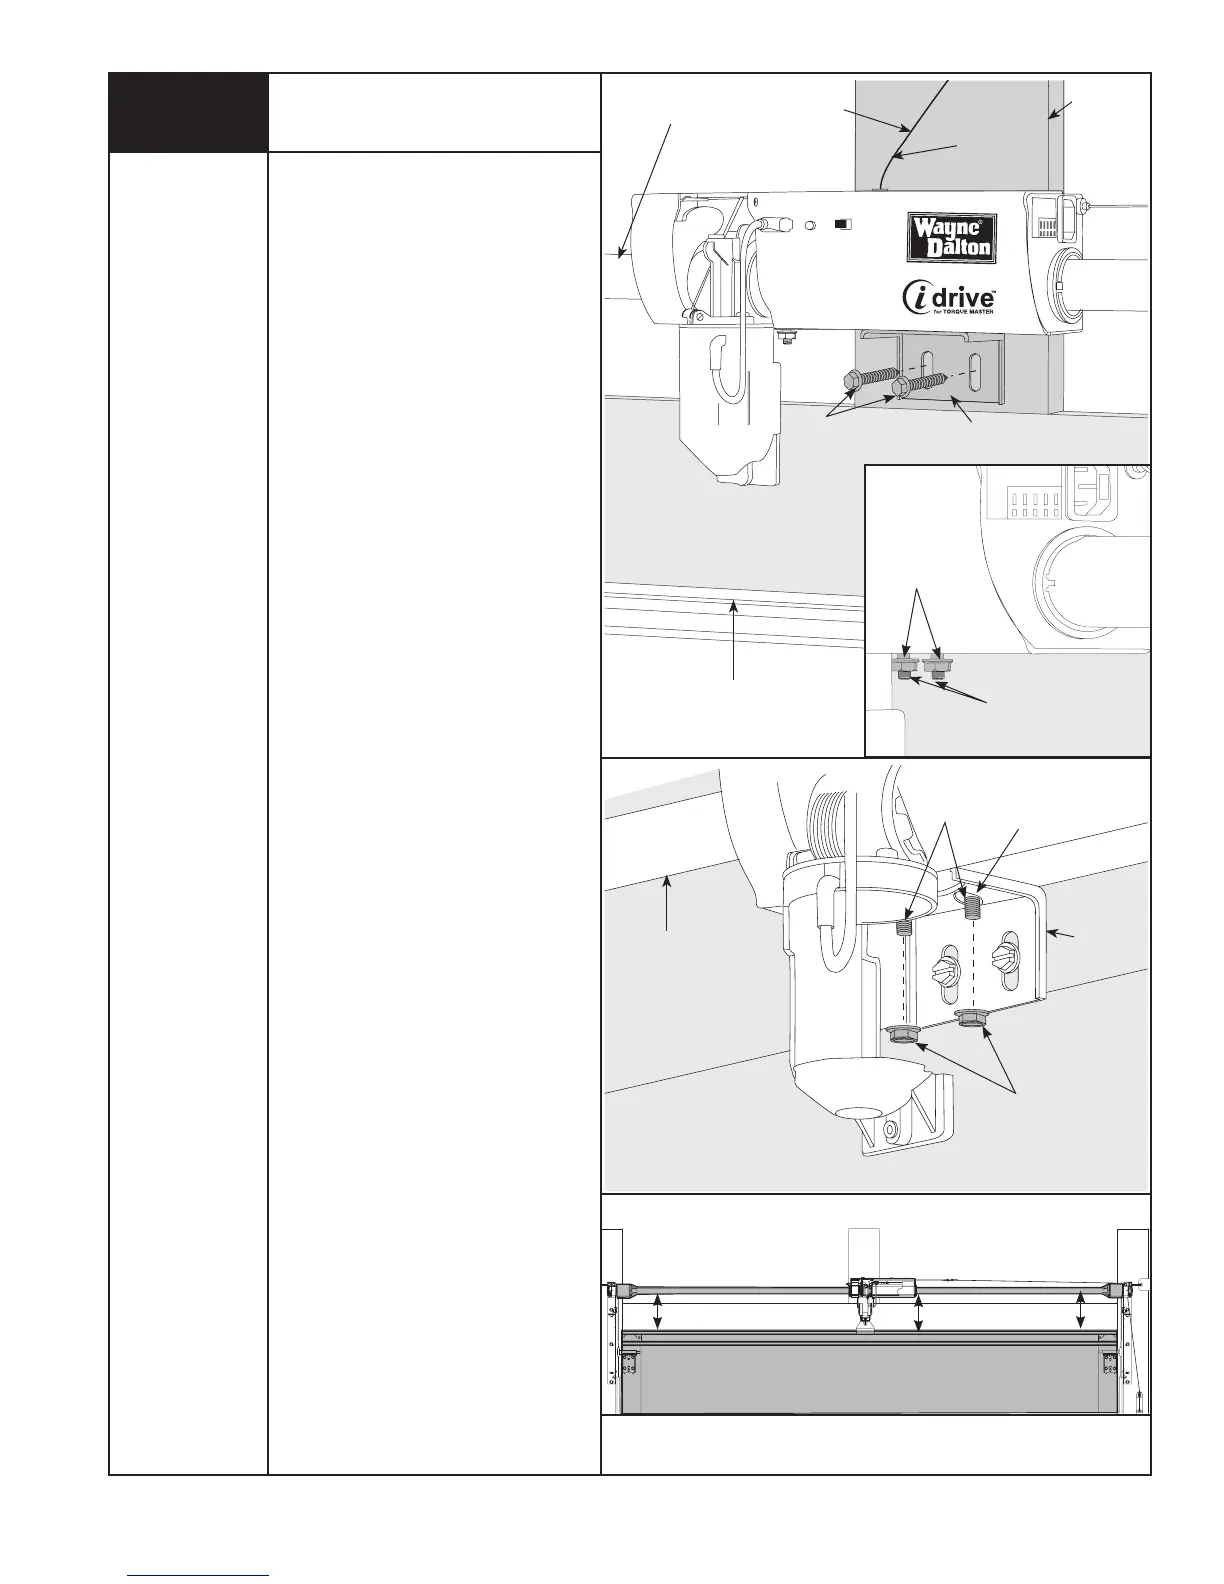
USING A TAPE MEASURE, MAINTAIN AN EQUAL MEASUREMENT “X”
(TOP OF DOOR TO BOTTOM OF TORQUEMASTER® TUBE) AT BOTH
ENDS AND THE CENTER.
TOP SECTION
“X”
“X”
NOTE: See idrive
®
main installation and
owners manual for idrive
®
parts.
NOTE: idrive
®
must be installed on a
solid mounting surface.
Locate the mounting surface. Remove
(2) 1/4”-20 flange nuts from bottom of
opener.
NOTE: Do not discard flange nuts.
Place the support bracket underneath
opener, to the right side of motor,
centered on mounting surface. Using a
tape measure, level the bottom of the
TorqueMaster
®
spring tube to the top of
the door section with the idrive
®
resting
on the support bracket. Once
TorqueMaster
®
spring tube is level, drill
1/8” pilot holes for the lag screws. Then
secure support bracket to the mounting
surface with (2) 1/4” x 1-1/2" lag
screws.
IMPORTANT: TORQUEMASTER
®
SPRING
TUBE MUST BE LEVEL AFTER SUPPORT
BRACKET IS FASTENED TO MOUNTING
SURFACE.
NOTE: If wood mounting surface is
behind dry wall, use 1/4” x 2” lag
screws.
Lift and slide the opener over the
support bracket, aligning the mounting
studs with the bracket slots. Loosely
fasten to mounting studs with the (2)
1/4”-20 flange nuts.
NOTE: Do not tighten 1/4”-20 flange
nuts to opener studs at this time. You
will be instructed when to tighten them
in the idrive
®
main installation and
owners manual.
Remove the temporary orange label
holding the antenna wire. Straighten
antenna wire and angle it 45 degrees to
the right.
NOTE: Do not coil the antenna wire.
This will reduce the radio signal range.
Power Drill
1/8” Drill Bit
7/16” Socket
Driver
45 ANGLE
ANTENNA
WIRE
MOUNTING
SURFACE
(HEADER)
TOP OF DOOR
SUPPORT
BRACKET
1/4” X 1-1/2”
LAG SCREWS
1/4” - 20
FLANGE NUTS
MOUNTING
STUDS
MOUNTING
STUDS
BRACKET
SLOTS
SUPPORT
BRACKET
TORQUEMASTER
®
SPRING TUBE
(2) 1/4” - 20
FLANGE NUTS
TORQUEMASTER
®
SPRING TUBE
“X”









 To Next Page