25
Tools Needed:
Tools Needed:
Please Do Not Return This Product To The Store. Contact your local Wayne-Dalton dealer.
To find your Wayne-Dalton dealer; refer to your local yellow pages / business listings or go to Find a dealer area online at www.wayne-dalton.com
INSTALLATION
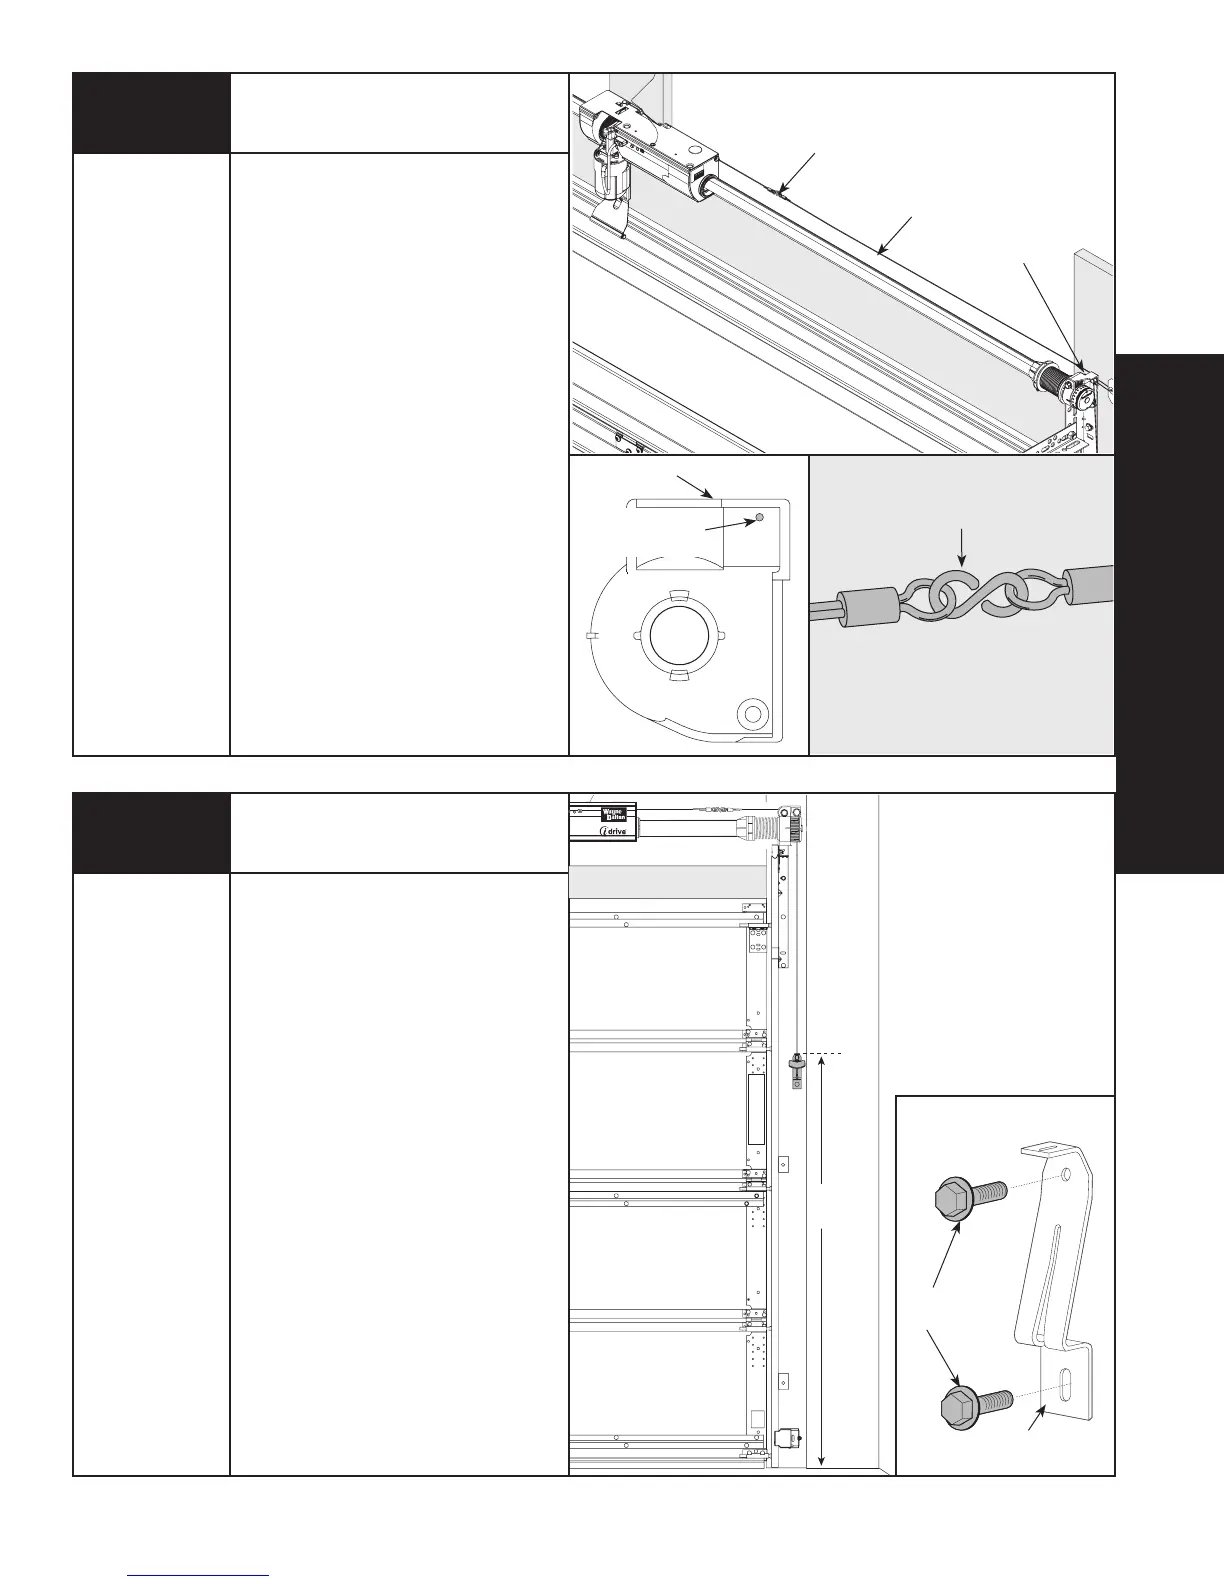
DISCONNECT
CABLE
S-HOOK
HOLE IN RIGHT
END BRACKET
NOTE: See idrive
®
main installation and
owners manual for idrive
®
parts.
Attach the loose disconnect cable
(located in opener hardware bag) to the
opener with the “S” hook. Close both
ends of the “S” hook (with pliers) to lock
assembly together.
Thread the disconnect cable (behind the
counterbalance cable) through the hole
in the right hand end bracket; remove
all slack between opener and right end
bracket.
Attaching Disconnect Cables
Pliers
Mounting Disconnect
Handle Bracket
Pencil
Tape measure
1/8” Drill Bit
7/16” Socket
Driver
Power Drill
CLOSE “S” HOOK
HOLE IN
END BRACKET
RIGHT SIDE OF
END BRACKET
NOTE: See idrive
®
main installation and
owners manual for idrive
®
parts.
Mark a location on the right jamb, 6
feet above the floor to mount the
disconnect handle bracket.
Drill 1/8” pilot holes for the lag screws.
Align top of the bracket with the mark.
Fasten bracket to the jamb with
(2) 1/4” x 1-1/2" lag screws.
(2) 1/4” X 1-1/2”
LAG SCREWS
DISCONNECT
HANDLE BRACKET
24
25







 To Next Page