7
EHG Orifice Size Chart (LP)
Btu/hr
Input
Orifice Part No.
Manifold
Pressure in. w.c.
425,000 (125 kW) “U” 0.3680” (9.35mm) 62438-031M 3.7 (922 Pa)
450,000 (132 kW) 3/8” 0.3750” (9.53mm) 62438-036M 3.5 (872 Pa)
500,000 (147 kW) 27/64” 0.4219” (10.72mm) 62438-037M 3.5 (872 Pa)
550,000 (161 kW) 29/64” 0.4531” (11.51mm) 62438-038M 3.5 (872 Pa)
600,000 (176 kW) 31/64” 0.4844” (12.3mm) 62438-039M 3.5 (872 Pa)
650,000 (191 kW) 1/2” 0.5000” (12.7mm) 62438-040M 3.5 (872 Pa)
700,000 (205 kW) 37/64” 0.5781” (14.68mm) 62438-041M 3.5 (872 Pa)
EHG Orifice Size Chart (Natural)
Btu/hr
Input
Orifice Part No.
Manifold
Pressure in. w.c.
425,000 (124.6 kW) 15/32” 0.4688” (11.91mm) 62438-011M 3.8 (922 Pa)
450,000 (131.9 kW) 31/64” 0.4844” (12.3mm) 62438-039M 3.5 (872 Pa)
500,000 (146.5 kW) 33/64” 05156” (13.1mm) 62438-043M 3.5 (872 Pa)
550,000 (161.2 kW) 35/64” 0.5469” (3.89mm) 62438-044M 3.5 (872 Pa)
600,000 (175.8 kW) 19/32” 0.5938” (15.08mm) 62438-045M 3.5 (872 Pa)
650,000 (190.5 kW) 5/8” 0.6250” (15.88mm) 62438-046M 3.5 (872 Pa)
700,000 (205.2 kW) 23/32” 0.7188” (18.26mm) No orifice 3.5 (872 Pa)
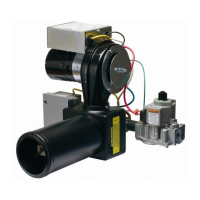
INSTALLATION
The EHG power gas conversion burners are
approved for use with natural and propane gas only.
The EHG burner models are shipped labeled and
orificed for natural gas. To convert to propane gas
and/or increase Btu/hr input on natural or propane
gas, an orifice kit is supplied with each burner with the
orifices shown in Figure 3.
To remove or interchange main orifice discs refer to
Figure 27.
1. Remove 1” NPT orifice plug, item #5.
2
. Remove orifice spring, item #4, to access and
remove orifice disc, item #3.
3. Install desired orifice from Figure 3, making sure it
is seated flat in the orifice holder, item #2.
4. Replace orifice spring and securely tighten 1”NPT
orifice plug (using proper pipe dope) into orifice
holder.
The installation must be wired and grounded in
accordance with local codes or in their absence, with
the National Electric Code ANSI/NFPA No. 70 latest
edition. In Canada, all wiring shall be done in
accordance with the Canadian Electrical Code.
For the 120 VAC wiring to the burner, use solid
copper conductor wire no lighter than #14 AWG. If a
fused disconnect is used, it should be fused for a
minimum of 15 amps.
CAUTION: The burner is equipped with its own 24
VAC transformer. Do not add any 24 VAC power
consuming device in the 24 VAC control circuit of the
burner, as it could overload the transformer.
CAUTION: Label all wires prior to disconnection
when servicing controls. Wiring errors can cause
improper and dangerous operation.
Verify proper operation after servicing.
NOTE: if any of the original burner wiring must be
replaced, it must be replaced with #18 AWG 105° C
wire or equivalent.
See Section III – Operation and Troubleshooting for
applicable burner wiring diagrams.