Setting Up WAZER
Install WAZER.
In this section, we will discuss preparing the WAZER’s location, unboxing it properly, completing
the physical installation, and connecting WAZER to electricity and water. After you complete this
section, you will be ready to make your first Cut.
The following procedures must be followed to setup WAZER:
•
Choose a location for WAZER
• Unbox WAZER
• Install WAZER
• Install the Pump Vent Cap
• Establish three water connections
• Establish three Power Cable connections
• Anchor WAZER to the wall
Most of these tasks have multiple steps. It is crucially important to get the installation right, or
WAZER will not function properly. Read carefully and don’t hesitate to get in touch with WAZER
support if you are still unclear after reviewing the User Manual.
VIDEO icon indicates that video instructions are available.
To see our How-To Videos, visit www.wazer.com/resources.
SECTION
4
VIDEO
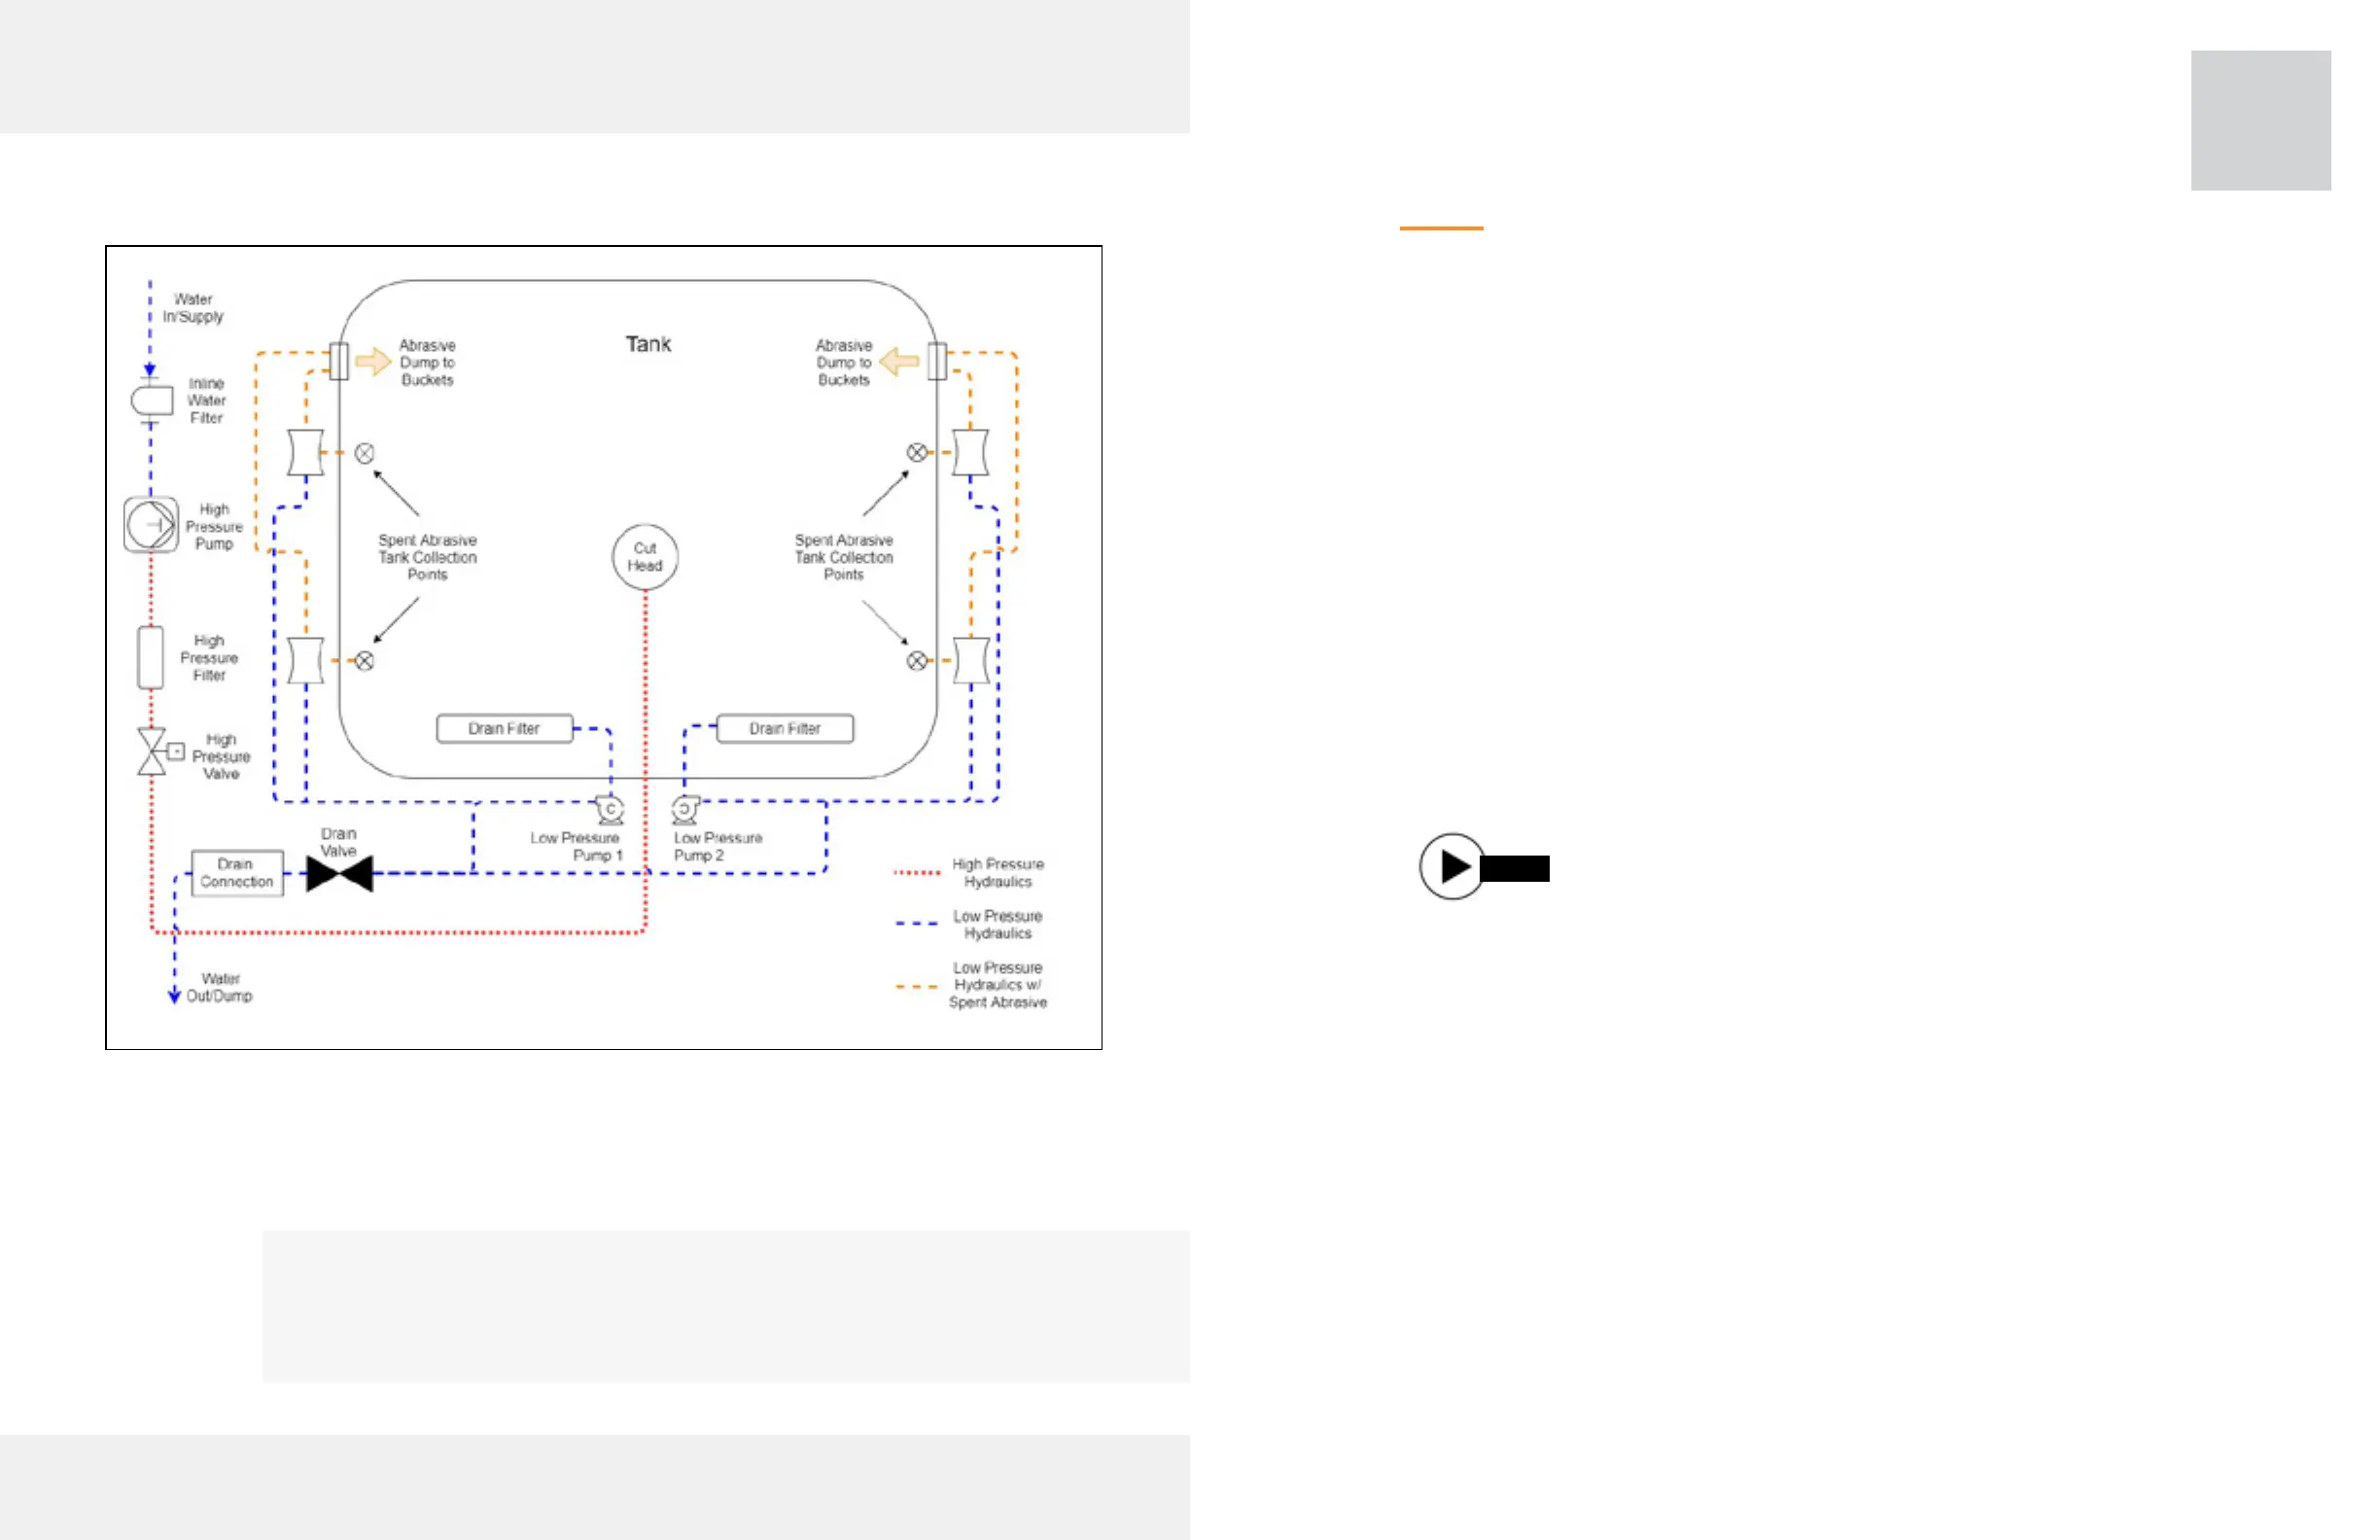
Hydraulic System Diagram
The above illustration shows the high pressure and low pressure
hydraulic system diagrams with relevant components.
25