Webasto Product N.A., Inc. 56 www.techwebasto.com
REPAIR DBW 2010/2020/300 COOLANT HEATERS
9.2.12 DRIVE MOTOR, REPLACEMENT
9.2.12.1 REMOVAL
NOTE: Take note of alignment of all
components before disassembly.
1. Move ignition coil out of the way. See Sec. 9.2.11
for guidance.
2. Remove four screws (item 6, Fig. 45) and withdraw
protection cap (1) from burner.
3. Disconnect motor leads.
4. Remove three screws (7) with lock washers and
withdraw drive motor (2).
5. Remove two screws (8) from motor (2) and flange
(3).
6. Inspect all parts for wear and damage and replace
as necessary.
9.2.12.2 INSTALLATION
NOTE: Recessed edge of mounting flange
(item 3, Fig. 45) must be oriented towards top.
All items must be aligned as before disassembly.
1. Attach mounting flange (3) to drive motor (2).
2. Tighten screws (8) to 5 - 6 Nm (44 - 53 lb-in.).
3. Align motor shaft, coupler (4) and flange (3) with
housing (5) and attach with screws (7).
4. Tighten screws (7) to 5 - 6 Nm (44 - 53 lb-in.).
5. Connect motor electrical leads.
6. Locate protection cap (1) and secure with the four
screws (6) removed earlier.
7. Tighten screws (6) to 2 Nm (18 lb-in.).
8. Install ignition coil
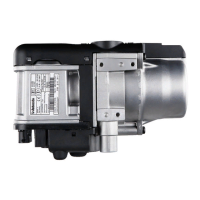
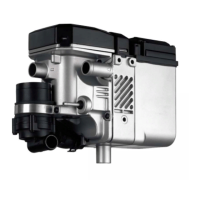
Figure 45: Drive Motor Assembly
1
2
3
4
5
DBW 2010
6
7
8
9
DBW 2020/300
1
2
3
4
5
6
7
8
9
 Loading...