7 Notes
on
Repair and Disassembly
7.1
General Important Repair Instructions
7
.1.1
Installation
and
Removal of Heater
Before proceeding with any work
on
the
heater, always
disconnect
the
main
cable from the vehicle battery
to
interrupt
the
battery main power
supply.
The battery
main power
must
not
be
cut off while
the
heater is
in
operation owing
to
the
danger of the heater overheat-
ing and the subsequent activation of the temperature
limiter. If extensive repair work is
to
be
performed
on
the
heater,
it
is useful
to
remove the heater completely.
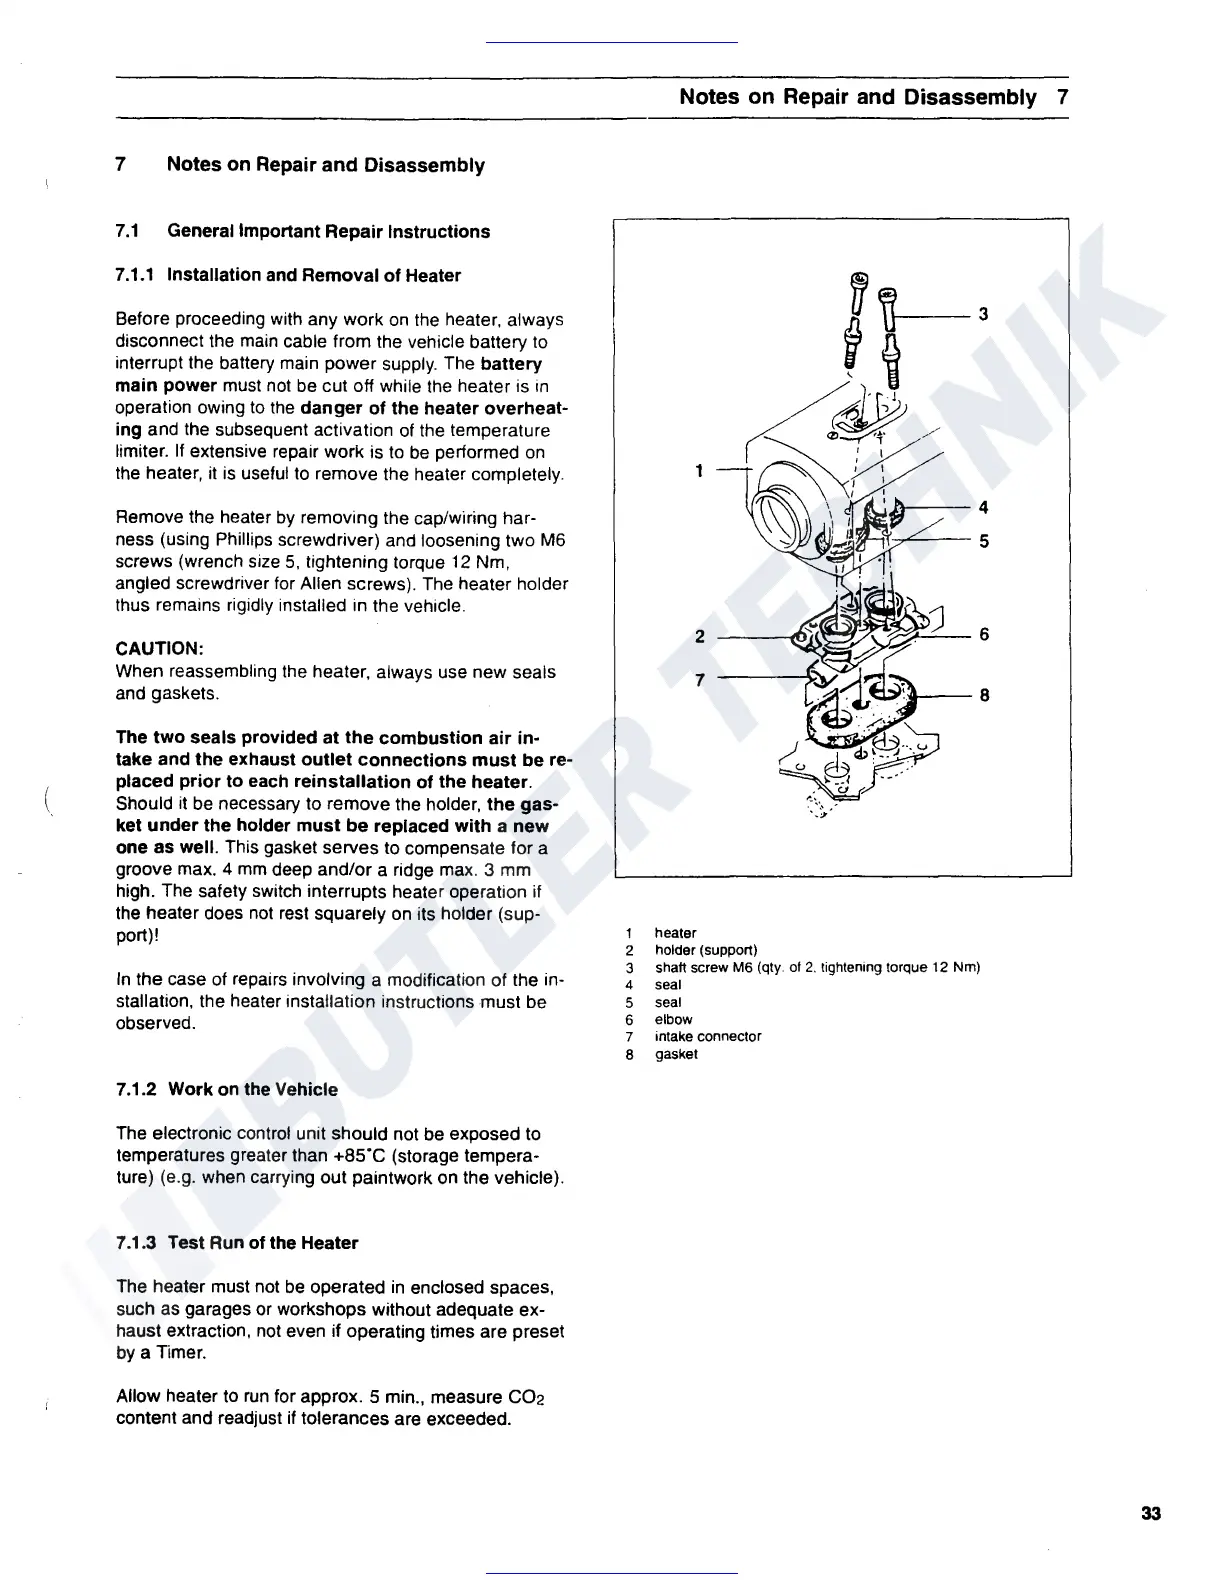
Remove the heater
by
removing the cap/wiring har-
ness
(using Phillips screwdriver)
and
loosening two
M6
screws (wrench size
5,
tightening torque
12
Nm,
angled screwdriver
for
Allen screws).
The
heater holder
thus remains rigidly installed in the vehicle.
CAUTION:
When reassembling the heater, always use new seals
and gaskets.
The
two
seals provided at
the
combustion
air
in-
take and the exhaust
outlet
connections
must
be re-
placed
prior
to each
reinstallation
of the heater.
Should
it
be
necessary
to
remove the holder,
the
gas-
ket
under
the holder
must
be
replaced
with
a new
one
as
well. This gasket serves
to
compensate for a
groove max. 4
mm
deep and/or a ridge
max.
3
mm
high. The safety switch interrupts heater operation if
the heater does
not
rest squarely
on
its holder (sup-
port)!
In
the case of repairs involving a modification of the in-
stallation, the heater installation instructions must
be
observed.
7.1.2
Work on the Vehicle
The electronic control unit should not be exposed to
temperatures greater than +85"C (storage tempera-
ture) (e.g. when carrying out paintwork on the vehicle).
7 .1.3 Test Run
of the Heater
The
heater must
not
be
operated
in
enclosed spaces,
such
as
garages
or
workshops without adequate ex-
haust extraction,
not
even if operating times are preset
by a Timer.
Allow heater to
run
for approx. 5 min., measure C02
content and readjust if tolerances are exceeded.
1
2
3
4
5
6
7
8
Notes on Repair and Disassembly 7
~~
f i
~
~/
~
~
1
2
7
heater
holder
(support)
I I
I I
3
4
5
shaft
screw
M6
(qty. of
2.
lightening
torque
12
Nm)
seal
seal
elbow
intake
connector
gasket
33
 Loading...