10
Step 2
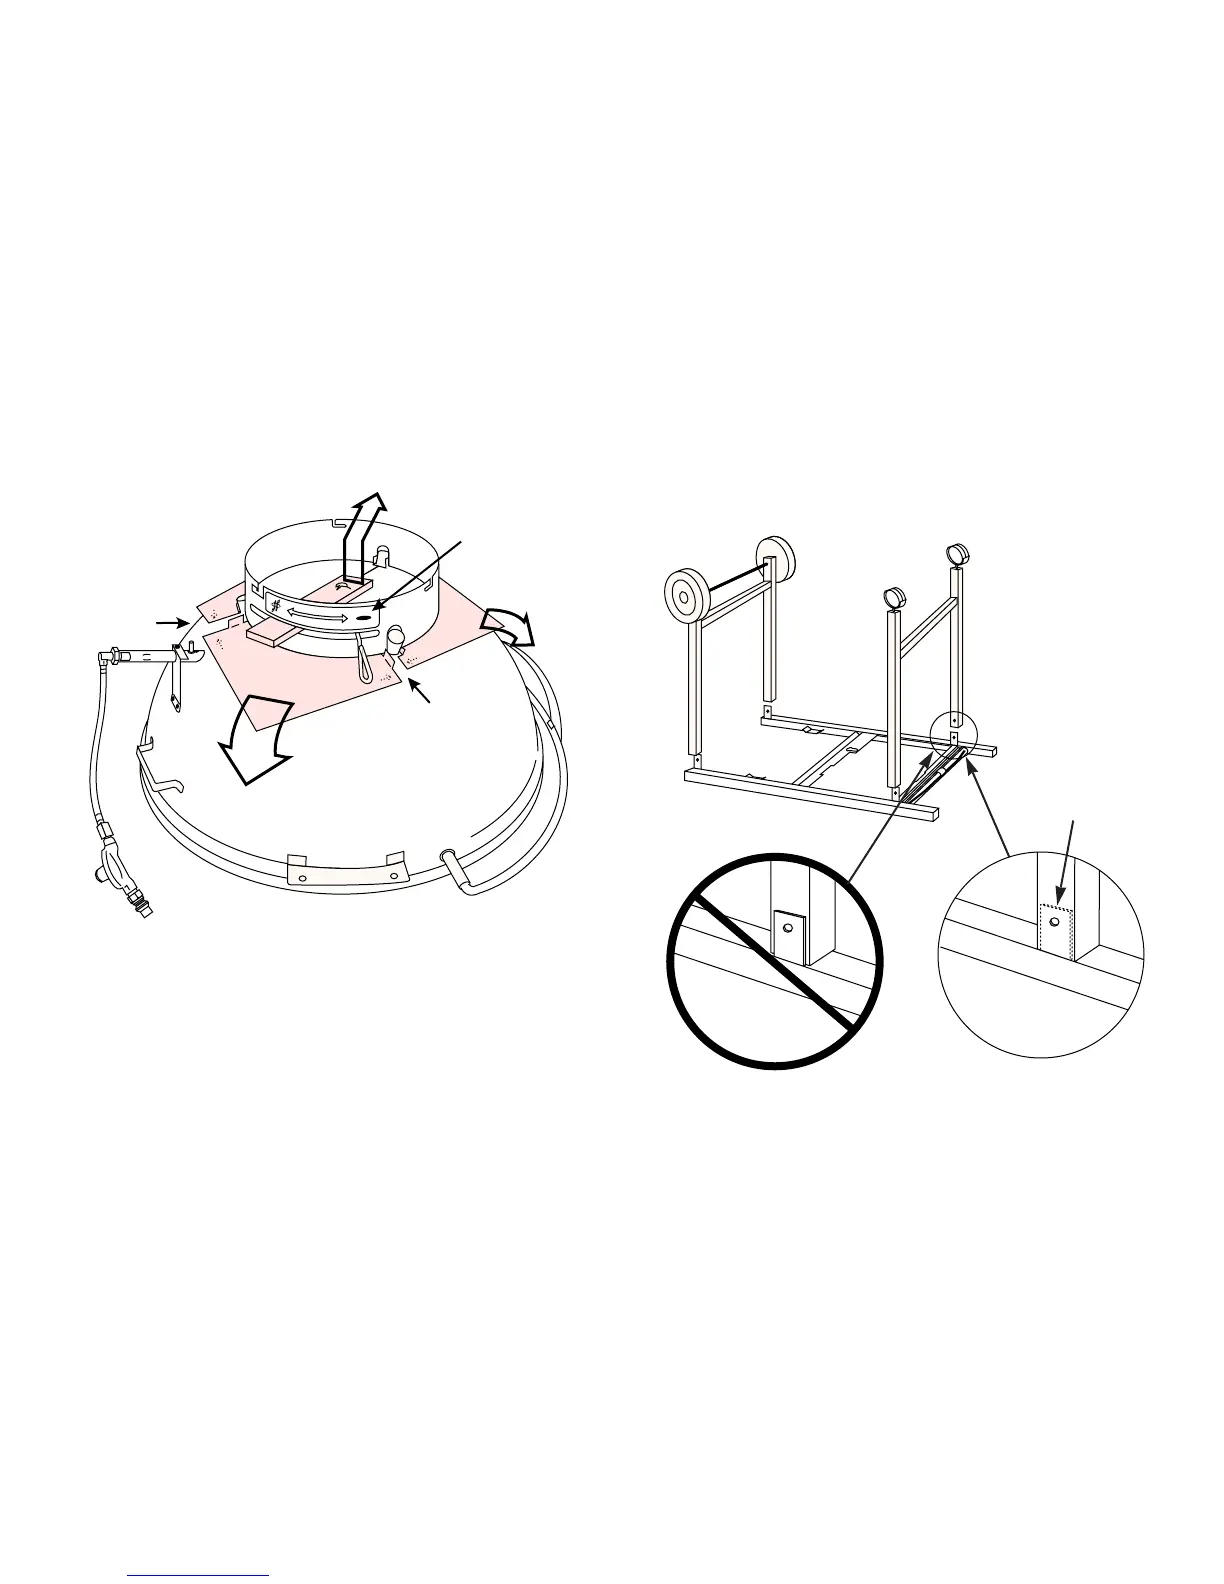
Remove protective packaging
Protective cardboard inserts must be removed from the
bowl before assembly. Figure 2. DO NOT
FORCEFULLY REMOVE THE INSERTS.
a) Remove cardboard insert from ash catcher ring. Be
careful when removing the cardboard not to bend
the ash catcher ring.
b) Tear cardboard along the perforations at leg
couplings and pull downward.
c) Peel off the protective plastic covering from the
nameplate on the ash catcher ring.
Figure 2
Figure 3
Step 3
Assemble the frame
You will need: top frame assembly, wheel frame
assembly and caster frame assembly.
Note - Work on soft surface (grass, or carton inserts) to
protect the finish during frame assembly.
Set the top frame on the ground so the leg tabs point
up. Fit the wheel frame assembly onto the leg tabs at
the open end of the top frame. Figure 3.
Fit the caster frame assembly onto the leg tabs at the
other end of the top frame. Figure 3.
The tabs must be on the inside of the frame tubes when
the joints are closed. Figure 3 (a).
(a)
Tab on the inside
of frame tube