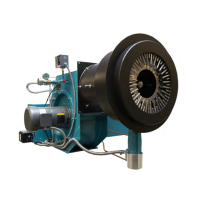
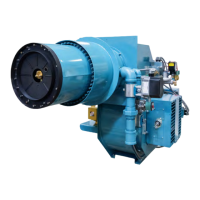
6. Single Fuel Setups
Single fuel burners can be adjusted following the pro-
cedures in Section 9 for gas ring, Section 10 for pressure
atomized oil and Section 11 for air atomized #2 oil.
The procedures for each of the systems (linkage, cams,
FGR) must be completely understood and followed as part
of the setup process.
7. Combination Gas and Pressure Atomized Oil
Combination burners, ring both gas and oil, require some
compromises in the setup because they share common
controls for both fuels. In this case, linkage units must have
the gas input adjusted to match the oil inputs because
there is little exibility in adjusting the oil rates. Oil will be
setup rst and will set the air damper positions to sup-
port the low and high re oil inputs. Follow the procedure
outlined in section 11 to complete the oil setup. Then setup
the gas input as dened in section 9, using the air damper
positions dened by oil, and adjusting the gas input to
match the air damper settings.
If the burner is equipped with an optional multiple set-point
modulating motor or parallel positioning, the low and high
re rates, as well as lightoff rates, can be set independently
for each fuel. In this case, the gas is adjusted rst, to set
the air damper locations for gas ring, as dened in Section
9. Once gas is set, oil is setup as dened in Section 10,
except that the multipoint modulating damper motor is ad-
justed to bring the low re air setting to match the oil needs.
There are several different options available that can alter
the exact setup details. These must be evaluated prior to
startup so that the procedures can be adjusted accordingly.
The procedures given are for linkage systems. Parallel
positioning (linkageless) systems allow for much more
exibility in the fuel, air and FGR settings on each fuel, and
can be tuned to better match each fuels needs. The setup
details for linkageless controls will follow the same general
sequence, but differ in specics for setting valve positions.
8. Combination Gas and Air Atomized #2 Oil
Combination burners, ring both gas and oil, require some
compromises in the setup because they share common
controls for both fuels. Air atomized #2 oil ring can have
turndowns and air damper positions very similar to gas
ring, simplifying the setup. If the burner is equipped with
FGR, gas must be started rst to set the FGR control valve
positions to obtain the correct NOx performance. If there is
no FGR, either fuel can be started rst, however the setup
cannot be nalized until both fuels have been reviewed to
determine the air damper positions. Follow the setup pro-
cedures dened in Section 10 for gas setup and Section 12
for air atomized oil setup.
If the burner is equipped with an optional multiple set-point
modulating motor, the low and high re rates, as well as
lightoff rates, can be set independently for each fuel. In
this case, the gas is adjusted rst, to set the air damper
locations for gas ring, as dened in Section 9. Once gas
is set, oil is setup as dened in Section 11, except that
the multipoint modulating damper motor is adjusted to
bring the low re air setting to match the oil needs.
There are several different options available that can
alter the exact setup details, and these must be evalu-
ated prior to startup so that the procedures can be
adjusted accordingly. The procedures given are for link-
age systems. Parallel positioning (linkageless) systems
allow for much more exibility in the fuel, air and FGR
settings on each fuel, and can be tuned to better match
each fuels needs. The setup details for linkageless
controls will follow the same general sequence, but
differ in specics for setting the valve positions.
9. Gas Setup
a. Place the burner switch in the “OFF” position
b. Place the “Auto-Manual” switch in the manual
position. If this is a combination fuel burner, make sure
the fuel selector switch is on “GAS”.
c. Place the manual ame control potentiometer in the
MIN (low re) position.
d. Close the downstream manual shutoff valve (closest
to the modulating valve) on the gas train.
e. Turn the electrical power on for the burner, boiler
and related components.
f. Verify that the gas metering valve is nearly closed,
the vent valve (if equipped) is operating and the gas
pilot valve is not open (the solenoid will hum and feel
warm).
g. If equipped with FGR, verify that the FGR control
valve is in the near closed position. A linkage system
should have the shutoff FGR valve in the closed
position.
h. Turn the burner switch on. This will start the blower
motor and initiate the prepurge cycle.
i. When the prepurge sequence is complete and the
low re start switch is made, the pilot valve will open
and the pilot ame should be visible through the sight
port.
j. When the pilot ame is established, the ame safe-
guard will energize the main gas valve (indicated with
the Fuel Valve Light). This operation of the main fuel
valves must be visually checked by observing the valve
stem operation.
k. After the timer has completed the trial for main
ame, the burner will go out on alarm (the closed
manual gas valve prevented the burner from lighting).
At this time, the gas valves must be visually checked to
verify that they have closed. This test sequence proves
the proper operation of the primary control.
l. Press the reset button and restart the burner. When
the pilot has started, open the manual gas valve to al-
low the main ame to start.
m. If equipped with FGR, the shutoff FGR valve should
open on a linkage system, after the main ame has
been proven. The timing can be adjusted with the time
delay inside the control panel, so that the FGR shutoff
valve opens as soon as the main ame is established.
The control valve of the linkageless system should
Page 43
JBE(X) Manual
Section F - Startup and Operating Instructions