11
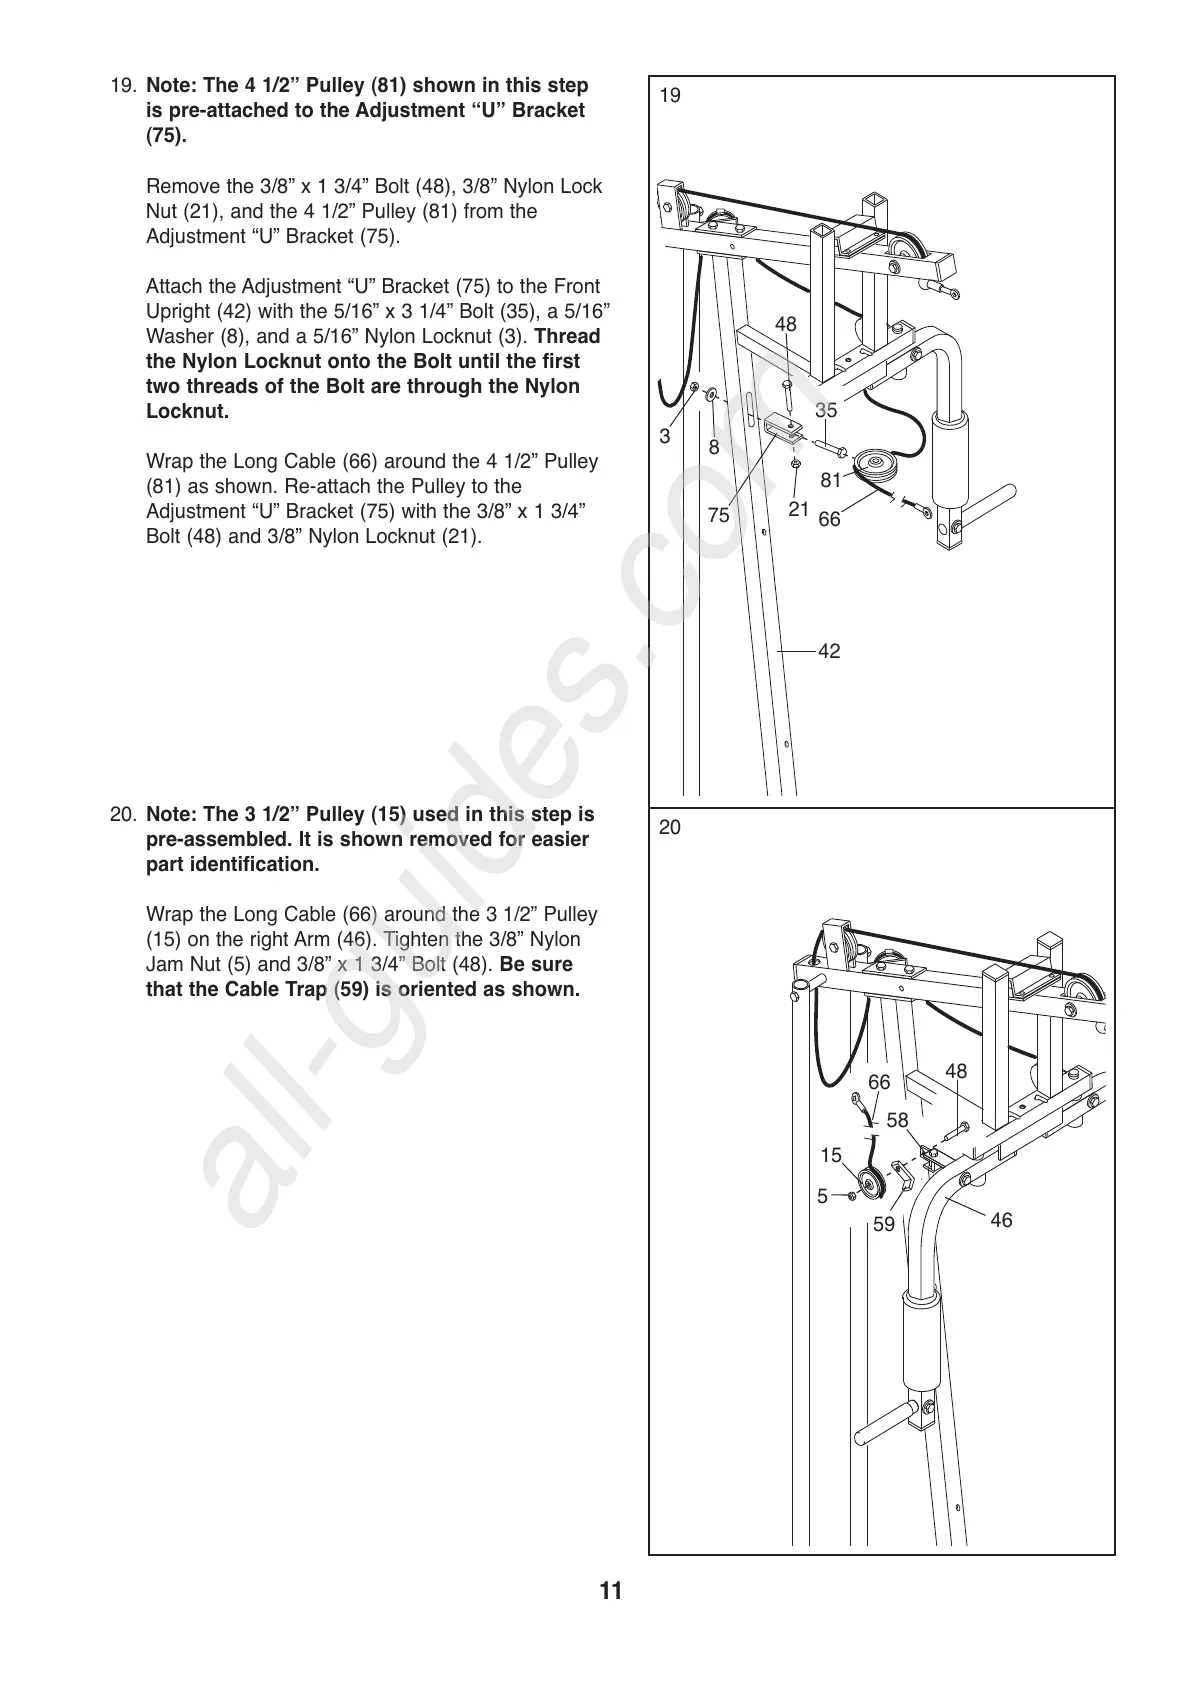
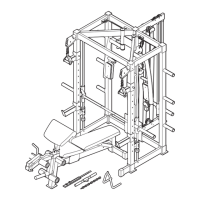
19. Note: The 4 1/2” Pulley (81) shown in this step
is pre-attached to the Adjustment “U” Bracket
(75).
Remove the 3/8” x 1 3/4” Bolt (48), 3/8” Nylon Lock
N
ut (21), and the 4 1/2” Pulley (81) from the
Adjustment “U” Bracket (75).
Attach the Adjustment “U” Bracket (75) to the Front
Upright (42) with the 5/16” x 3 1/4” Bolt (35), a 5/16”
Washer (8), and a 5/16” Nylon Locknut (3). Thread
the Nylon Locknut onto the Bolt until the first
two threads of the Bolt are through the Nylon
Locknut.
Wrap the Long Cable (66) around the 4 1/2” Pulley
(81) as shown. Re-attach the Pulley to the
Adjustment “U” Bracket (75) with the 3/8” x 1 3/4”
Bolt (48) and 3/8” Nylon Locknut (21).
20. Note: The 3 1/2” Pulley (15) used in this step is
pre-assembled. It is shown removed for easier
part identification.
Wrap the Long Cable (66) around the 3.1/2” Pulley
(15) on the right Arm (46). Tighten the 3/8” Nylon
Jam Nut (5) and 3/8” x 1 3/4” Bolt (48). Be sure
that the Cable Trap (59) is oriented as shown.
19
20
42
35
48
75
8
3
81
21
66
66
15
48
58
5
59
46