13
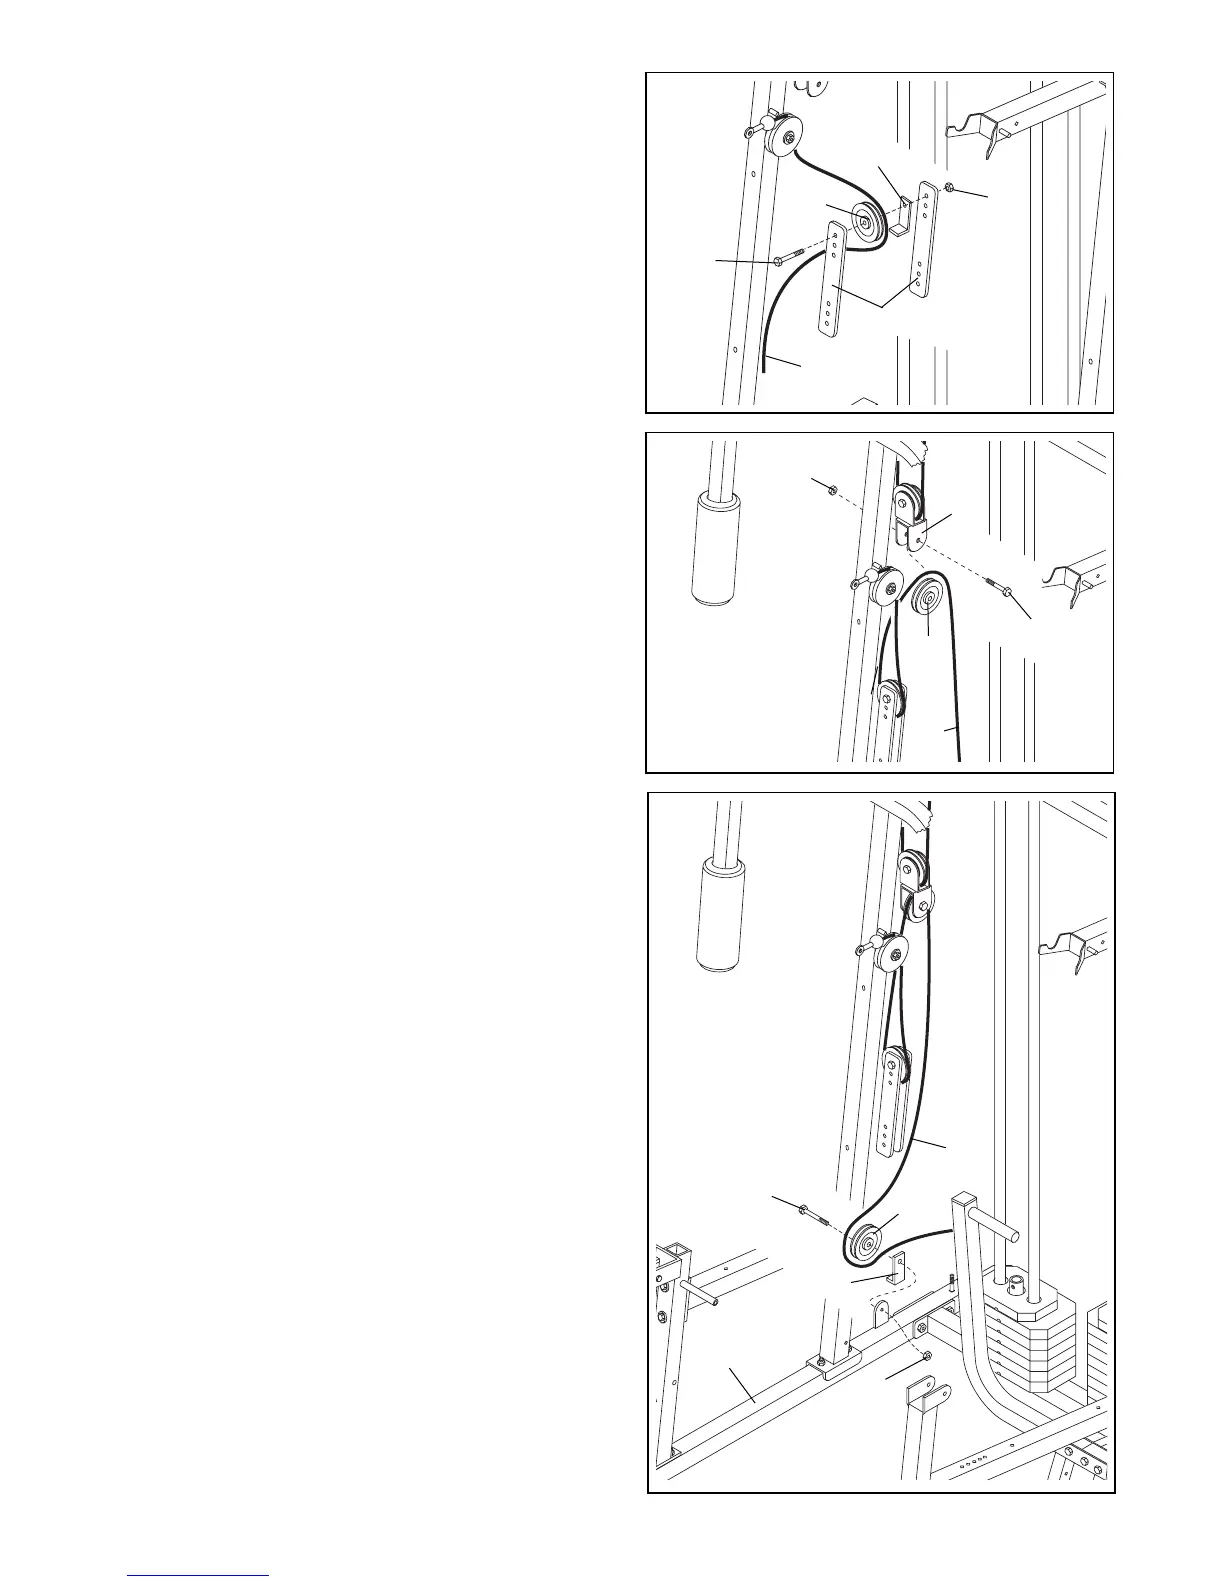
26. Wrap the Ab Cable (74) around a 3 1/2” Pulley (24) in
the direction shown. Attach the Pulley to the Small
Pulley Bracket (22) with a 3/8” x 1 3/4” Bolt (57) and
a 3/8” Nylon Locknut (50). Make sure the Pulley
Bracket is oriented as shown.
26
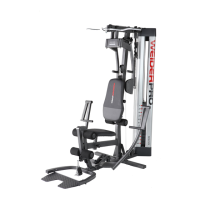
25. Remove both 3 1/2” Pulleys (24) from the pre-assem-
bled Adjustable Pulley Plates (23).
Wrap the Ab Cable (74) around a 3 1/2” Pulley (24) in
the direction shown. Attach the Pulley and a Cable
Trap (25) to the top hole in the two Adjustable Pulley
Plates (23) with a 3/8” x 2” Bolt (54) and a 3/8” Nylon
Locknut (50). Make sure the Cable Trap and the
Pulley Plates are oriented as shown.
25
25
50
23
74
54
74
50
24
22
57
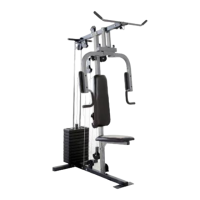
27. Wrap the Ab Cable (74) around a 3 1/2” Pulley (24) in
the direction shown. Attach the Pulley and a Cable
Trap (25) to the welded bracket on the Butterfly Base
(4) with a 3/8” x 2” Bolt (54) and a 3/8” Nylon Locknut
(50). Make sure the Cable Trap is oriented as
shown.
27
24
54
74
24
25
4
50