14
49
80
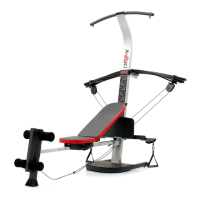
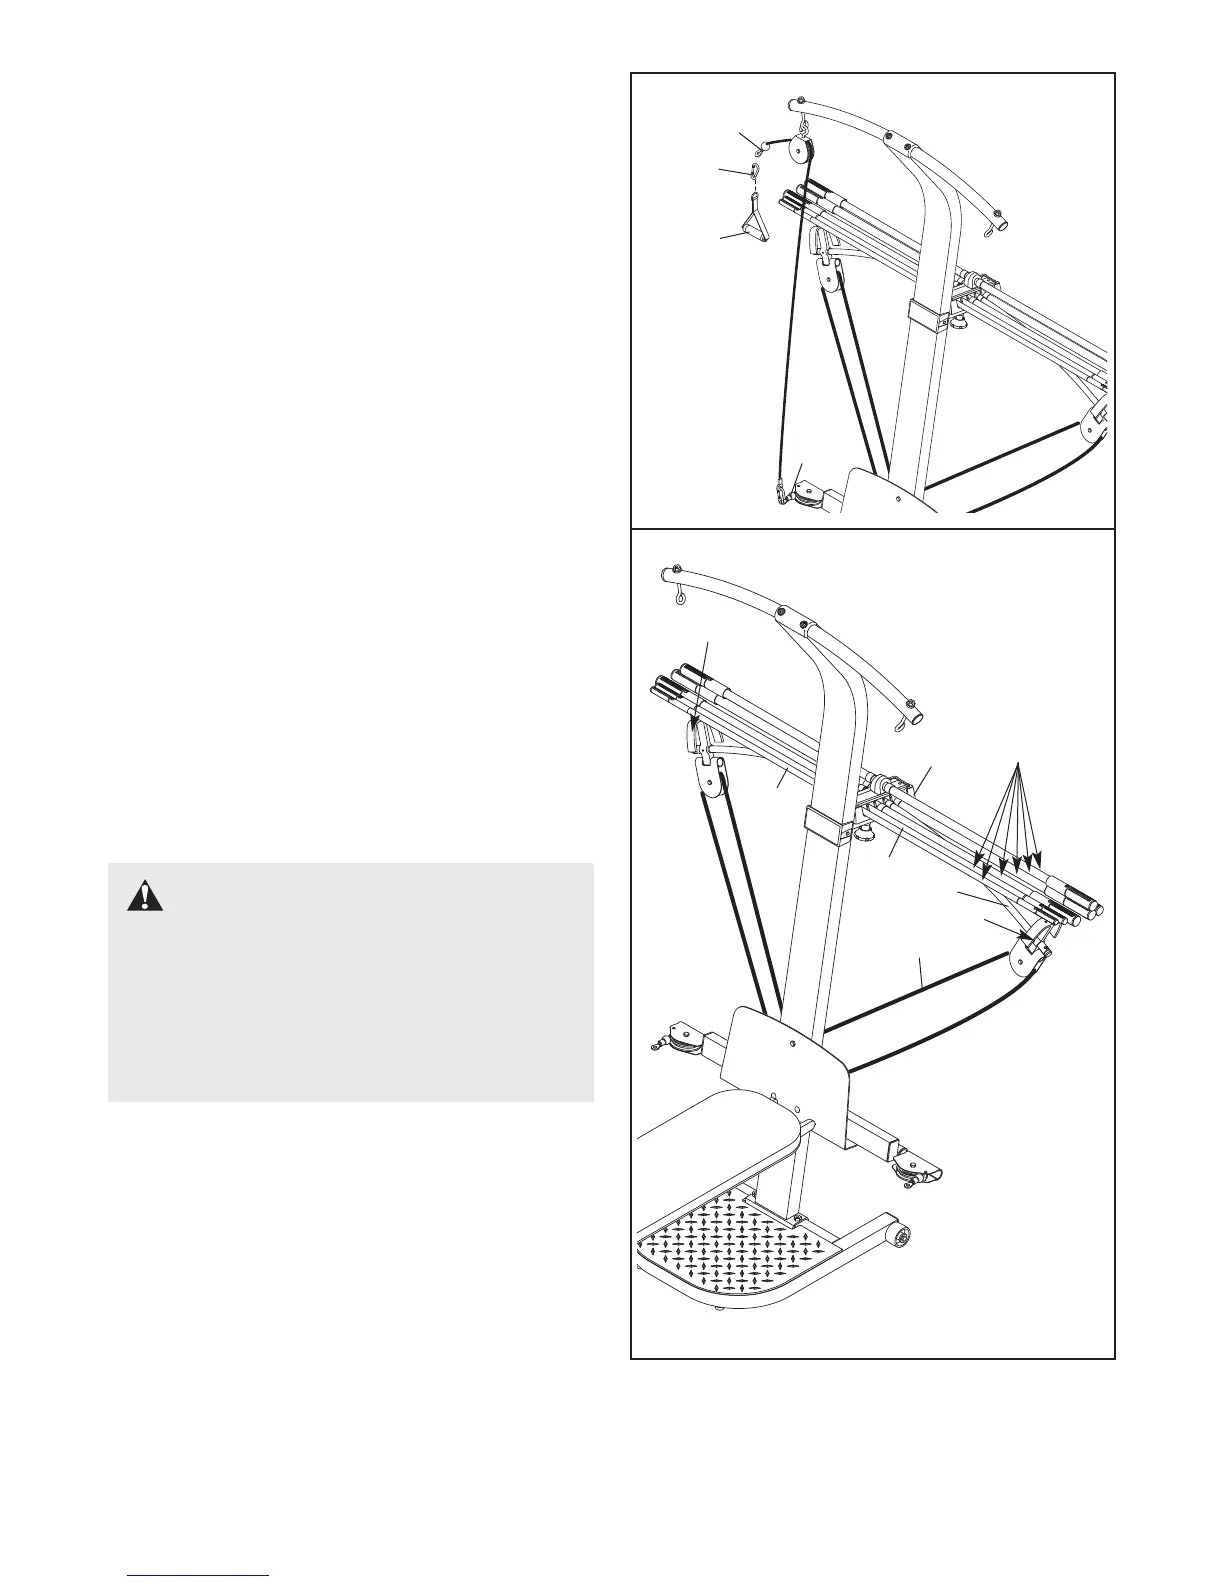
ATTACHING THE ACCESSORIES
To attach a Short Handle (49) to a high pulley, first
a
ttach the high pulley to the resistance system (see
ATTACHING THE HIGH PULLEYS AND LEG LEVER
o
n page 13). Then, attach the Short Handle to the
Short Cable (33) with a Cable Clip (51).
The Long Handles (not shown) or the Ankle Strap (not
shown) can be attached to the Long Cable (80) with
Cable Clips (51). Attach the Leg Press Strap (not
shown) to both ends of the Long Cable, or the Curl Bar
(not shown) to the Short Cables (33), with Cable Clips.
Note: A lat bar is an optional accessory for the
resistance system. To purchase a lat bar, call our
Customer Service Department toll-free at 1-800-999-
3756 and ask for model number WEMC0442.
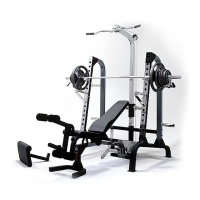
33
51
44
35
67
36
80
“U”-Channel
“U”-Channel
Crossbows
ADJUSTING THE RESISTANCE
To add resistance, hold a “U”-channel on the 10-
pound Center Crossbow (44) firmly and push the end
of a crossbow under it. Repeat with the other end of
the crossbow. If more resistance is needed, add one
crossbow at a time.
Note: When adding resistance, always start with the
heaviest crossbow to be used, and finish with the
lightest crossbow. When removing crossbows from
the “U”-channels, start with the lightest crossbow and
finish with the heaviest.
Note: The CrossBow by WEIDER
™
2000X resistance
system uses progressive resistance. As the cross-
bows begin to bend, the amount of resistance will
increase gradually. As the crossbows bend further,
the resistance will increase rapidly.
WARNING: When adding resist-
ance, make sure that both ends of the cross-
bow rest under the two “U”-channels. The
rings on the Removable Crossbows (36, 67)
must be pushed against the Crossbow Spacer
(35). Do not add or remove crossbows from
the “U”-channels while an end of the Long
Cable (80) is pulled out.
 Loading...