Do you have a question about the Weider Club 560 and is the answer not in the manual?
Provides customer service contact information for assistance and inquiries.
Advises users to read all precautions before operating the equipment.
Explains the purpose of warning decals and how to obtain replacements.
Lists essential precautions for safe operation, including weight limits and user conduct.
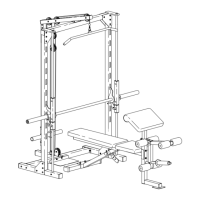
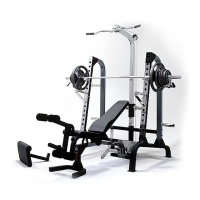
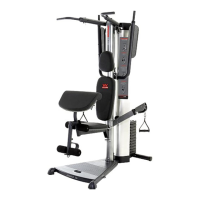
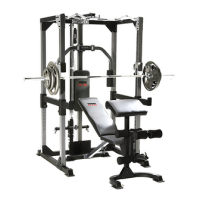
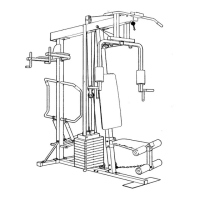
Introduces the product and guides users to familiarize themselves with labeled parts.
Provides a comprehensive list of all parts with key numbers, quantities, and descriptions.
Lists required tools and essential preparation steps before beginning assembly.
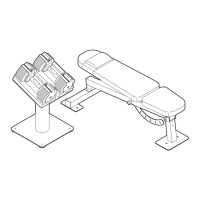
Details the initial steps involving attaching the bench leg to the base.
Describes connecting the bench frame to the bench leg using specified hardware.
Outlines attaching the bench base to the bench frame with bolts and nuts.
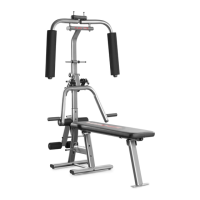
Covers the installation of the leg lever, weight tube, and associated caps.
Explains how to attach the backrest to its frames with screws and washers.
Details connecting the backrest frames to the main bench frame.
Describes securing the seat to the bench frame using screws.
Covers inserting pad tubes and attaching foam pads to the leg lever.
Details attaching the curl pad to the curl post and mounting it to the bench leg.
Outlines connecting the right and left bases to the center base.
Details attaching rear uprights to bases and connecting foot plates.
Describes connecting front uprights and joint plates to the left and right bases.
Guides the installation of weight rests and spotters onto the uprights.
Details attaching the chin-up bar and joint plates to the front uprights.
Covers attaching center, left, and right frames and tightening all nuts.
Explains inserting bushings and spacers into the weight carriage.
Details attaching weight bumpers and guides to the weight carriage assembly.
Describes connecting the weight guide frame to the center frame and guides.
Provides instructions for routing the high cable through various components.
Details attaching the high cable to the weight carriage using specific hardware.
Explains how to attach pulleys for the high cable system.
Details attaching additional pulleys for the high cable.
Covers routing the low cable and attaching its pulley.
Describes attaching cable traps and pulley plates to the pulley system.
Explains how to slide handgrips onto the lat bar.
Advises on final tightening, cable smoothness checks, and correct routing.
Guides the adjustment of weight rests and safety spotters for optimal exercise positioning.
Provides instructions for positioning the bench correctly for squat exercises.
Explains how to adjust the backrest to decline, level, or incline positions.
Details how to load and secure weights onto the leg lever assembly.
Guides weight loading for pulley stations and barbells, emphasizing balance.
Describes connecting the lat bar to the high or low pulley stations.
Explains how to remove the curl post and pad tubes when not in use.
Provides methods for tightening cables by adjusting pulley positions.
Discusses muscle building, toning, weight loss, and cross-training approaches.
Emphasizes individual pace, listening to the body, and progressive overload.
Covers the importance of warm-ups, workout duration, and scheduling.
Stresses proper technique, range of motion, and breathing during exercises.
Recommends rest periods, stretching, and methods for staying motivated.
Provides a visual guide to major muscle groups for exercise reference.
Lists essential product details needed when contacting customer service for parts.
Outlines the warranty period, coverage, exclusions, and legal rights.
Presents a comprehensive list of parts with key numbers, quantities, and descriptions.