2-3/8"
(60mm)
or
2-3/4"
(70mm)
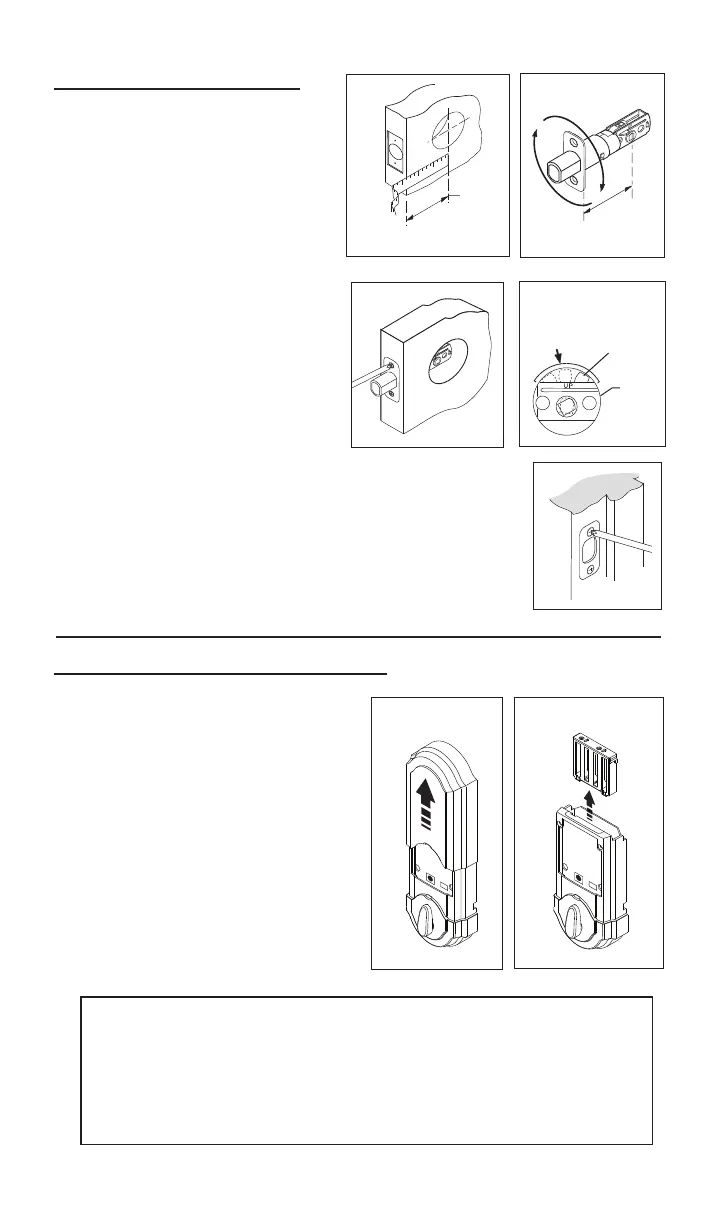
1.InstalllatchandStrike.
Fig.3
Fig.1
d.Leavetheboltintheextendedposition.
e.Installstrikewithtwo1-1/2”(38mm)woodscrews
(seegure5).
2.Removecoverandbatterycase.
2
Area
Crank
a.Determineyourbackset,see
gure1.
b. Ifa2-3/4”(70mm)backsetis
required,extend bolt and adjust
latch as shown.(Seegure2).
Fig.2
Fig.5
Fig.4
c.Installlatch,securingwithsmall
woodscrews(seegure3).Note:
For a 1-1/2” (38mm) diameter
hole, test if latch extends and
retracts smoothly. Area indicated
may require addition clearance for
crank of latch to function properly
(see gure 4).
a.
Removecoverfromassem-
blybyslidingcoverupandoff,
seegure.6
b.Removethebatterycase
frominteriorassemblybylift-
ing the case up and out and
setaside,seegure7.
Fig.7
Fig.6
Importantbeforeproceeding:
1. Verifythatposition#2ofthe“SettingsSwitch”isintheOFF posi-
tion.(Refertosection10.)
2. Workwiththedooropen(awayfromjamb)toavoidaccidental
lockout.
3.Makesuretheboltisintheextended(locked)position.