Weiss Enginering Ltd. DAC501-4ch/DAC502-4ch
2 Quick Start Guide
This Quick Start Guide presents the first steps to set up the DAC50x-4ch unit. Further and more detailed infor-
mations about the DAC50x-4ch and its features can be found in the DAC501-4ch/DAC502-4ch User Manual
and White Papers.
2.1 Setting up the DAC50x-4ch hardware
Carefully unpack the DAC50x-4ch unit. The following items should be included:
• The DAC50x-4ch unit
• This quick start guide with a warranty card
• An IR remote control unit
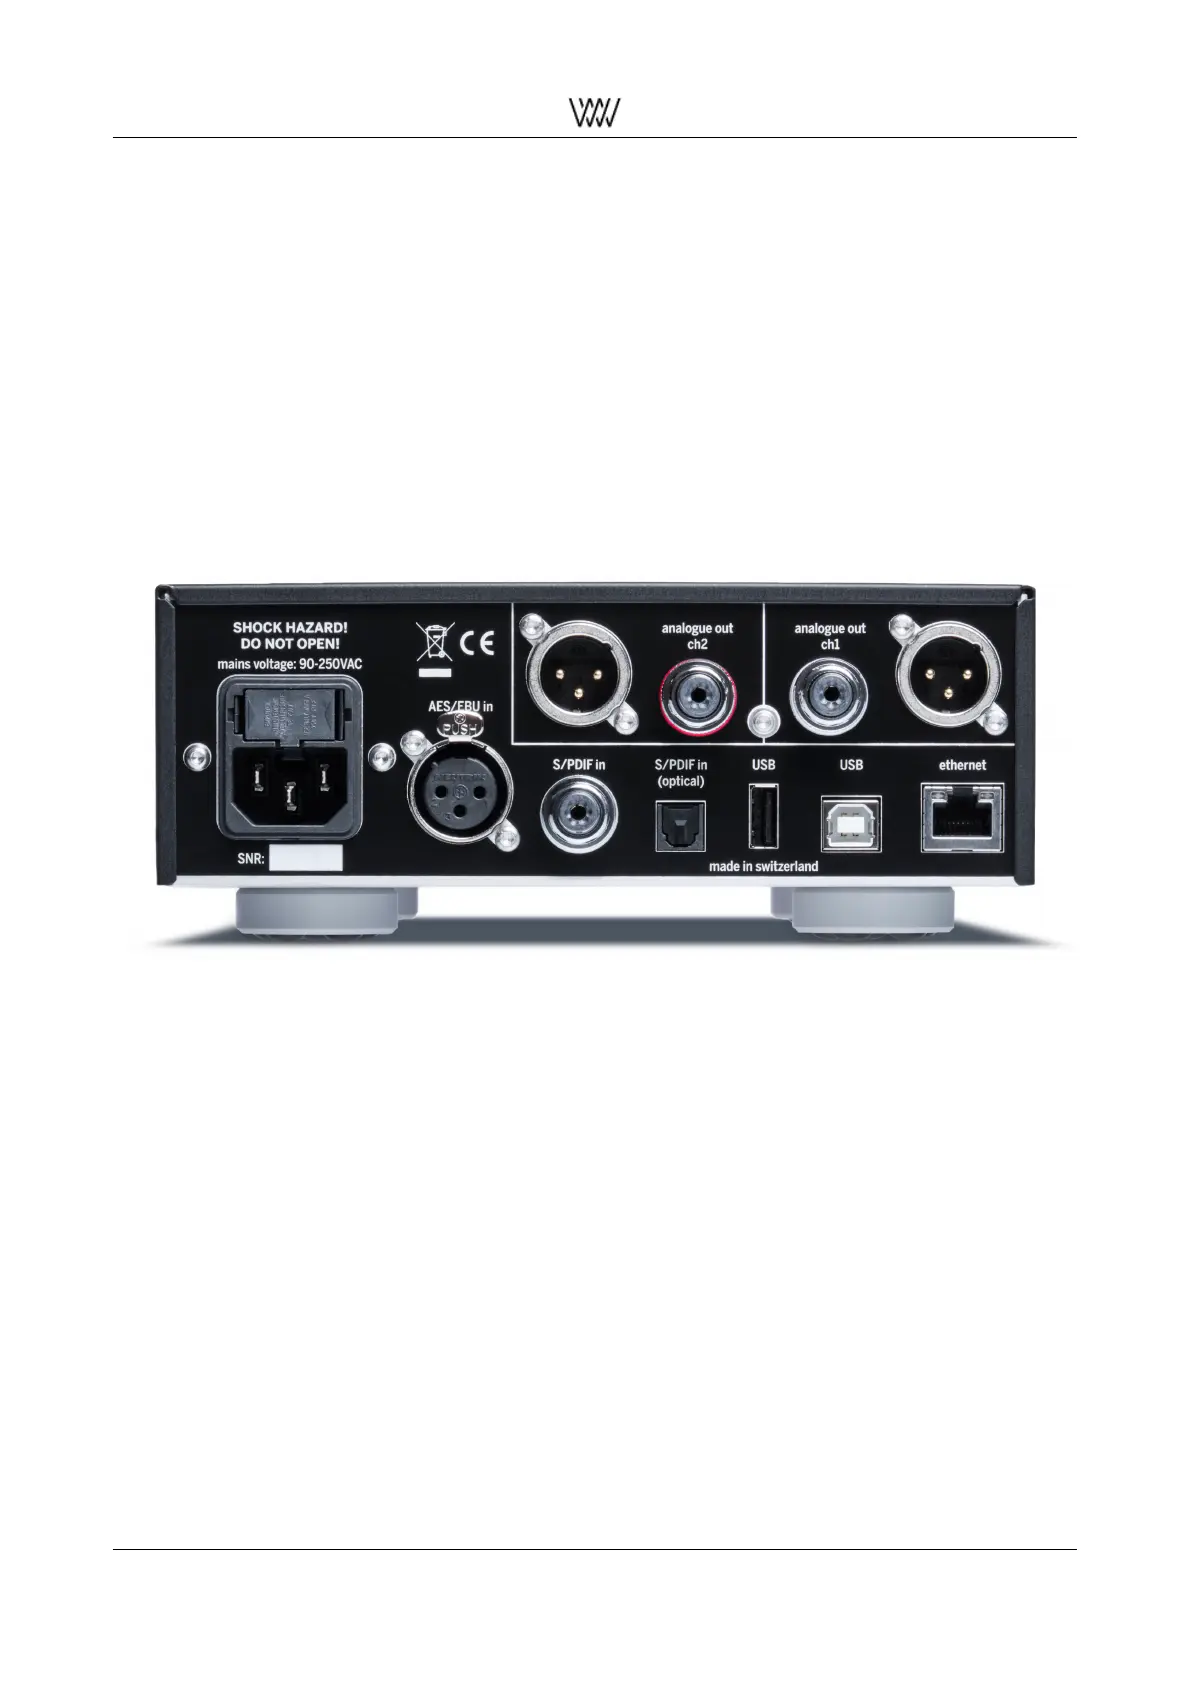
Figure 3: The back panel of the DAC501-4ch
After unpacking the DAC50x-4ch connect the necessary input/output cables at the back of the unit.
Also connect the mains cable. The mains voltage is automatically sensed by the DAC50x-4ch. Mains voltages
between 90V and 240V are allowed. No manual mains voltage selection is necessary.
To switch on the unit press on the rotary knob on the faceplate or press the power on/off button on the IR remote
(upper/left corner). Wait for about half a minute for the unit to boot.
Note: Most of the parameters mentioned below can also be set via the DAC50x-4ch’s web interface. If you
have connected your DAC50x-4ch with an Ethernet cable to a router unit you may access the DAC50x-4ch via
web browser. Enter this URL into your browser:
• dac501-4ch-nnnn.local (for a DAC501-4ch unit) or dac502-4ch-nnnn.local (for a DAC502-4ch unit)
• nnnn is the serial number of your DAC50x-4ch unit. You see that number on the back of the unit.
The first steps with your DAC50x-4ch 2 Quick Start Guide

 Loading...