SECTION
2
-.
Functional Description
This
section of
the Service Manual is
used to
describe
the
Connectors,
Controls,
and Indicators of the GSI 17.
Refer to
Figure
2-l for the layout and positioning of
all
Connectors,
Controls,and Indicators.
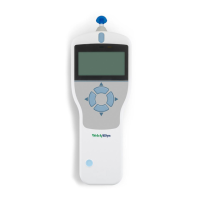
2.1 THE FRONT PANEL CONTROLS AND INDICATORS (FIGURE 2-1)
F1
-
Power switch and indicators for ON
(1)
and OFF (0).
F2
-
Range
extension pushbutton allows
operator to
increase
the
stimulus intensity 10
dB
above
the
standard
maximum
HL at
any
frequency
-
its
operation is indicated by the
"+"
being lit on
the
LCD.
F3
-
HL control for setting stimulus
intensity
level.
Level indicated on LCD.
F4
-
Present Bar for stimulus presentation.
F5
-
Loudspeaker
in operation as such.
Actual
presentation indicated by illuminated LED.
F6
-
Subject response
indicator LED shows the operator
that the test
subject
has pressed the handswitch
button.
F7
-
Frequency
control for setting stimulus
frequency.
Frequency indicated in window adjacent to control.
F8
-
Routing
switch for routing the stimulus signal to
the
left or
right
earphone.
Left or
indicated by illustration of
subject.
right
F9
-
Tone
type
switch for setting
the
stimulus
tone
type.
FM
= warble tone
= steady tone
---
= pulsed tone
F10
-
Low battery indicator to alert the
operator
when
the
batteries
have a
limited
time
available
operating
(recharge or
replace
batteries
soon,
depending
on whether
NiCad
or
alkaline
batteries
are used).
9
 Loading...