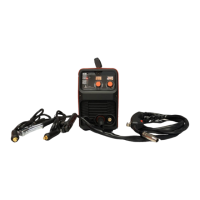
13
MIG Synergic setup
• Select MIG Synergic (18) by pressing the welding process selector (15) the MIG SYN light will light up.
• Remove the welding nozzle from the torch in a clockwise twisting action (this ensures the tip adaptor spring remains
tight) and then remove the welding tip, press and hold the trigger on the welding torch this will run the wire feed
motor to push the wire through the torch. Once the wire comes out of the torch release the torch trigger stopping the
wire feed motor.
• Reinstall the welding tip ensuring the correct tip is selected (same size as the wire or one size larger) and reinstall the
nozzle again using a clockwise twisting action.
• Your MIG145 MIG synergic mode, removes the guess work out of selecting the right combination of VOLTAGE and
WIRE SPEED. Once you have selected MIG Synergic increasing or decreasing dial (13) will adjust both the voltage (heat)
and Amperage (wire speed m/min). The voltage will be displayed on voltage display screen (11) and your Amperage on
the amperage display screen (12).
• Adjusting the synergic curve up or down will fine tune your welder’s performance (finding the sweet spot). Turn the
dial (14) clockwise this will increase VOLTAGE only (increasing heat to the weld pool but not wire speed), turning the
dial anti-clockwise will reduce the VOLTAGE only cooling the weld pool (effectively increasing wire speed). Once you
have found the sweet spot use dial (13) to adjust the welder for increased thickness on thinner plate.
MIG Manual setup
• To adjust your voltage and wire speed individually, select MIG Manual by pressing the Step selector (15).
• Remove the welding nozzle from the torch in a clockwise twisting action (this ensures the tip adaptor spring remains
tight) and then remove the welding tip, press, and hold the trigger on the welding torch this will run the wire feed
motor pushing the wire through the torch. Once the wire comes out of the torch release the torch trigger stopping the
wire feed motor.
• Reinstall the welding tip ensuring the correct tip is selected (same size as the wire or one size larger) and reinstall the
nozzle again using a clockwise twisting action.
• The voltage will be displayed on the voltage display screen (11) and your Amperage (wire speed) on the amperage
display screen (12).
To increase or decrease voltage (heat), adjust the voltage adjustment dial (14) the higher the voltage the thicker the
material and hotter the weld pool. To adjust the wire speed, turn the Amperage adjustment dial (13) to the required
setting.
It is recommended that the welding voltage is first set and then slowly adjust the amperage (wire speed) until the arc is
stable and smooth. Once this is achieved if the voltage is too high (hot – burning through) or two low (cold – lacking
penetration) adjust the voltage again and repeat this process.
With your PPE on, you are ready to start welding. Ensure to adjust your settings to receive optimal results.
 Loading...