ASSEMBLY INSTRUCTIONS
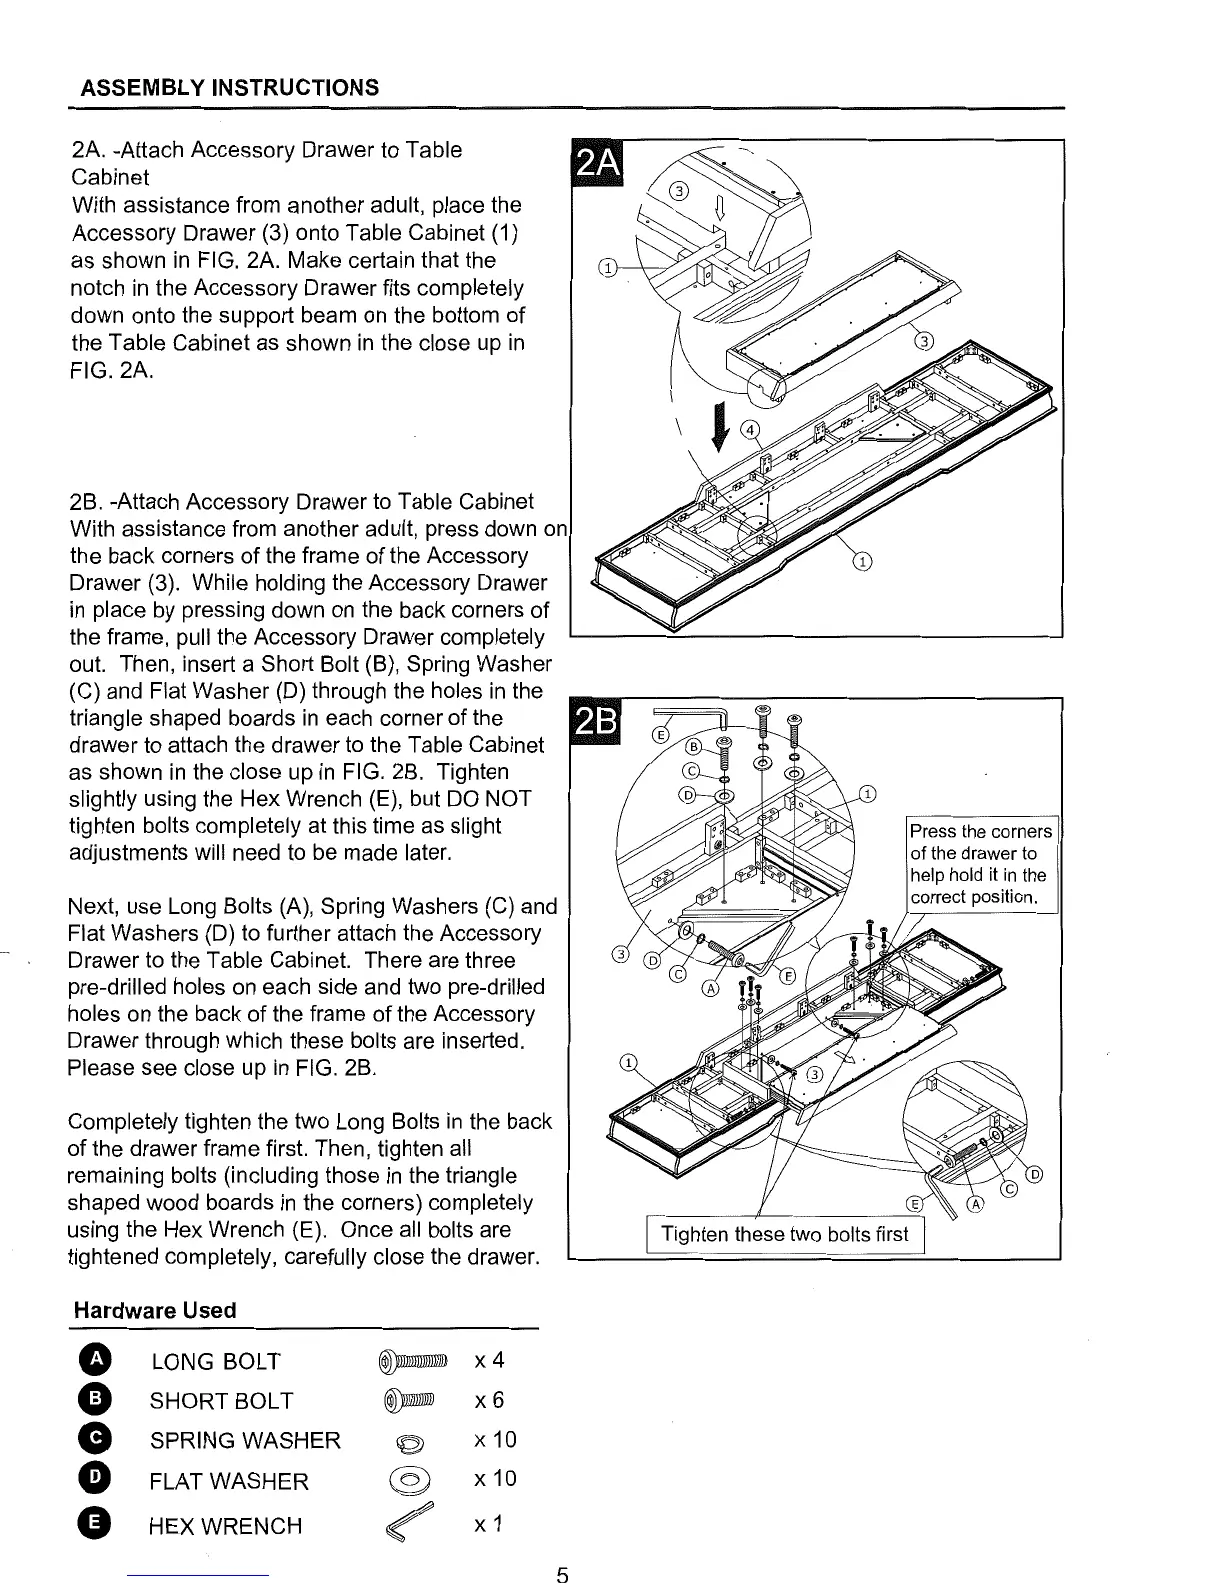
2A. -Attach Accessory Drawer to Table
Cabinet
With assistance from another adult, place the
Accessory Drawer (3) onto Table Cabinet (1)
as shown
in
FIG. 2A. Make certain that the
notch
in
the Accessory Drawer fits completely
down onto the support beam on the bottom
of
the Table Cabinet as shown
in
the close up
in
FIG. 2A.
2B. -Attach Accessory Drawer to Table Cabinet
With assistance from another adult, press down
on
the back corners
of
the frame
of
the Accessory
Drawer (3). While holding the Accessory Drawer
in
place
by
pressing down
on
the back corners of
the frame, pull the Accessory Drawer completely
out. Then, insert a Short Bolt (B), Spring Washer
(C) and Flat Washer (D) through the holes
in
the
triangle shaped boards
in
each corner of the
drawer to attach the drawer to the Table Cabinet
as shown
in
the close up
in
FIG. 2B. Tighten
slightly using the Hex Wrench (E), but
DO
NOT
tighten bolts completely at this time
as
slight
adjustments will need to be made later.
Next, use Long Bolts (A), Spring Washers (C) and
Flat Washers (D) to further attach the Accessory
Drawer to the Table Cabinet. There are three
pre-drilled holes
on
each side and two pre-drilled
holes
on
the back
of
the frame
of
the Accessory
Drawer through which these bolts are inserted.
Please see close up
in
FIG. 2B.
Completely tighten the two Long Bolts
in
the back
of the drawer frame first. Then, tighten all
remaining bolts (including those
in
the triangle
shaped wood boards
in
the corners) completely
using the Hex Wrench (E). Once all bolts are
tightened completely, carefully close the drawer.
Hardware Used
0
LONG BOLT
~
x4
0
SHORT BOLT
ID-
x6
G
SPRING WASHER
©>
x10
G
FLAT WASHER
@
x10
G
HEX WRENCH
~
X 1
5
Press the corners
of
the drawer to
help hold it
in
the
correct position.
 Loading...