8
ASSEMBLY
1.
2.
3.
4.
5.
6. 7.
8.
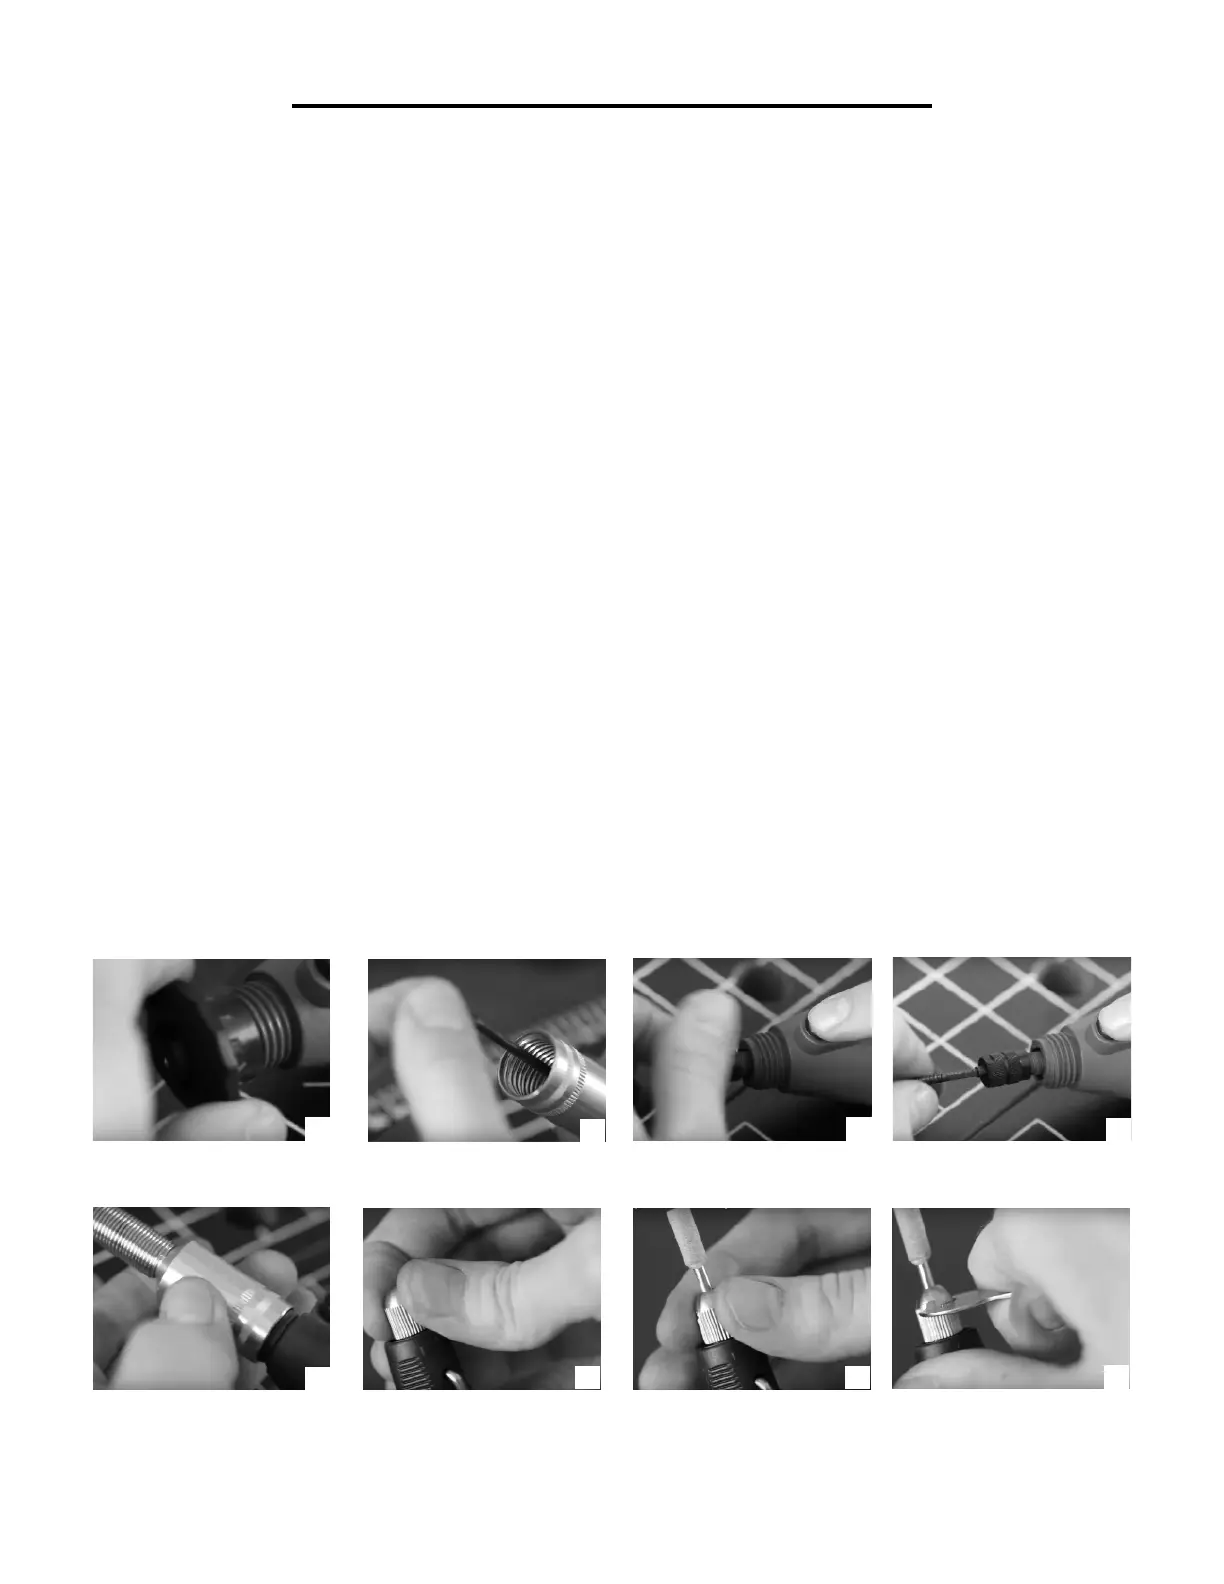
ATTACHING FLEX SHAFT:
NOTE: Flex Shaft attachment is not included for this model. If you would like to purchase the attachment, please
visit www.wenproducts.com.
FOR VIDEO INSTRUCTIONS VISIT: http://bit.ly/wenflexshaft
1. Unscrew the black threaded collar at the end of the rotary tool.
2. Grab the flex shaft and slide the inner core out about 2-3”.
3. Loosen the collet nut by pressing down on the collet lock button and unscrewing the collet nut.
4. Insert the inner core of the flex shaft to the collet nut, press down on the collet lock button, and tighten the
collet nut. Use the included bit changing spanner wrench to ensure that the flex shaft is properly tightened and
secured.
5. Now that the inner core is secured to the collet nut, slide down the shaft adapter, and then screw it in place onto
the rotary tool.
6. Once secured, take the other end of the flex shaft and insert the hex tool into the hole on the side to prevent
the collet from rotating.
7. Unscrew the collet until the end is loose enough for the bit to be attached.
8. Insert the bit and tighten the collet. Use the bit changing spanner wrench to ensure that the bit is properly tight-
ened and secured to the collet. Make sure to remove the hex tool from the rotary tool before turning it on.