9
ADJUSTMENTS
ON/OFF SWITCH
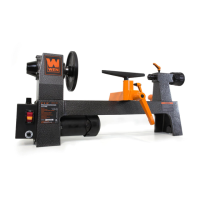
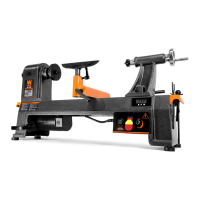
The ON/OFF switch (Fig. I - 1) controls the power to the unit. To start the lathe, move the switch into the ON
position (flipped up).
NOTE: This lathe features a gradual start up, meaning that the chuck will not start spinning until couple of mo-
ments after the switch is turned ON, and will start spinning at a lower speed before gradually ramping up to its
full RPM. This doubles as both a safety feature and as protection to the machine’s motor, helping to maximize its
lifespan.
Move the switch to the OFF position to stop the lathe (flipped down). The safety switch key (Fig. I - 2) can be
removed once the unit has been turned off. This will prevent the lathe from starting up until the safety switch key
has been replaced.
WARNING: Always set the speed control knob to the lowest speed setting before starting the lathe. Never start a
workpiece at maximum speed.
SPEED CONTROL KNOB
The speed control knob (Fig. I - 3) sets the speed of the lathe to suit the weight of the workpiece or the type of
tool being used. After the lathe is started, turn the knob clockwise to increase the spindle speed. Always make sure
the variable speed is set to its lowest setting before powering on the machine.
1. Turn the knob counterclockwise to decrease spindle speed (down to the minimum of 750 RPM).
2. Turn the knob clockwise to increase the spindle speed (up to the maximum of 3200 RPM).
Fig. I
CIRCUIT BREAKER RESET BUTTON
This tool has a circuit breaker reset button (Fig.
I - 4) that will restart the motor after it shuts off
due to overloading/low voltage. If the motor stops
during operation:
1. Turn the ON/OFF (Fig. I - 1) switch to the
OFF position.
2. Wait about five minutes for the motor to cool
off.
3. Push the circuit reset button (Fig. I - 4)
4. Turn the variable speed knob (Fig. I - 3) to the
lowest speed. Then, turn the ON/OFF switch
back ON.