9
ASSEMBLY AND ADJUSTMENTS
Fig. D
Fig. E
Fig. F
REPLACING THE CHAIN
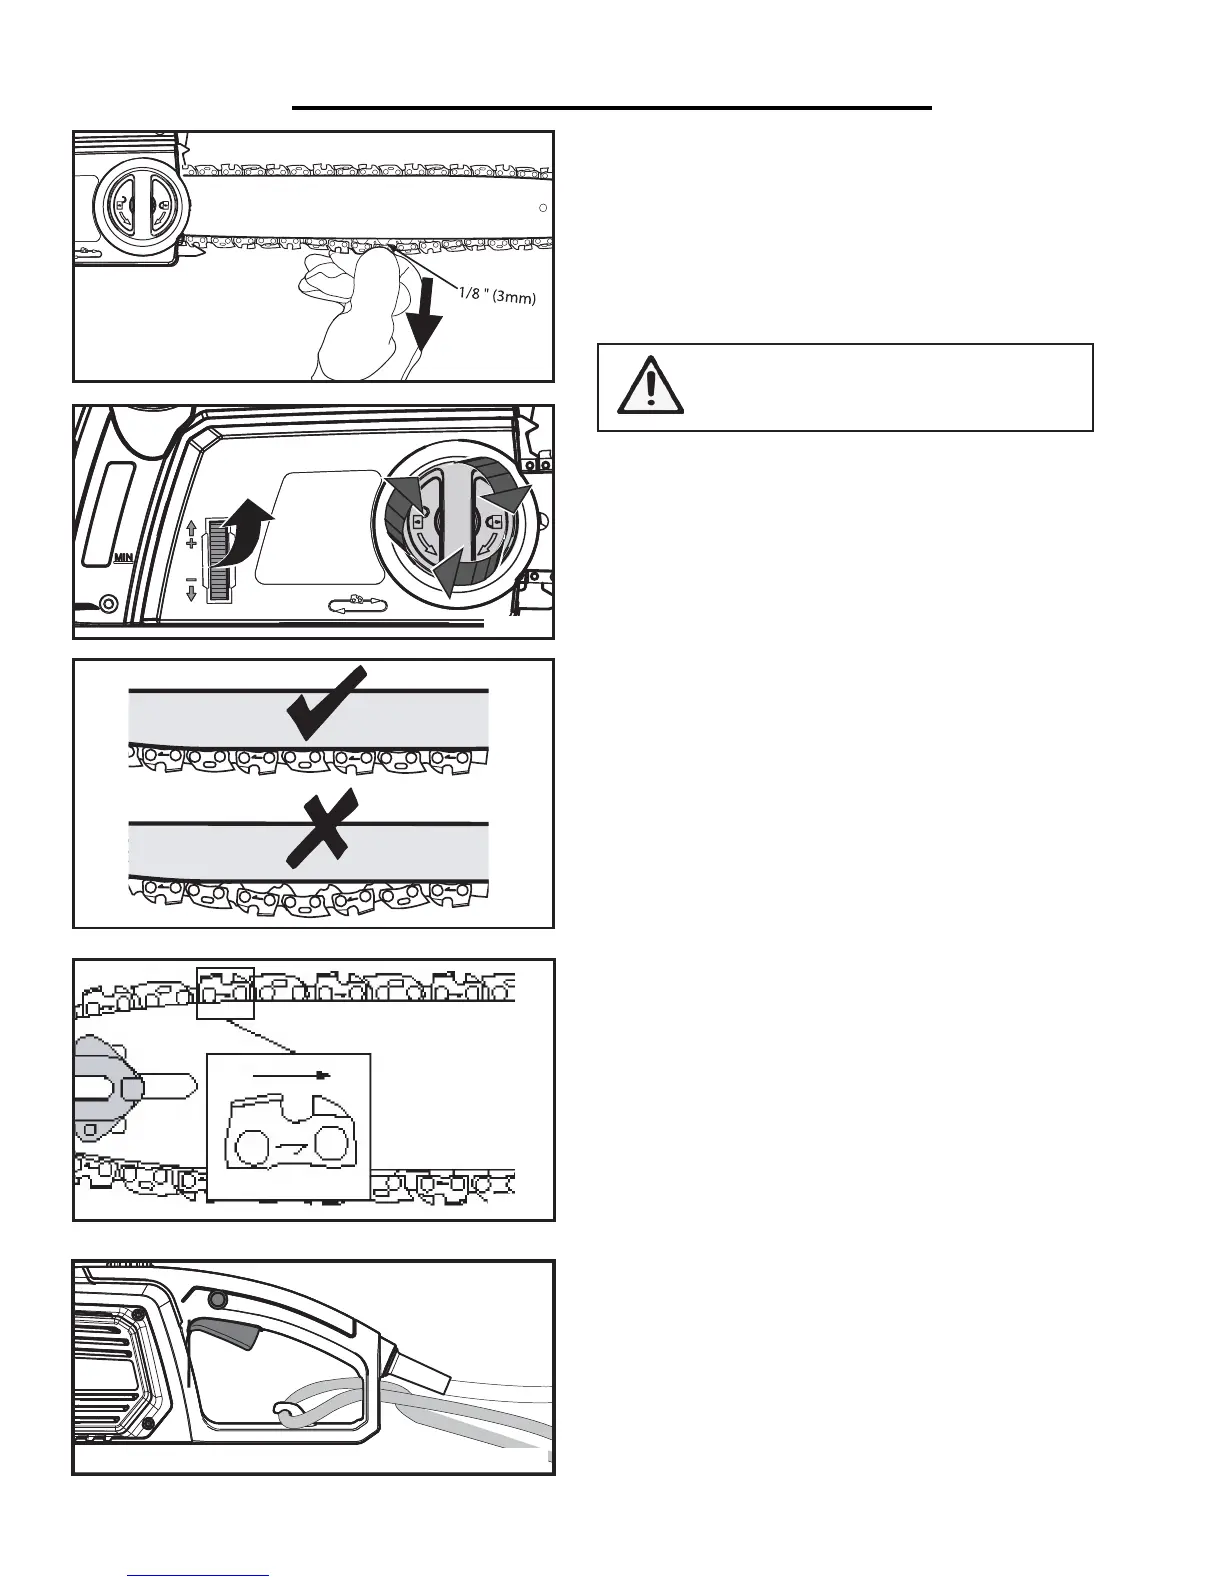
1. Rotate the bar adjustment locking knob and remove the
cover of the saw’s body (see Assembly of Guide Bar and
Chain for more details - Page 8).
2. Lift the worn saw chain out of the fitted slot in the guide
bar.
3. Place the new chain in this position, making sure the
teeth are facing the correct direction and that the edge of the
chain fits into the slot around the guide bar.
4. Replace the cover. Adjust tension before operating.
FILLING THE AUTO OIL SYSTEM
This chain saw features an auto-oiling system to keep the
chain and guide bar properly lubricated. The oil level indica-
tor shows the remaining oil in the chain saw. If the oil level
decreases to below one quarter capacity, refill it with the
proper bar and chain oil. To fill the oil reservoir:
1. Remove the oil cap. Fill the reservoir with bar and chain
oil until the oil level has reached full capacity.
2. Put the oil cap back on. Make sure to check the oil level
after every 10 minutes of use. Unplug the chain saw before
checking oil levels or filling the oil reservoir.
USING THE CABLE STRAIN RELIEF NOTCH
The notch underneath the trigger switch helps to wrangle
an extension cord to ensure that the saw does not become
unplugged during operation. To use this notch:
1. Double the extension cord and loop it around the notch
(Fig. H).
2. Gently pull on the cord to make sure that it is secure.
3. Plug the end of the chain saw’s power cord into the end
of the extension cord.
Fig. G
Fig. H
WARNING - when handling saw chains,
always wear protective gloves.

 Loading...