11
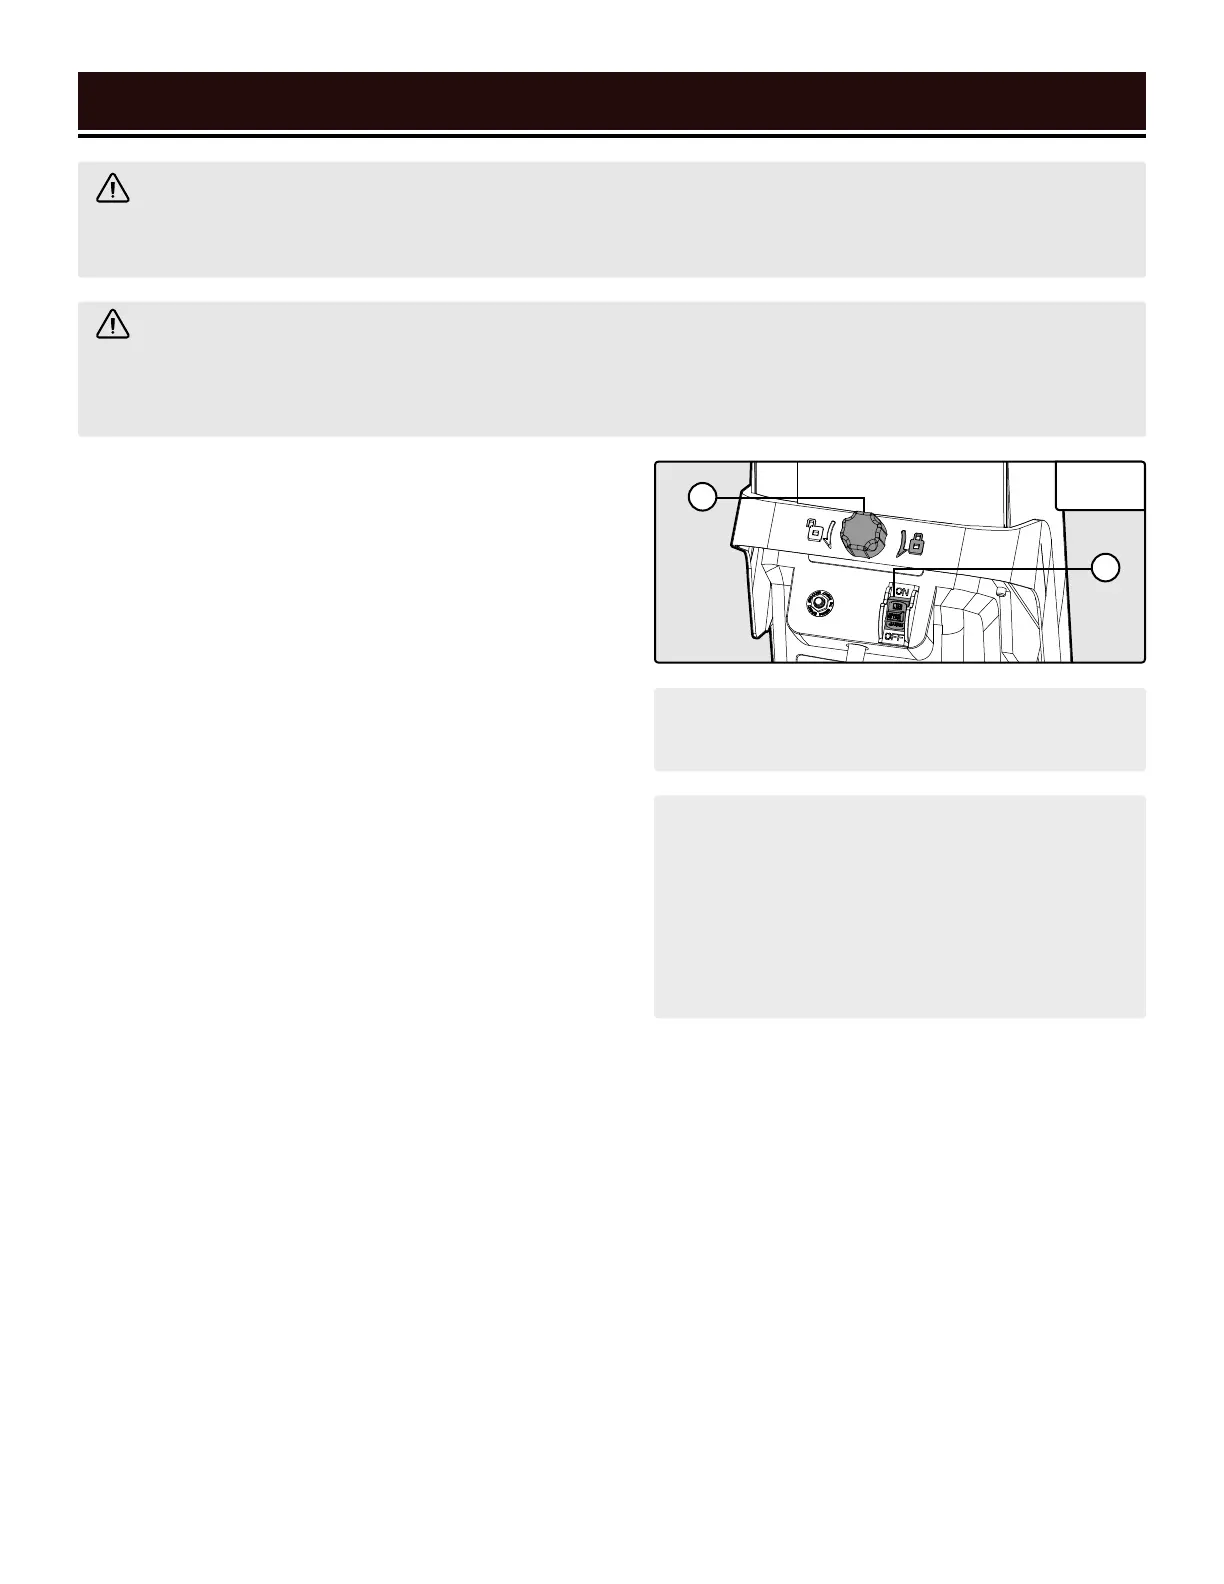
BASIC SHREDDING OPERATION (FIG. 4)
1. Place the shredder on a dry, level ground in the upright
position. Do not operate the shredder if it is tilted or lying
on its side.
2. Check to make sure that the hopper is empty. Close the
hopper tightly by turning the hopper lock knob (A) clock-
wise. The shredder will not run if the hopper is open or not
fully closed.
3. Inappropriate materials may damage the machine and
cutting blades. Examine all materials before feeding them
into the shredder:
• Remove pieces of metal, rocks or other foreign objects
that may damage the blades.
• Do not feed wooden sticks with a diameter larger than
1.5 inch.
• Before shredding roots, remove any remaining soil and
stones.
• Do not shred soft, damp material such as kitchen waste.
4. Connect the shredder to the power source and turn the
power switch to ON (B).
5. Follow the rules below when feeding materials:
• Only insert as much material as needed to prevent
blockage of the feeding chute.
• Feed wilted and damp materials alternately with dry
branches to prevent cutting blades from blocking up.
• Branches with leaves must be completely processed
before new material is fed. Make sure that the chopped
material can fall freely from the discharge chute.
• Maintain the working speed of the shredder and do not
overload it.
• Keep a few dry branches to be shredded at the end, as
they will help clean your shredder.
OPERATION
WARNING! Do not plug in or turn on the tool until it is fully assembled according to the instructions. Read
through and become familiarized with the following procedures of handling and adjusting your tool. Failure to
follow the safety instructions may result in serious personal injury.
WARNING! Wear ANSI Z87.1-approved safety glasses, work-appropriate clothing, work gloves, and dust
mask. Read through the safety section. Do not allow any part of the body or your clothing near the feeding
chute or the discharge chute. Never reach under the hopper until the shredder has come to a complete stop and
has been disconnected from the power supply.
Fig. 4
A
B
NOTE: For optimal performance, we recommend
shredding materials with diameters less than 1".
NOTE: The power switch is equipped with a
safety key to prevent children from accidentally
starting the machine. Turn off the power switch
and remove the safety key to engage the child-
safety lock and prevent unwanted start-ups. The
switch cannot be turned on when the safety key
is removed.
6. Slowly insert the branch into the hopper through
the feeding chute (p. 9). Keep hold of the branch
at a safe distance from the feeding chute until it is
automatically drawn into the shredder.
7. Use the included paddle to push the material inside
the hopper, but be careful not to shred the paddle.
8. Only switch off the shredder after all of the shred-
ding materials have passed through the discharge
chute. Otherwise, the discharge chute may jam the
next time the shredder is turned on.
9. When all shredding work is complete, switch the
machine to OFF and unplug the power cord. Wait for
the blades to come to a complete stop before leaving
the work area.
 Loading...