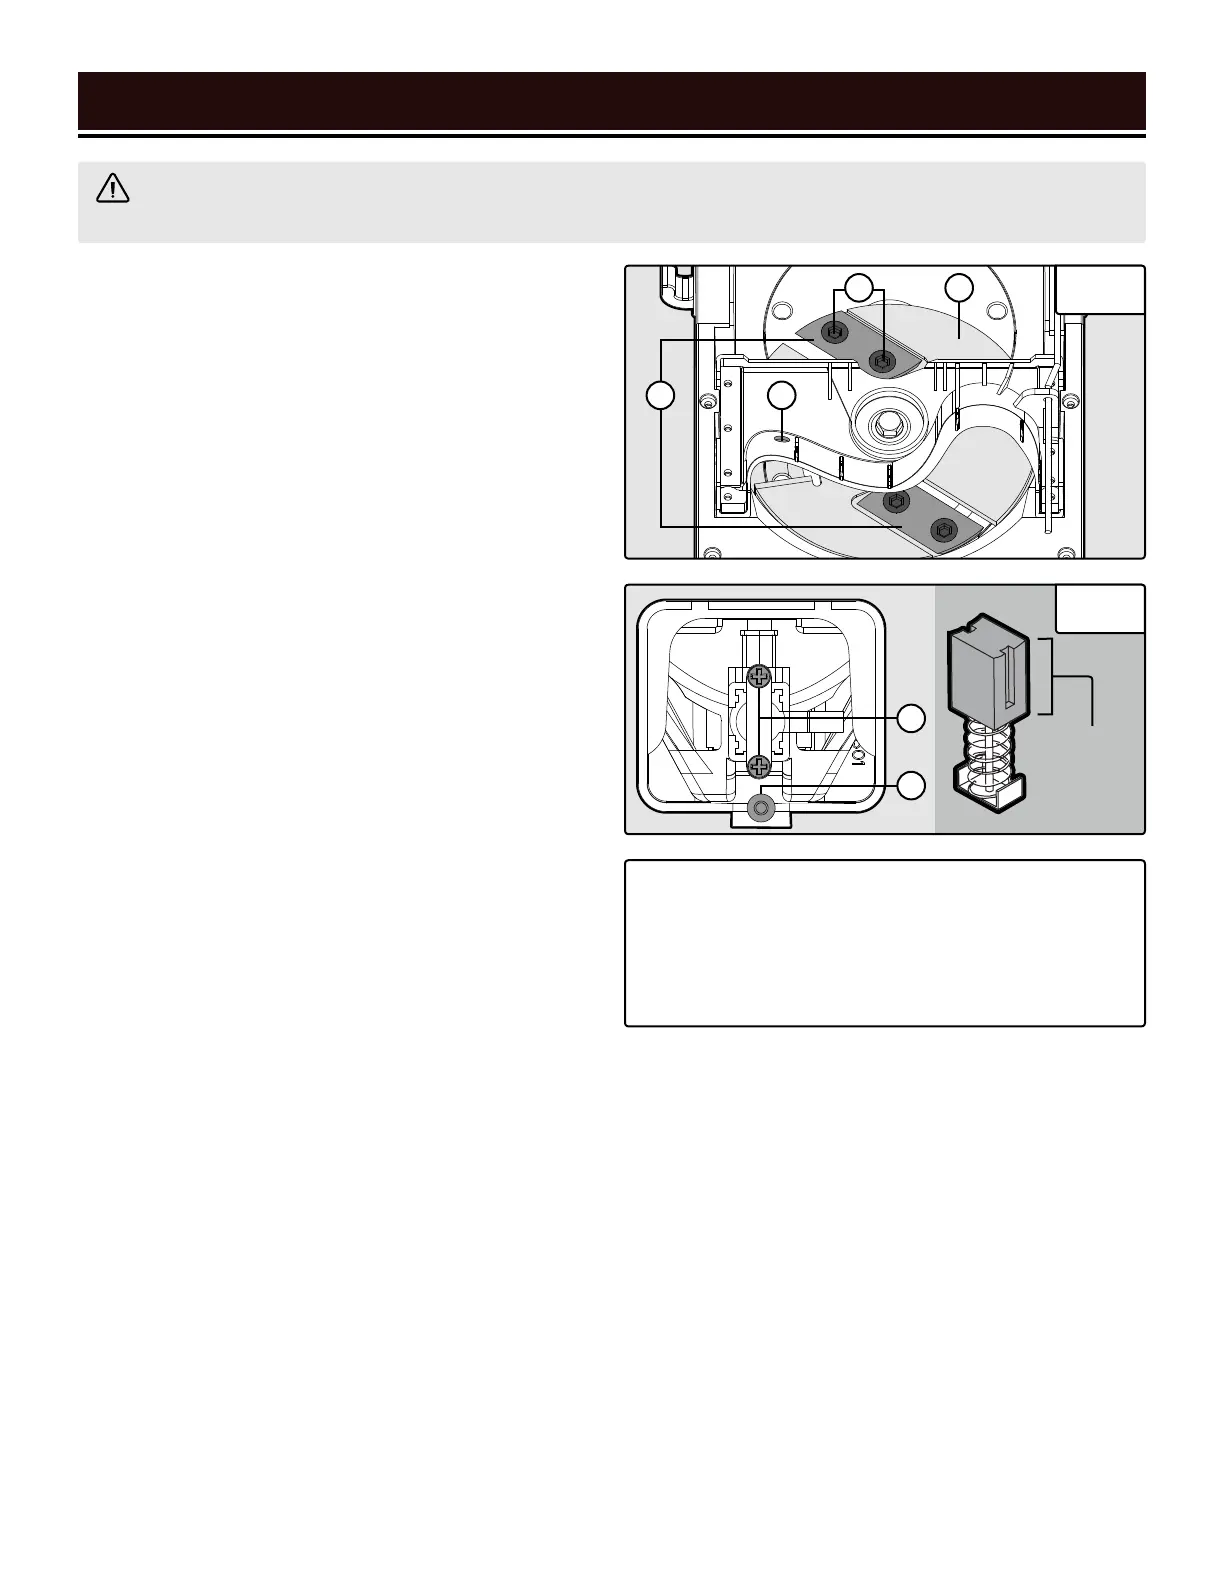
REPLACING CUTTING BLADES (FIG. 6)
1. Turn off and unplug the machine. Wait for the blades
to come to a complete stop.
2. Fully unscrew the hopper lock knob (p. 9) until
it springs out. Open the hopper to access the cutting
head (A).
3. Clean out all chips or foreign matter sticking to the
cutting head and blades (B) using a soft brush.
4. Rotate the cutting head to the configuration shown
in Fig. 6. To prevent the cutting head from rotating dur-
ing blade change, insert a screwdriver through the blade
guard hole (C) and the slot in the cutting head.
5. Unscrew the two hex bolts (D) on the top blade. Turn
the cutting head 180 degrees to remove the other blade.
6. The blades may be reversed when one of the cutting
edges becomes dull or chipped. Reverse the direction
of the original blades, or install two new blades. Make
sure to reverse or replace both blades at the same time
so they are balanced with one another. Align the slots on
the blade with the grooves on the cutting head.
7. Secure each blade with two hex bolts, firmly tighten
them with a hex wrench. Close the hopper and fully
tighten the hopper locking knob.
CARBON BRUSH REPLACEMENT (FIG. 7)
The wear on the carbon brushes depends on how fre-
quently and how heavily the tool is used. To maintain
maximum efficiency of the motor, we recommend in-
specting the two carbon brushes every 60 hours of op-
eration or when the tool stops working.
1. Turn off and unplug the machine. Wait for the blades
to come to a complete stop.
2. The two carbon brushes can be accessed through the
front and back carbon brush cover located on the bot-
tom of the shredder body. Unscrew the Phillips head
screw from the housing and open the carbon brush
cover (A).
3. Unscrew the two small Phillips screws (B) to remove
the carbon brush holder. Carefully remove the old car-
bon brushes using pliers.
14
MAINTENANCE
NOTE: Keep track of which orientation the old carbon
brushes were in to prevent needless wear if they will be
reinstalled.
4.
Measure the length of the brushes (Fig. 7). Install
the new set of carbon brushes if either carbon brush
length is worn down to 3/16" or less. Reinstall the
old carbon brushes (in their original orientation) if
your brushes are not worn down to 3/16" or less.
Both carbon brushes should be replaced at the same
time.
5. Replace the carbon brush holder and cover. Tighten
all screws. Repeat the steps above to replace the carbon
brush located on the other side of the motor.
NOTE: New carbon brushes tend to spark for a few min-
utes during the first use as they wear down.
WARNING! Wear protective gloves to protect your hands. Cutting blades have sharp edges on both sides
and are fragile. Handle the blades carefully to avoid personal injury or damage to the blades.
Fig. 6
Fig. 7
CB
AD
TIP: Replacement carbon brushes can be ordered at
wenproducts.com (Part No. 41121-027-18). Only
genuine WEN replacement brushes designed spe-
cifically for your tool should be used. Carbon brush-
es are not covered under the two-year warranty.
A
B
 Loading...