7
AMPERAGE
REQUIRED GAUGE FOR EXTENSION CORDS
25 ft. 50 ft. 100 ft. 150 ft.
4.5 A 18 gauge 16 gauge 16 gauge 14 gauge
ASSEMBLY AND ADJUSTMENTS
UNPACKING
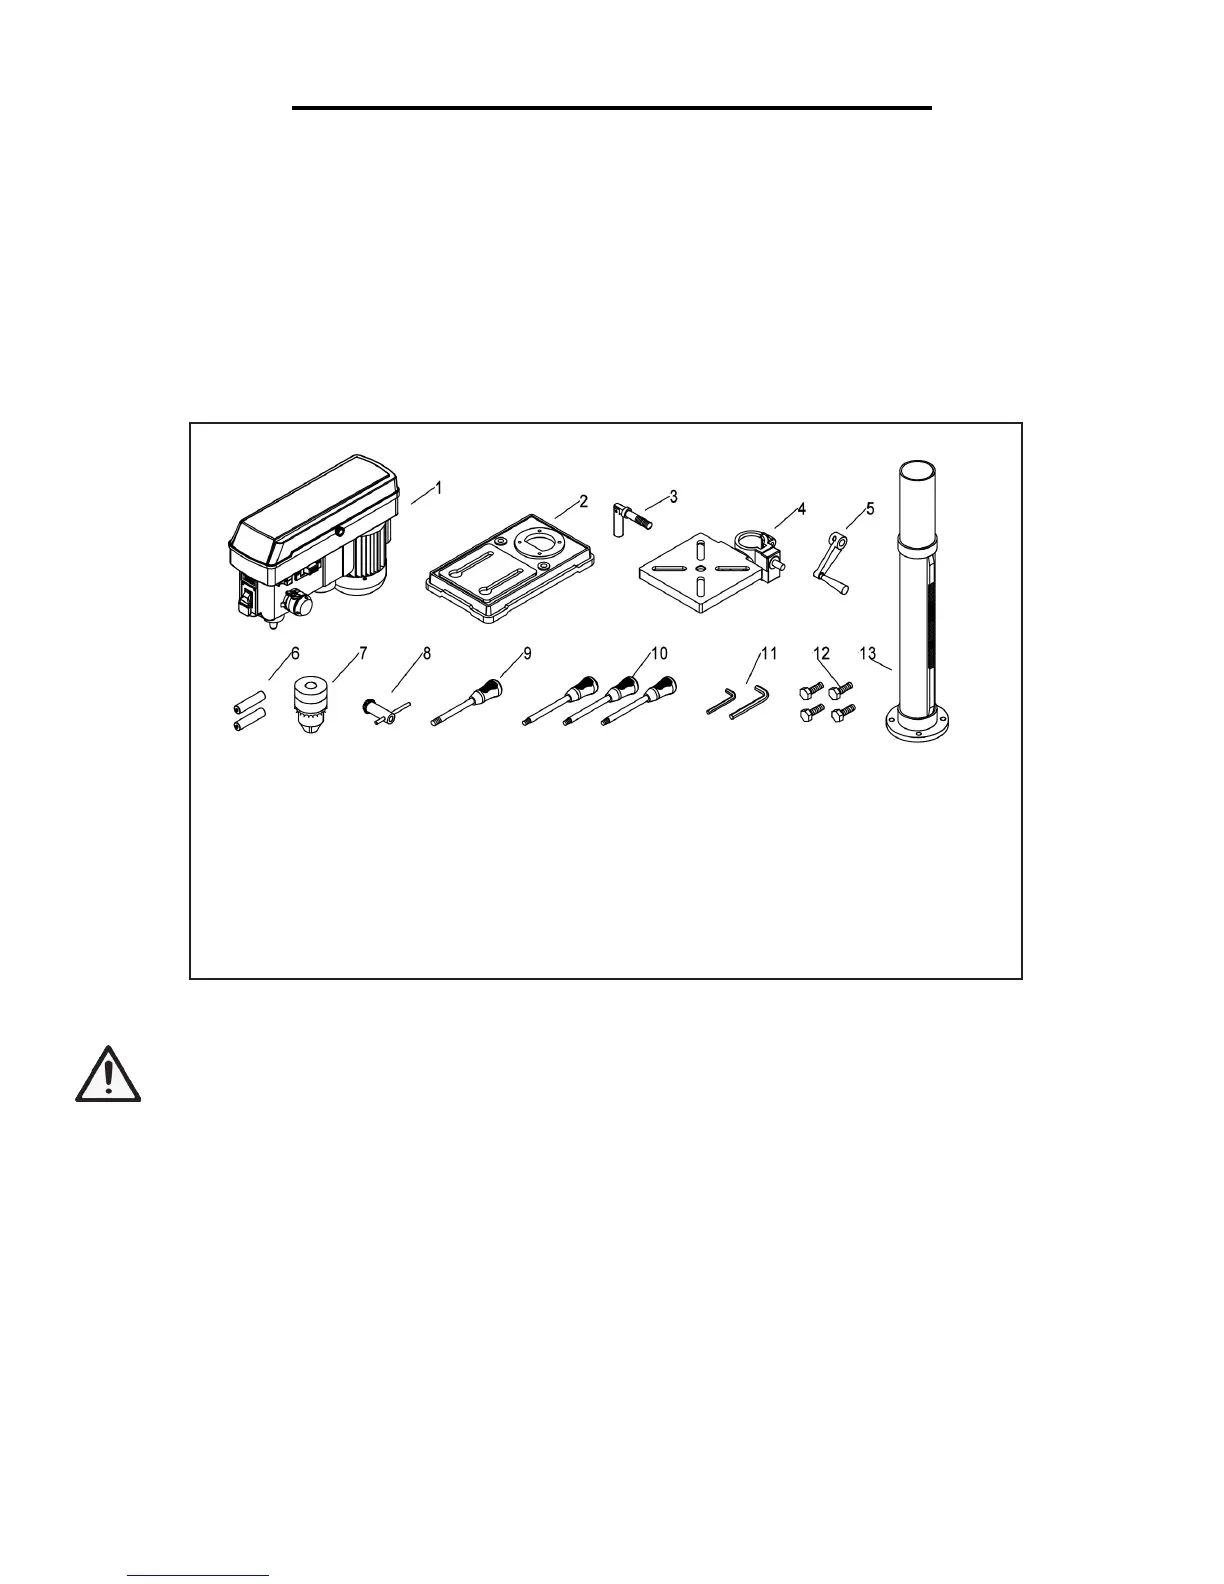
Unpack the drill press and all of its parts. Compare against the list below. Do not discard the carton or any
packaging until the drill press is completely assembled.
To protect the drill press from moisture, a protective coating has been applied to the machine’s surfaces. Remove
this coating with a soft cloth moistened with kerosene or WD-40®. Do not use acetone, gasoline, or lacquer
thinner to clean. Apply a coat of good paste wax to the table and column. Wipe all parts with a clean dry cloth.
1
2
3
4
5
6
7
Head/Motor Assembly
Base
Table Locking Handle
Table Assembly
Table Adjustment Handle
AAA Batteries (2)
Chuck
8
9
10
11
12
13
Chuck Key
Speed Adjustment Handle
Feed Handles (3)
Hex Wrench
Hex Head Bolts (4)
Column Assembly
WARNING: If any part is missing or damaged, do not plug the drill press in until the missing or damaged
part is repaired or replaced.
The column assembly (column, column support, rack, rack collar, and table support bracket) must be attached to
the base. The table and table support handles must be attached to the table support bracket. The motor housing
must be attached to the column.
Tools needed for assembly
• Adjustable wrench
• screwdriver
• Hammer and block of wood

 Loading...


