9
ASSEMBLY AND ADJUSTMENTS
WARNING: If any part is missing or damaged, do not plug the drill press in until the missing or damaged
part is repaired or replaced.
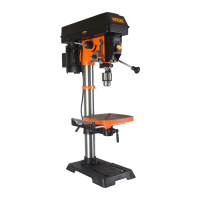
The column assembly (column, column support, rack, rack collar, and table support bracket) must be attached to
the base. The table and table support handles must be attached to the table support bracket. The motor housing
must be attached to the column.
Tools needed for assembly
• Adjustable wrench
• screwdriver
• Hammer and block of wood
COLUMN ASSEMBLY TO BASE (Fig. 3)
1. Place the column tube (1) on the base (2), aligning the column
support holes to the base holes.
2. Install a hex head bolt (3) in each column support hole and
tighten bolts using the adjustable wrench.
TABLE TO TABLE SUPPORT BRACKET (Fig. 4)
1. Place the crank handle (1) onto the shaft (2) of the table bracket
so the flat of the shaft is under the set screw (3). Tighten the set
screw.
2. Thread the table lock handle (4) into the front of the table
support bracket.
3. Thread the table support lock handle into the rear of the table
support bracket (not shown).
4. Position the table (5) in the same direction as the base. Install
the table and tighten the table lock handle (4) and support lock
handle.
Fig. 4
Fig. 3

 Loading...