ASSEMBLY & ADJUSTMENTS
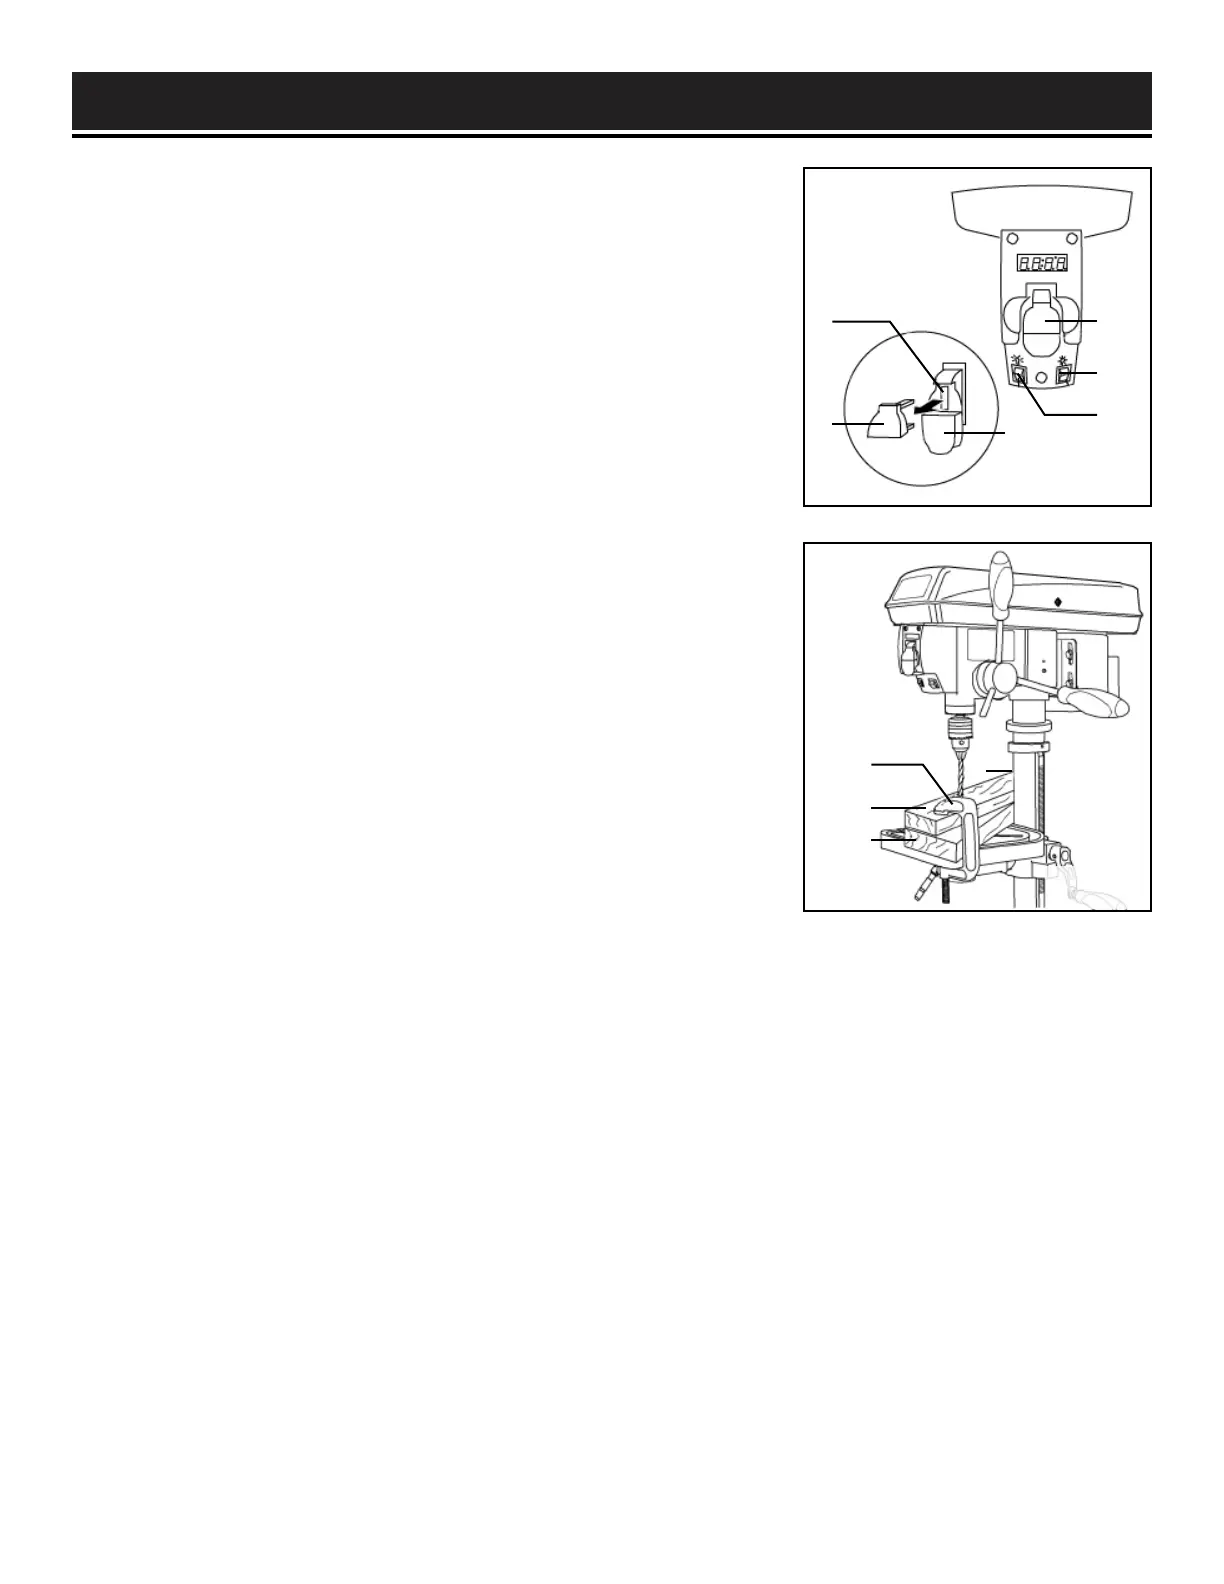
DRILL PRESS ON / OFF SWITCH (FIG. 19)
1. To turn the drill press ON, insert the yellow safety key (Fig. 19 - 1)
into the switch housing (Fig. 19 - 2). As a safety feature, the switch
cannot be turned ON without the safety key.
2. Flip the switch upward to the ON position.
3. To turn the drill press OFF, flip the switch downward.
4. To lock the switch in the OFF position, remove the safety key
(Fig. 19 - 1) from the switch. Store the safety key in a safe place away
from the reach of children.
Fig. 20
LIGHT & LASER LINE ON/OFF SWITCHES (FIG. 19)
The light switch (Fig. 19 - 3) is located on the lamp cover.
The laser switch (Fig. 19 - 4) is located below the ON/OFF switch on
the right.
Fig. 19
POSITION THE TABLE AND WORKPIECE (FIG. 20)
Always place a piece of backup material (Fig. 20 - 1) (wood, plywood,
etc.) on the table underneath the workpiece (Fig. 20 - 2). This will
prevent splintering on the underside of the workpiece as the drill bit
breaks through. To keep the material from spinning out of control, it
must contact the left side (Fig. 20 - 3) of the column as illustrated, or
be clamped (Fig. 20 - 4; not included) to the table.
NOTE: For small workpieces that cannot be clamped to the table, use a
drill press vise (not included). The vise must be clamped or bolted to
the table to avoid injury.
1
2
3
3
4
5
1
2
3
4
18

 Loading...


