11
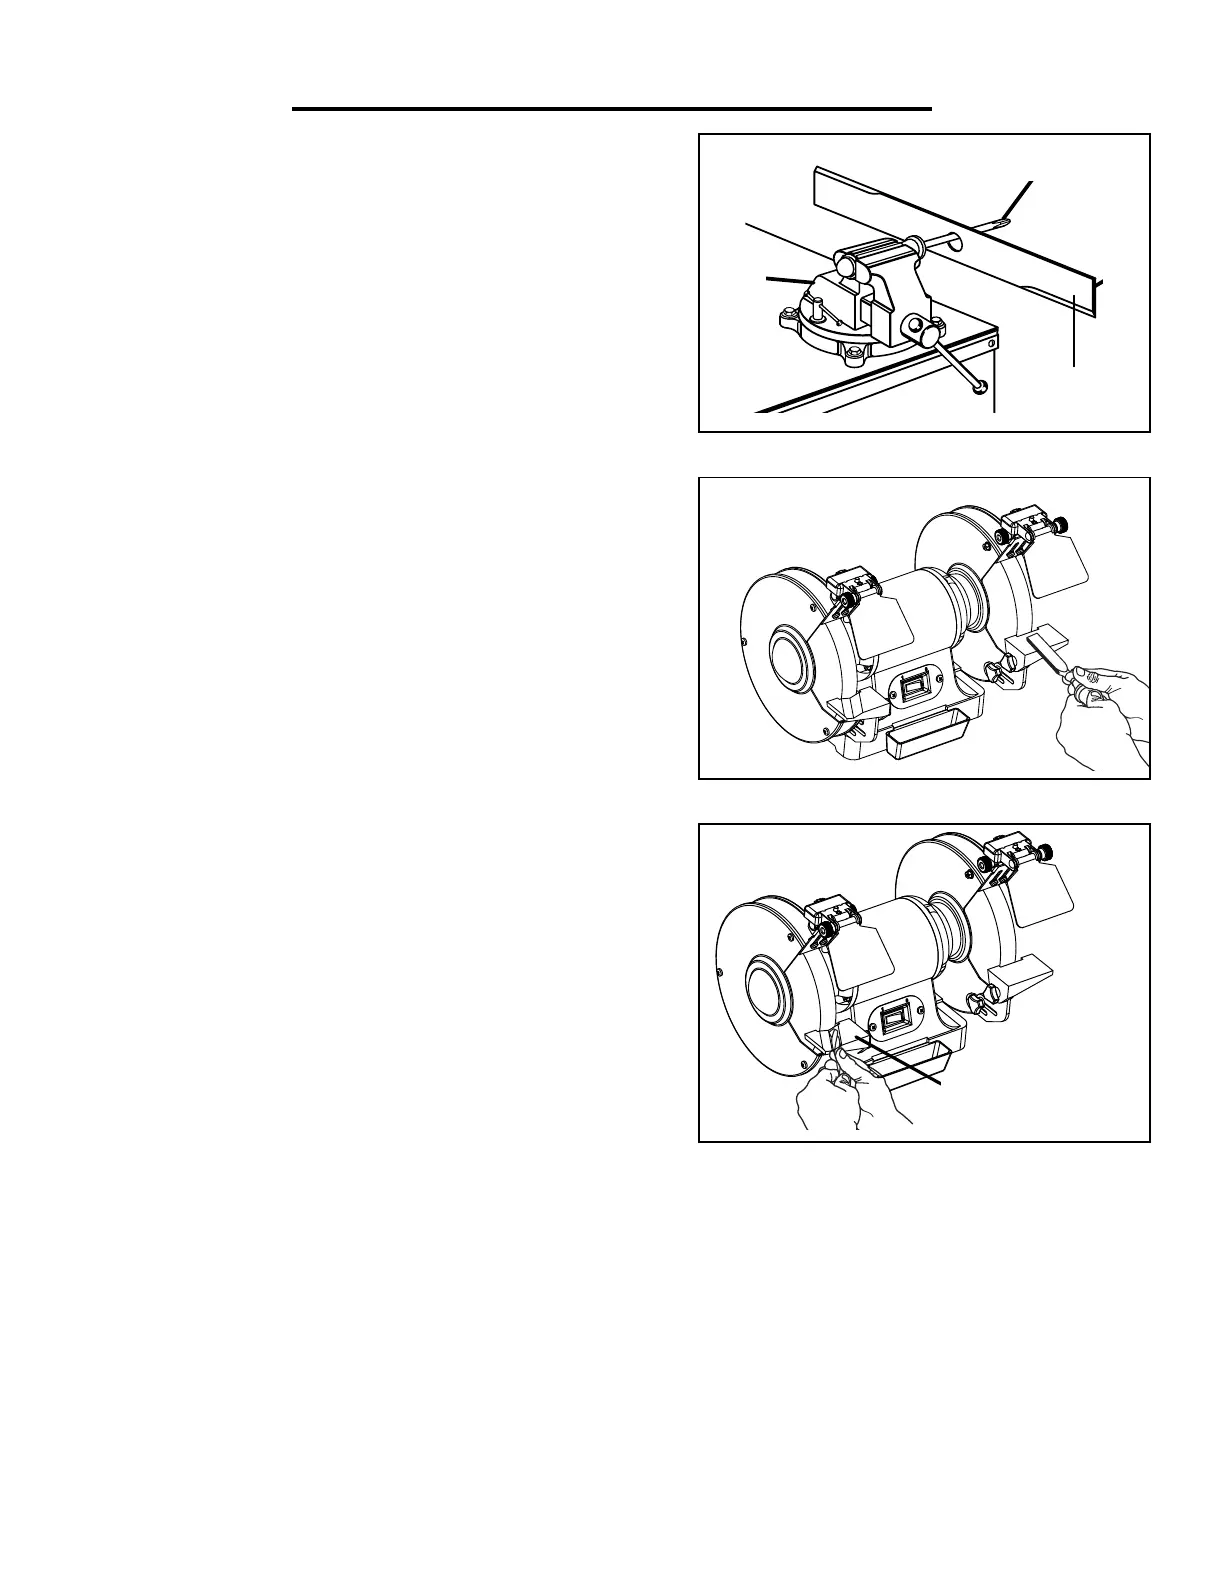
SHARPENING LAWN MOWER BLADES (Fig. C)
Lawn mower blades are usually sharpened on only one edge
and dressed up slightly on the other. Perform this sharpening
process on both cutting ends of the blade.
After sharpening, be sure to balance the blade by removing ad-
ditional material from the heavy end. Unbalanced blades can
cause serious crank shaft damage to your lawn mower. There
are a number of inexpensive cone balancers on the market for
this purpose. Alternatively, you can balance the blade using a
screwdriver that is secured onto a vise as shown.
NOTE: Always remove spark plug wires or battery from the
mower before servicing the blades to prevent accidental start-
ups.
SHARPENING CHISELS & FLATHEAD SCREW-
DRIVERS (Fig. D)
The end of a properly sharpened chisel or screwdriver will be
a perfectly flat rectangle, perpendicular to the center line of the
shank. The two sides and two faces will taper outward from the
end. Hold each face of the screwdriver against the wheel to true
it up, then ease the end straight into the stone to grind it true.
SHARPENING DRILL BITS (Fig. E)
Use the grooved work rest to provide angled support to drill bits
during grinding operation. The angled groove running through
the work rest allows for a cradle for drill bits during sharpening
operations.
For better sharpening results, you can use a sharpening jig (avail-
able at most hardware stores). Begin on one side of the point
at the existing angle, then twist the bit while maintaining contact
with the grinding surface. Sharpen only the tip of the drill bit.
SHARPENING KNIVES
14
Fig. 10
Fig. 13
Fig. 14
Fig. 11
A - On/Off switch
A
Fig. 12
A - Work rest
A
C
A
B
A - Vise
B - Lawn mower blade
C - Screwdriver
A
A
CHISEL SHARPENING
A - LED light switch
Screwdriver
Lawn mower
blade
14
Fig. 10
Fig. 13
Fig. 14
Fig. 11
A - On/Off switch
A
Fig. 12
A - Work rest
A
C
A
B
A - Vise
B - Lawn mower blade
C - Screwdriver
A
A
CHISEL SHARPENING
A - LED light switch
14
Fig. 10
Fig. 13
Fig. 14
Fig. 11
A - On/Off switch
A
Fig. 12
A - Work rest
A
C
A
B
A - Vise
B - Lawn mower blade
C - Screwdriver
A
A
CHISEL SHARPENING
A - LED light switch
Grooved Work Rest
Fig. C
Fig. D
Fig. E
Working from the heavy end of the blade towards the tip to remove metal from both faces of the knife.
SHARPENING SCISSORS
If possible, take the scissors apart to make the sharpening operation easier and safer. Remove material only from
the outside surface and work from the heavy end of the blade toward the tip.
OPERATION
Vise

 Loading...