7
ASSEMBLY AND ADJUSTMENTS
WARNING: To avoid injury from accidental startups, turn the power switch OFF and remove the
plug from the power source outlet before making any adjustments.
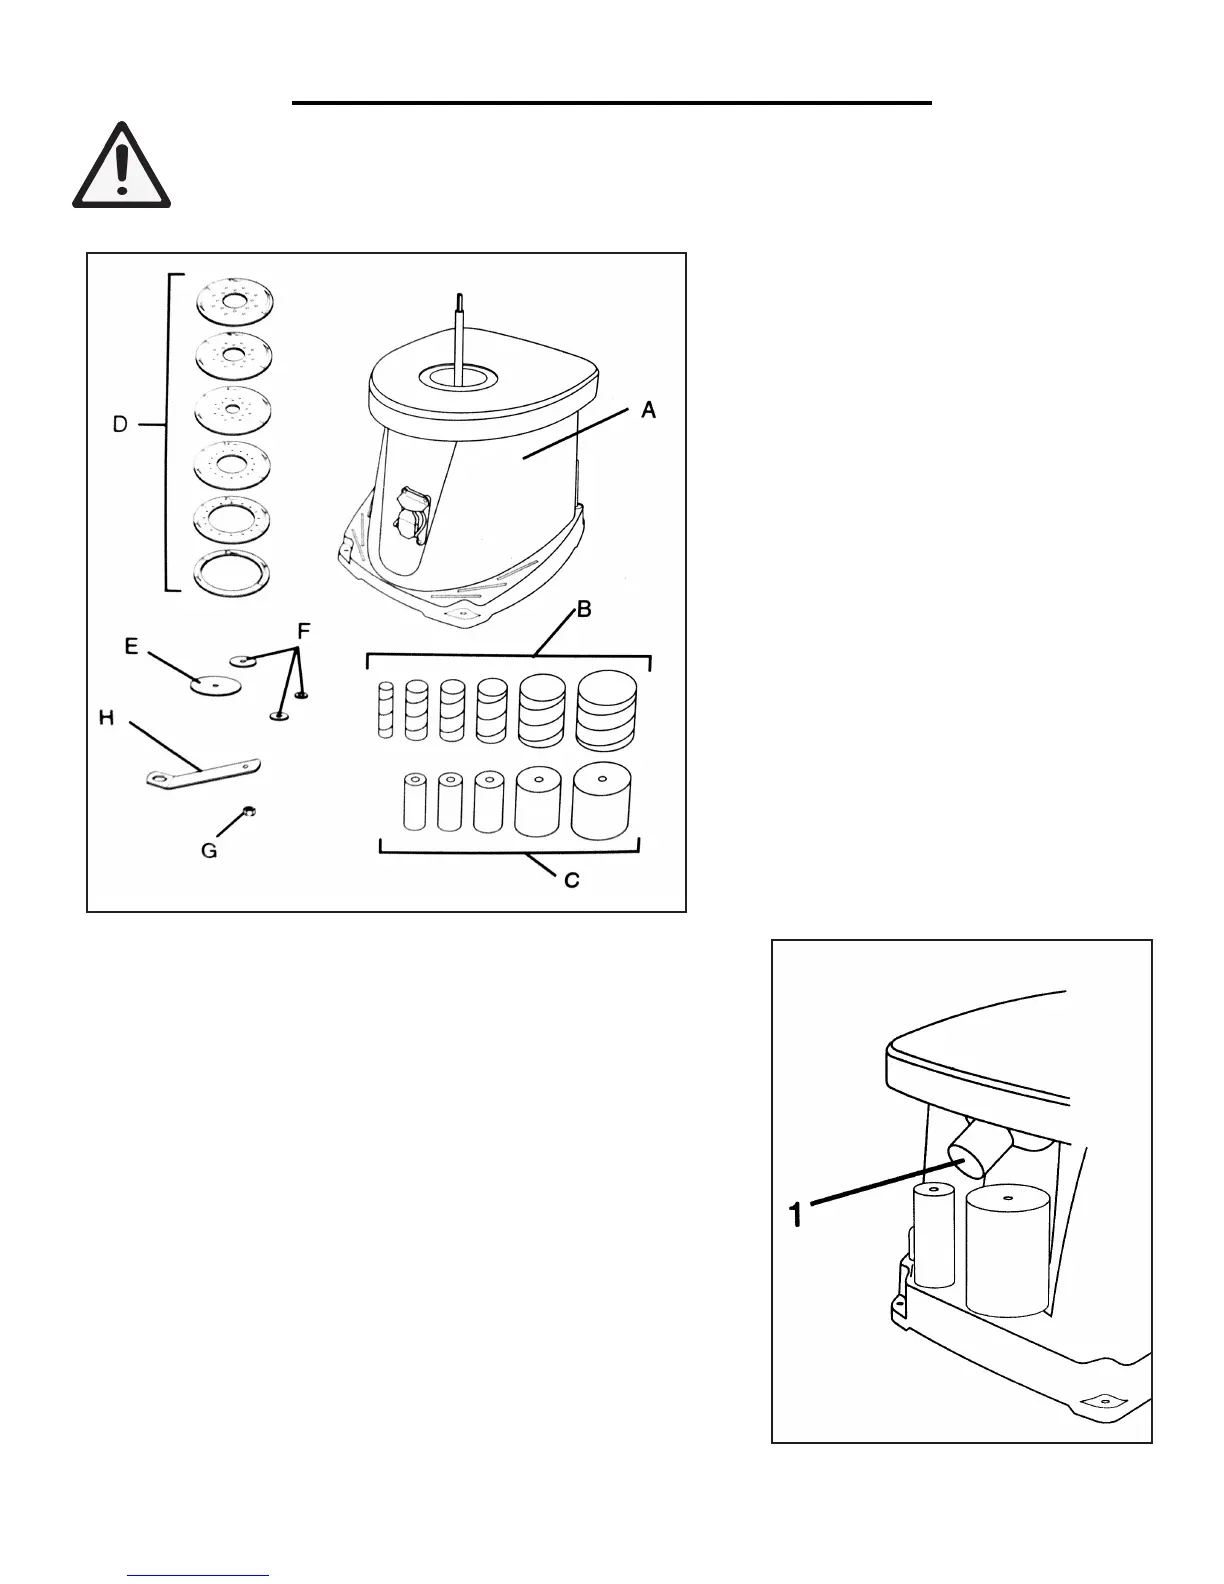
A Spindle Sander
B Sanding Sleeves (6)
C Rubber Drums (5)
D Throat Plates (6)
E Lower Spindle Washer
F Upper Spindle Washers (3)
G Spindle Lock Nut
H Wrench
UNPACKING
Carefully unpack the spindle sander and all its parts, and compare
against the list below (Fig. 1). Do not discard the carton or any packag-
ing until the spindle sander is completely assembled. If any parts are
missing or damaged, contact the WEN customer support line.
This spindle sander requires some assembly. For your safety, completely
assemble the oscillating spindle sander before connecting it to the power
or switching it on.
DUST COLLECTION
A 1-1/2” dust port is located at the rear of the machine as seen on page
6 (Item H) or in Fig. 2 to the right. This can be connected to a dust-
collection system (not included).
Fig. 1
Fig. 2