9
ASSEMBLY AND ADJUSTMENTS
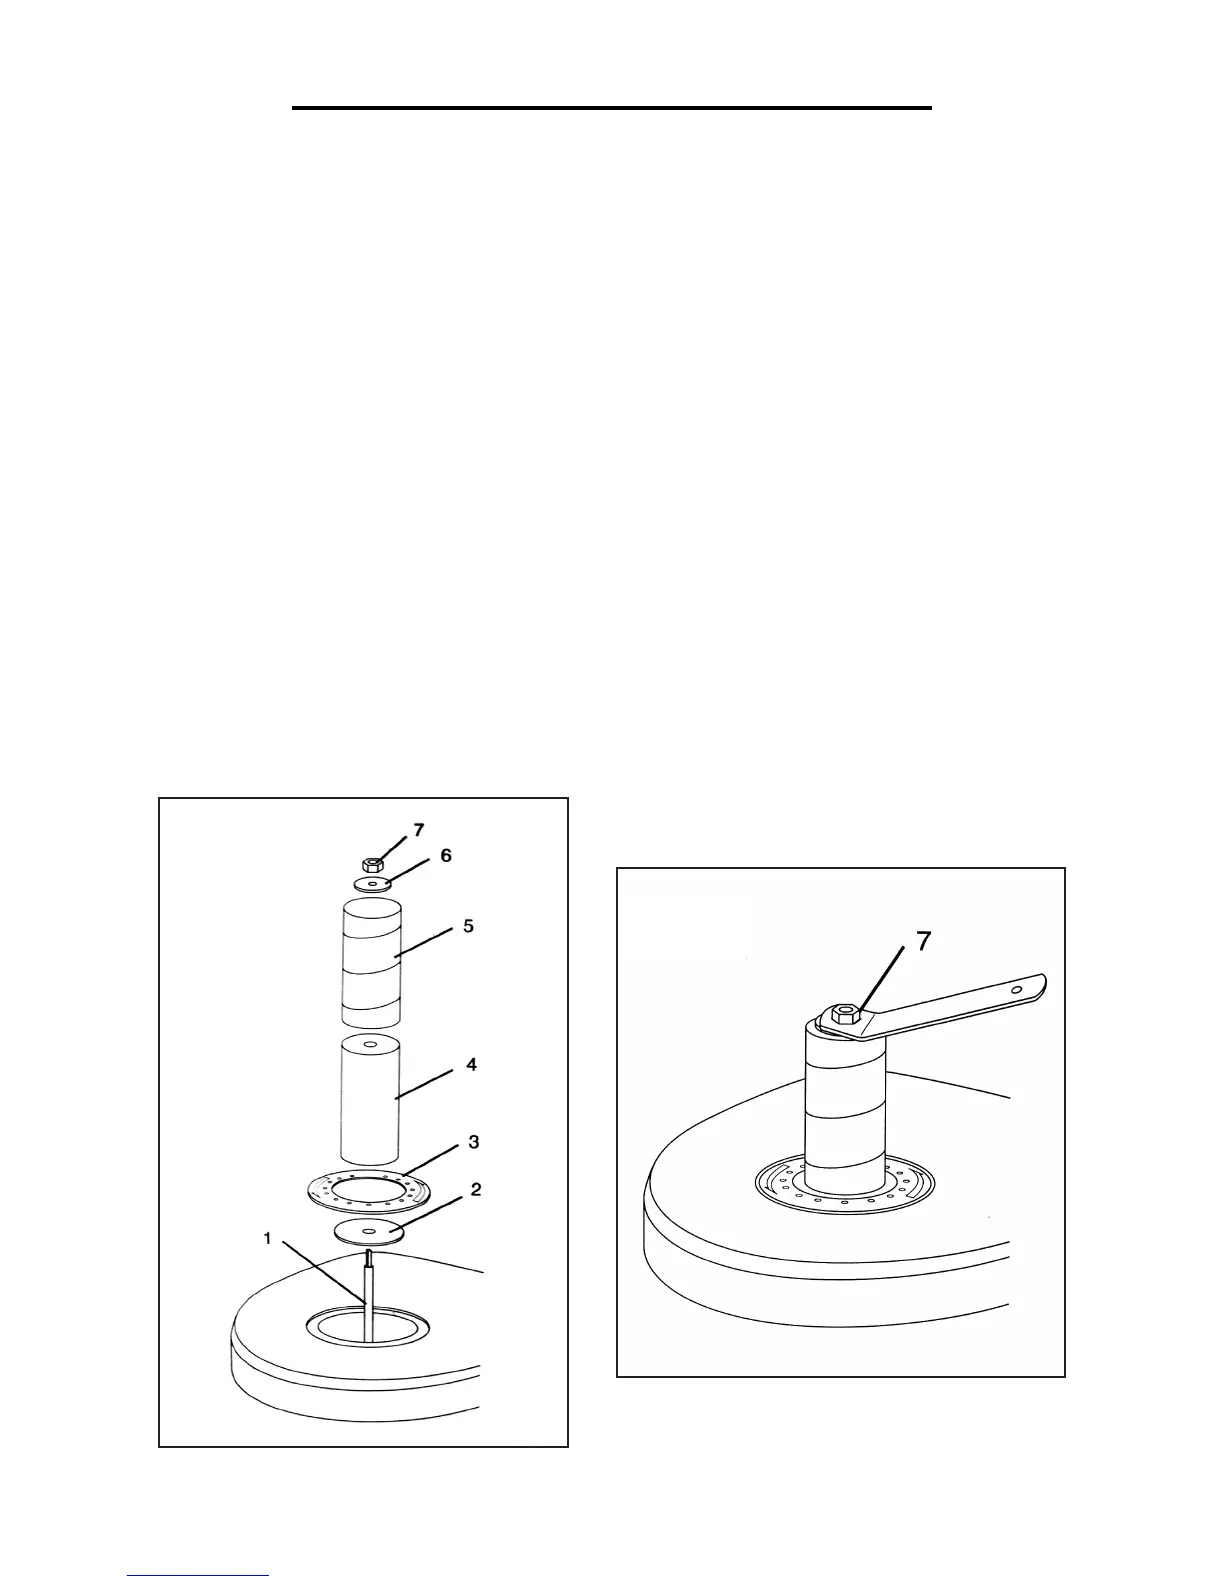
INSTALLING A SANDING SLEEVE (Fig. 6)
All sleeves with the exception of the 1/2” sleeve fit over a rubber sanding drum. To install a sleeve:
1. Place the lower spindle washer (2) over the spindle (1) with the fin side facing down.
2. Select a sanding sleeve (5) for the job that you are planning. Select the corresponding rubber sanding drum (4).
Note: Do not use a sanding drum with the 1/2” sanding sleeve.
3. Select the throat plate (3) that provides the smallest clearance between the sanding sleeve (5) and the opening in
the throat plate.
4. Place the throat plate (3) over the spindle (1), and fit it into the opening in the table.
5. Place the sanding drum (4) over the spindle.
6. Slide the sanding sleeve (5) over the sanding drum (4).
7. Place the appropriate upper spindle washer (6) over the spindle (1).
8. Place the hex nut (7) on the spindle (1). Tighten the hex nut only enough to expand the rubber sanding drum (4)
against the sanding sleeve (5). Do not overtighten (Fig. 7).
Fig. 6
Fig. 7