the planed surface will be rough and uneven.
CAUTION: Tighten all clamping screws carefully when attaching the blades to the planer. A loose clamp-
ing screw can be extremely dangerous. Check regularly to make sure that all six clamping screws are tight-
ened securely.
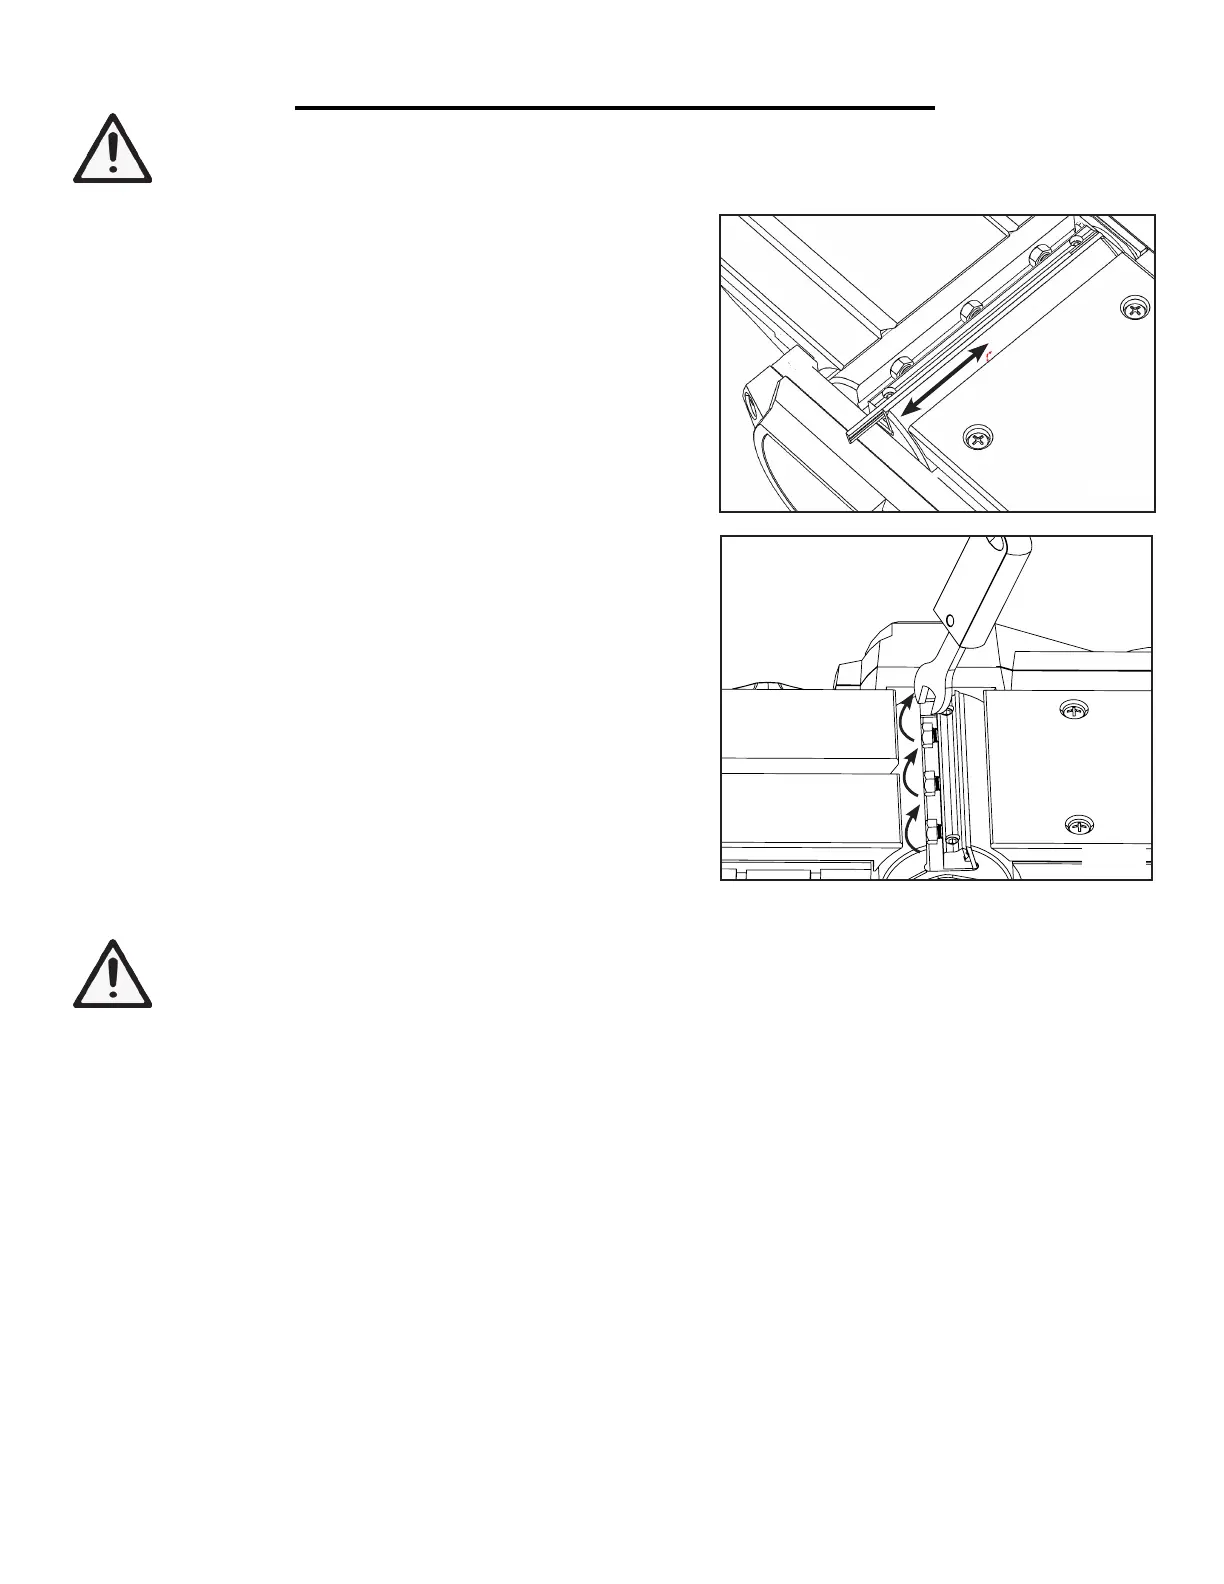
7. Slide the blade with the good side up into the blade retainer of
the blade drum (Fig. L). Make sure that the blade is positioned in
the center of the blade drum.
NOTE: The flat side of the blade should be facing the front of
the planer and the ridged side of the blade should be facing the
back of the planer.
8. The blades must be mounted so that the cutting edge is abso-
lutely level (parallel to the surface of the rear shoe). Check that
both ends of the blade protrude out evenly from the blade re-
tainer of the blade drum.
NOTE: The planed surface will end up rough and uneven if
blades are not set properly or securely.
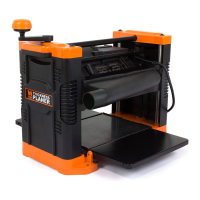
10. Tighten the clamping screws using the blade wrench, ensuring
that all three screws are tightened evenly (Fig. M).
11. Repeat steps 2 - 10 for the installing/changing the second
blade. It is important to reverse or replace the two blades at the
same time so they are balanced with one another. Both blades
should be set to the same cutting level and alignment, otherwise
13
Fig. L
WARNING: To avoid injury from accidental startups, always ensure that the tool is switched OFF and
unplugged from the power supply before making adjustments or installing or removing blades.
Fig. M
ADJUSTMENTS