ADJUSTMENTS
WARNING! To avoid injury from accidental startups, always ensure that the tool is switched OFF and un-
plugged from the power supply before making adjustments or installing or removing blades.
REMOVING OR INSTALLING PLANER BLADES
WARNING! Planer blades are sharp and fragile. Wear protective gloves to protect your hands. Handle the
blades carefully to avoid personal injury or damage to the blades.
WARNING! Do not attempt to sharpen or use resharpened blades of any kind. Use only blades designated
for use with this model. Other blades may not clamp securely in the blade holder, causing vibration and a de-
crease in performance.
Condition of blades will affect the precision of cuts. Observe the quality of the cut that the planer produces to check
the condition of the blades. Dull blades will tear wood fibers and produce fuzzy surfaces. Raised grain will occur on
the wood when the cutting blades are dull or nicked.
NOTE: Blades on this planer are reversible and should always be reversed or replaced as a matched set. Unbalanced
blades can cause vibration and poor planing action while shortening the life of the blade and the tool. Keeping a
spare set of blades on hand is recommended. Replacement blades (model 6534B) can be ordered in two packs at
wenproducts.com.
1. Disconnect the planer from the power source.
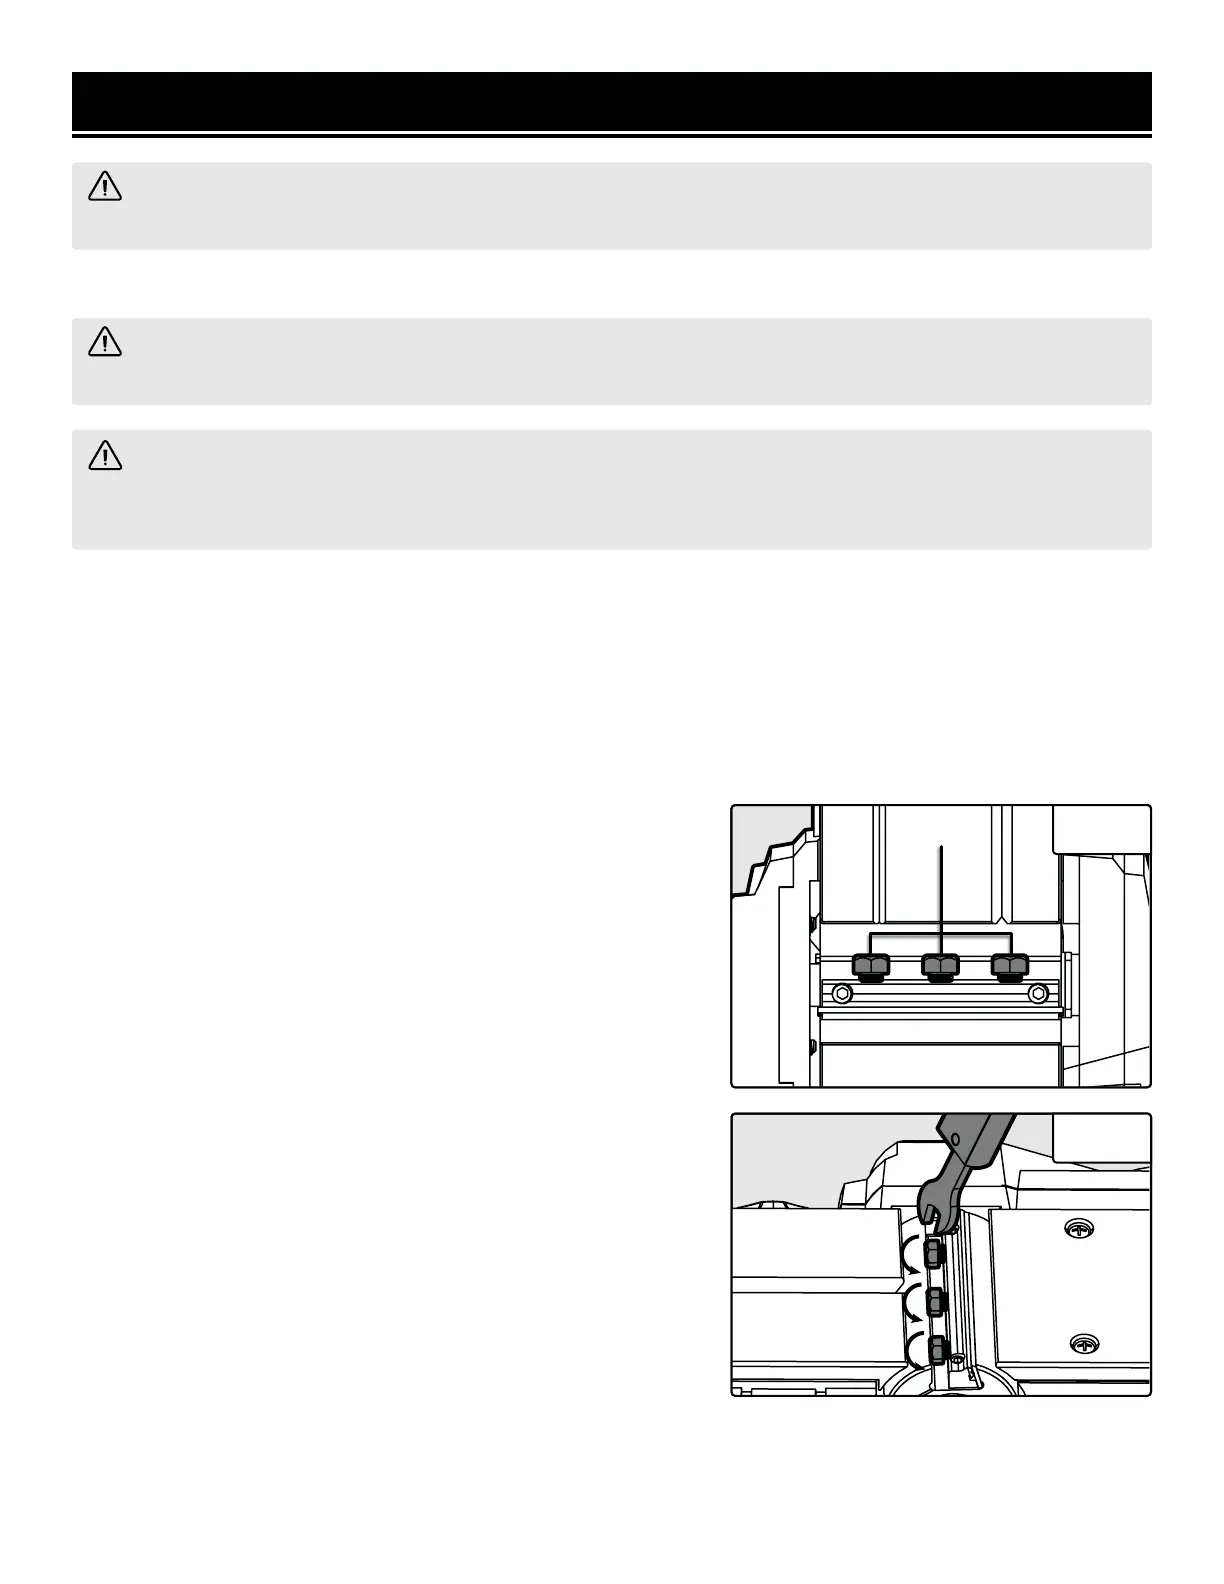
2. Put the planer on a secure work surface and turn it upside down.
Carefully rotate the blade drum to expose the clamping screws (Fig.
11 - 1).
3. Loosen the three clamping screws using the included blade
wrench in the direction indicated by the arrows (Fig. 12).
CAUTION! The blade drum can rotate as you’re doing this so be
careful not to contact the blade with your hand. If the screw is dif-
ficult to loosen, try tightening it a little and then loosen it.
4. Hold the blade drum in place and carefully slide out the blade
(Fig. 13). You can also use a wooden block to push the blade out of
the blade drum.
5. Clean out all chips or foreign matter adhering to the blade drum
and the blade using a soft brush or compressed air.
6. Each planer blade has two cutting edges and may be reversed
when one of the cutting edges becomes dull or chipped.
• If one edge is dull, reverse the blade.
• If both edges are dull, remove the old blade and replace it with a
new one.
Directions continue on the next page.
Fig. 11
Fig. 12
1
14
 Loading...