7
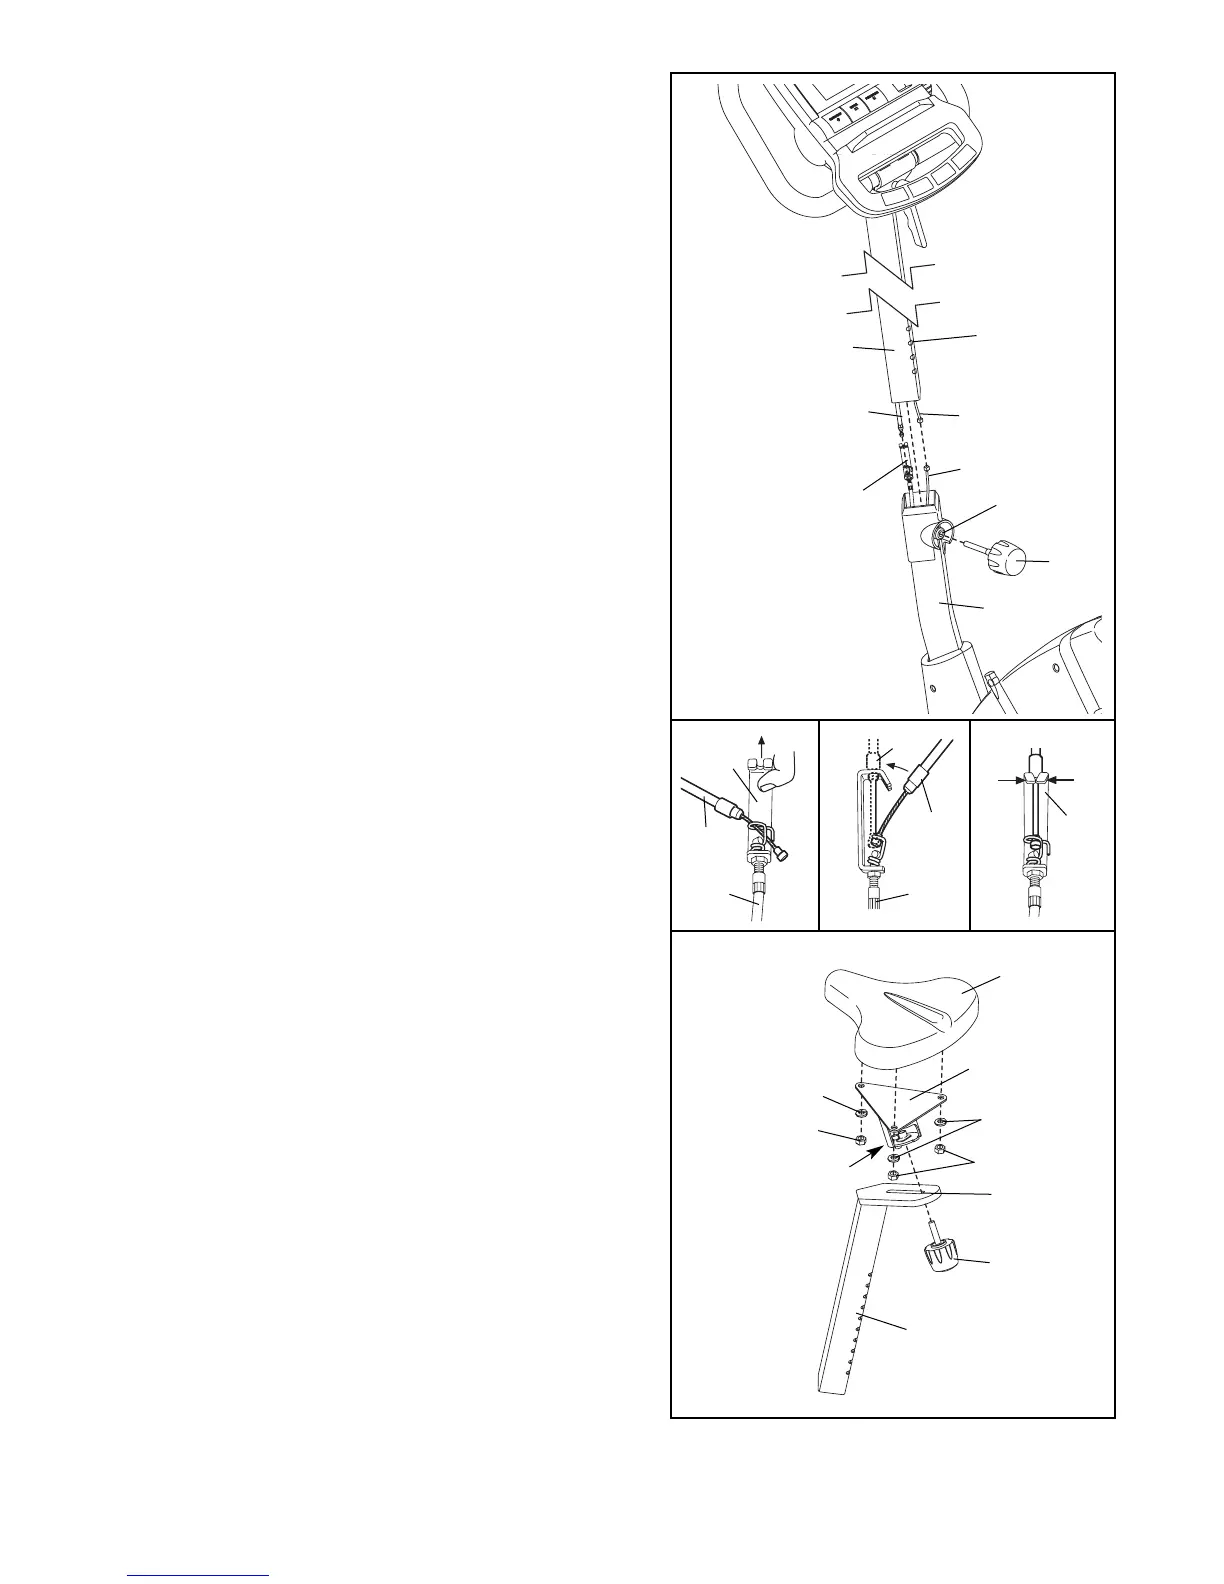
7. Attach the Seat (12) to the Seat Bracket (50) with three
M8 Nylon Locknuts (10) and three M8 Flat Washers
(51). Note: The Nylon Locknuts and Flat Washers may
be preattached to the underside of the Seat.
Orient the Seat (12) and the Seat Post (5) as shown.
Insert the pin on the bottom of the Seat Bracket (50)
into the indicated slot on the Seat Post. Tighten the
Seat Knob (36) into the Seat Bracket.
6. Whilst another person holds the Upright (13) in the
position shown, connect the console wire to the Reed
Switch Wire (43). Next, connect the console cable to
the Lower Cable (45) in the following way:
• Refer to inset drawing A. Pull up on the metal brack-
et (MB) on the Lower Cable (45), and insert the tip of
the console cable (CC) into the wire clip inside of the
metal bracket.
• Refer to inset drawing B. Firmly pull the console
cable (CC) and slide it into the metal bracket on the
Lower Cable (45) as shown.
• Refer to inset drawing C. Using pliers, squeeze the
prongs on the upper end of the metal bracket
together.
Carefully push the excess wire and cable down into the
Frame (1), and insert the Upright (13) into the Frame.
Be careful to avoid pinching the wires and cables.
Next, align one of the adjustment holes in the Upright
with the indicated hole in the Frame. Insert the
Adjustment Knob (9) into the Frame and the Upright,
and turn the Knob clockwise until it is tight. Make sure
that the Knob is inserted through one of the
adjustment holes in the Upright.
13
Console Wire
9
43
Hole
1
45
6
Console Cable
Adjustment
Holes
7
51
12
51
36
10
10
Pin
Slot
50
5
Be careful
to avoid
pinching the
wires.
A
B C
45
CC
CC
MB
MB
MB
45