Do you have a question about the Westomatic ELEVATE QUARTZ and is the answer not in the manual?
Provides an overview of the document, copyright, software version, and availability.
Details the capabilities and operation of the Robimat vending machine.
Information on how to contact customer service for assistance and warranty claims.
Lists the machine versions covered by these operating instructions.
Provides specifications for the machine's dimensions, power, and environmental conditions.
Crucial safety instructions for operation, installation, and maintenance.
Defines warning symbols and their meanings for safe operation.
Explains specific terminology and formatting used within the manual.
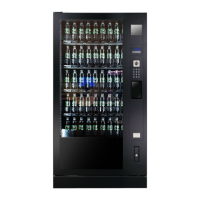
Illustrates the internal and external components of the vending machine.
Detailed diagram showing the interior layout of the machine.
Explains the mechanism and components of the sliding door unit.
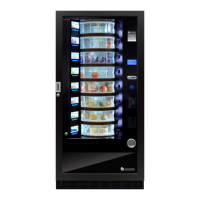
Details the features specific to the high-security configuration.
Provides an illustration of the high-security version.
Describes the characteristics of the EC-version, noted for its segmented panel.
Highlights the variations in features and dimensions between XL and XM models.
Step-by-step explanation of how a customer purchases a product.
Criteria for selecting an optimal and safe installation site for the machine.
Specifies required clearances around the machine for ventilation and access.
Instructions on fitting suction protection to prevent hot air intake.
Guidance on fitting the kickplate for stability and aesthetics.
Step-by-step procedure for ensuring the machine is stable and level.
Instructions on how to remove transport locks before operation.
Details on using wall brackets for securing the machine and ensuring ventilation.
Information on fitting an optional rear panel for advertising.
Instructions for connecting the machine to the power supply safely.
Procedures for installing and connecting the coin mechanism.
Guidance on physically mounting the coin mechanism into the machine.
Steps for connecting the coin mechanism electrically to the main unit.
How to configure the machine's communication protocol for the coin system.
Adjusting the coin return mechanism for proper function.
Instructions on how to load coins into the mechanism.
Steps for setting up the machine to dispense specific products.
Explains the function and use of the service key for accessing machine functions.
Describes the mechanism and operation of product compartments and pushers.
Instructions for pulling out and preparing the product container for filling.
Guidance on correctly re-inserting the product container after filling.
Detailed procedure for loading products into the containers safely and correctly.
A table outlining parts, actions, frequency, and resources for cleaning.
How to clean the exterior of the machine, including the delivery compartment.
Procedures for removing and installing the product basket for cleaning.
Warnings and precautions regarding chiller unit maintenance and lint filter cleaning.
Steps for cleaning the special panel on high-security models.
How to clean the internal surfaces of product containers to ensure proper function.
Instructions for cleaning the machine's floor area, ensuring cable movement.
Identifies and explains the functions of the programming keys on the control board.
Describes how to navigate and select options within the machine's menu system.
Provides an overview of the main menu hierarchy and access codes.
Lists and briefly describes all available sub-menus within the machine's control system.
Used for error display and deletion of error messages.
Allows programming of prices, product names, and other settings.
Controls chiller unit settings, including temperature and times.
Enables testing of the vending process without charge.
Displays sales and stock information, allowing for statistics deletion.
Shows total sales statistics since the machine's commissioning.
For programming time, date, and locking times for machine operation.
Main menu for machine parameter configuration and setup.
Provides access to diagnostic functions, error locating, and maintenance tests.
Manages filling and emptying of coin mechanism tubes and displays tube status.
Menu for initial setup, calibration, and functional tests of the Robimat system.
Safety guidelines and procedures for safely moving and transporting the machine.
Illustrates and specifies appropriate equipment for moving the machine.
Indicates the centre of gravity for safe handling and to prevent tipping.
Recommendations for storing the machine in a clean, dry environment.
Steps to follow for safely shutting down the machine for a short period.
Procedures for safely decommissioning and disposing of the machine.
Maintenance tasks and intervals for the machine's external housing and door.
Maintenance schedule for the chiller unit, including filter and condenser checks.
Maintenance tasks for the glass door, seals, and locking bolts.
Maintenance for the machine's lighting system, including LEDs and cables.
Maintenance for the sliding door mechanism, keypad, and coin return.
Maintenance for product containers, pushers, and drive mechanisms.
Maintenance for the terminal box and its components, like the FI-circuit breaker.
Procedures for performing final checks on selections and component alignment.
| Manufacturer | Westomatic |
|---|---|
| Model | ELEVATE QUARTZ |
| Category | Vending machines |
| Type | Coffee Vending Machine |
| Beverage Options | Tea, coffee, hot chocolate |
| Display | Touchscreen |
| Payment Options | Cash |
| Power Supply | 230V, 50Hz |
| Water Supply | Mains water connection |
| Customization Options | Branding |
| Product Types | Hot Beverages |