ENGLISH INSTRUCTIONS
14
Some parts of the Vacuum Sealer may need replacing after repeated use. A
Vacuum Sealer Maintenance Kit (Sold Separately Model No. 08-0501-W) may be
necessary for the Vacuum Sealer to properly function.
REPLACING THE OVAL VACUUM CHAMBER SEALS:
1. Turn “OFF” the Vacuum Sealer and remove the Power Cord from the electrical
outlet.
2. Make sure the unit is completely cool.
3. Open the Vacuum Lid.
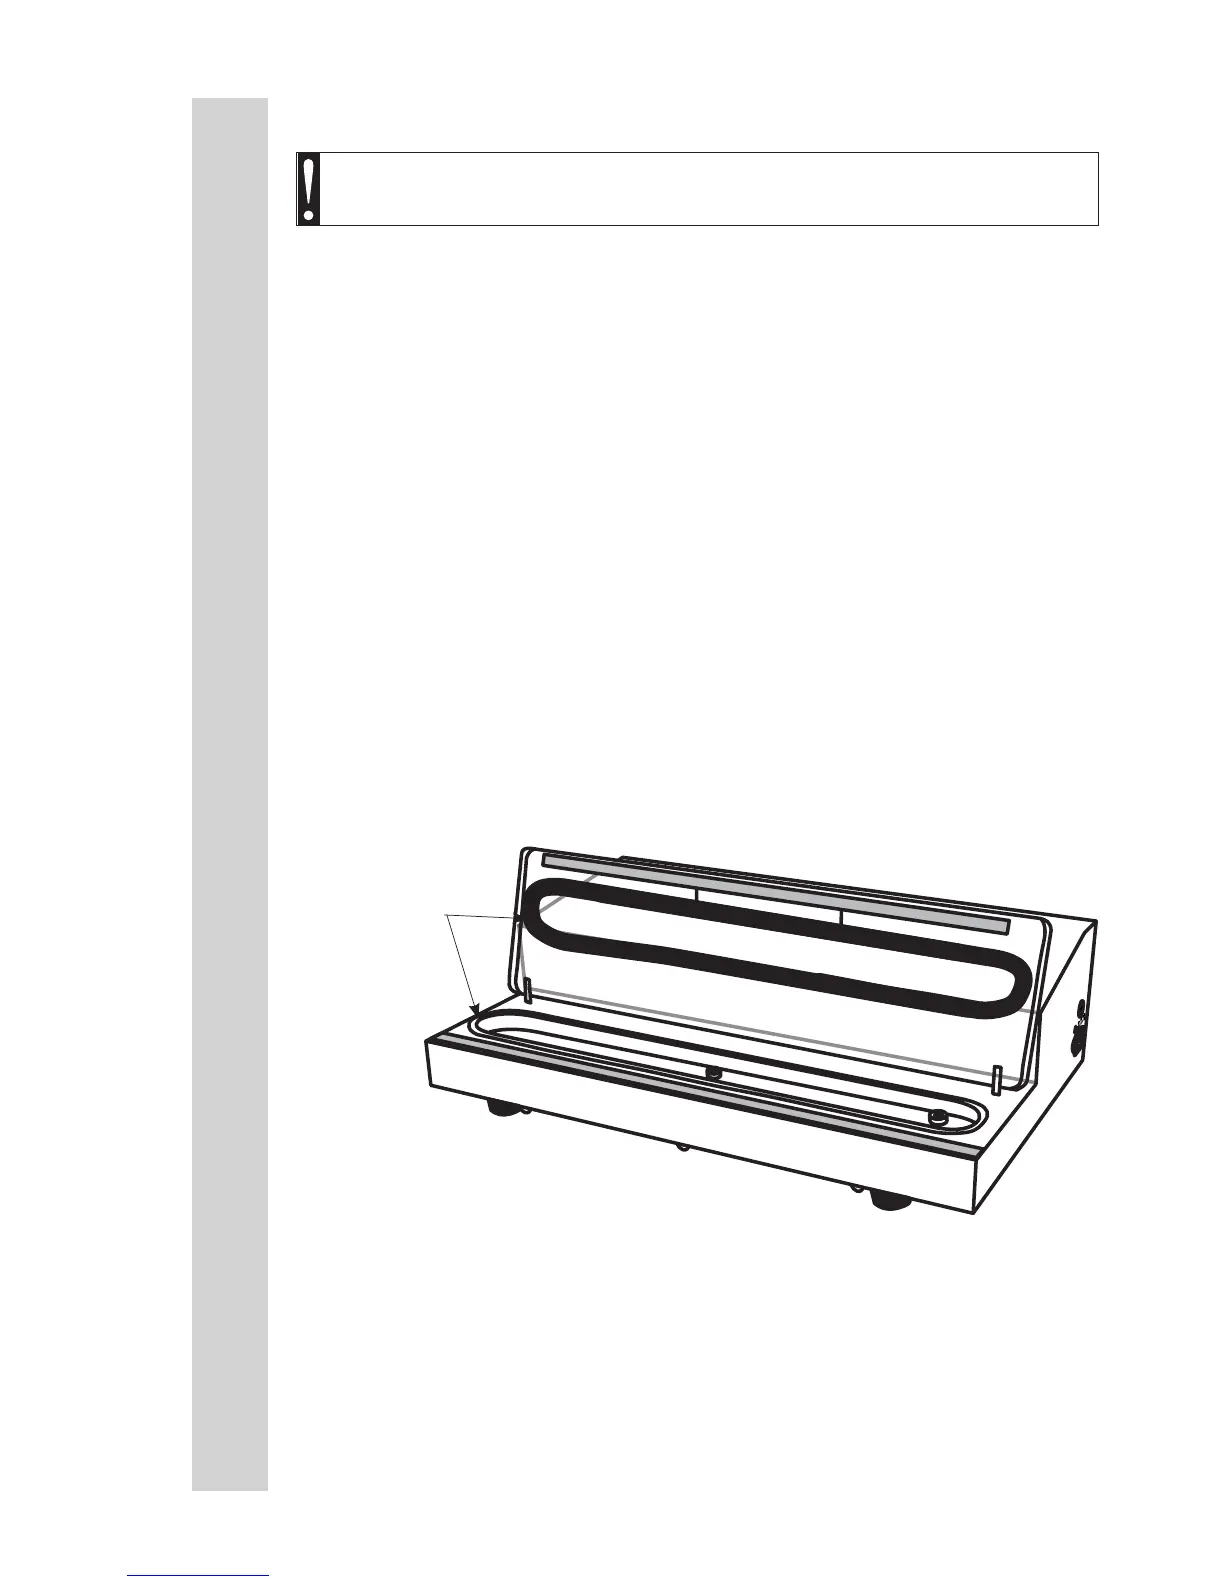
4. Remove the Oval Vacuum Chamber Seal from the groove on the underside of
the Vacuum Lid (FIGURE 8).
5. Remove the Oval Vacuum Chamber Seal from the groove in the Plastic
Vacuum Chamber.
6. Set a new Oval Vacuum Chamber Seal on the groove in the Plastic Vacuum
Chamber. Work the seal into the groove.
7. Position a new Oval Vacuum Chamber Seal near the groove in the Vacuum
Lid. Work the seal into the groove.
SERVICE INSTRUCTIONS
WARNING! Before cleaning, assembling or disassembling the
Vacuum Sealer, make sure the Vacuum Sealer is OFF and the PLUG IS
REMOVED FROM THE OUTLET/POWER SOURCE!
4
FIGURE 8
Oval Vacuum
Chamber Seals