5
REMOVING THE AC (110 VOLT) SIDE OF THE CONVERTER
1. Drop the front door down and turn off 30amp main breaker.
2. Remove all screws holding the front door assembly on.
3. Remove two screws holding the metal plate that covers the AC breakers.
4. Remove the converter neutral wire (white wire) from the neutral bus bar.
5. Remove the converter ground wire (green wire) from the ground bus bar.
Note: some converters may not have ground wire attached to the bus bar.
6. Remove the converter hot wire (black wire) from the breaker provided for the converter.
Note: sometimes removing the breaker from the stab bar may make this step easier.
Removing the DC (12 volt) side of the converter:
7. Record the fuse locations and wire locations off the old fuse board.
8. Remove all the output circuit wires from the fuse board.
9. Remove the two screws that old the fuse board to the converter mounting bracket.
10. Turn the fuse board over to the back side and remove the red wire, white wire and blue wire
from the fuse board.
REMOVING THE CONVERTER MBA
11. Remove the (four) screws holding the converter (MBA) frame to the housing.
12. Slide the converter MBA and frame out of the housing.
Note: The new WF-8900-AD-REP comes with a new fuse board and hardware package.
INSTALLATION OF THE WF-8900-AD-REP IS DIVIDED INTO THREE SEGMENTS
• Installing new converter (MBA) Into housing.
• Installing the DC (12 volt) side of the converter
• Installing the AC (110 volt) side of the converter
INSTALLING NEW CONVERTER (MBA) INTO HOUSING
1. Position the new converter and frame in front of housing and remove the two screws hold the
converter to the frame (this make routing the wires easier).
2. Carefully install the frame and converter into the housing and route wires from the converter
through the holes in the frame and the housing.
3. Once all wires are routed correctly replace the two screws that hold the converter to
the frame.
4. Attach the fame to the housing using the (four) screws provided.
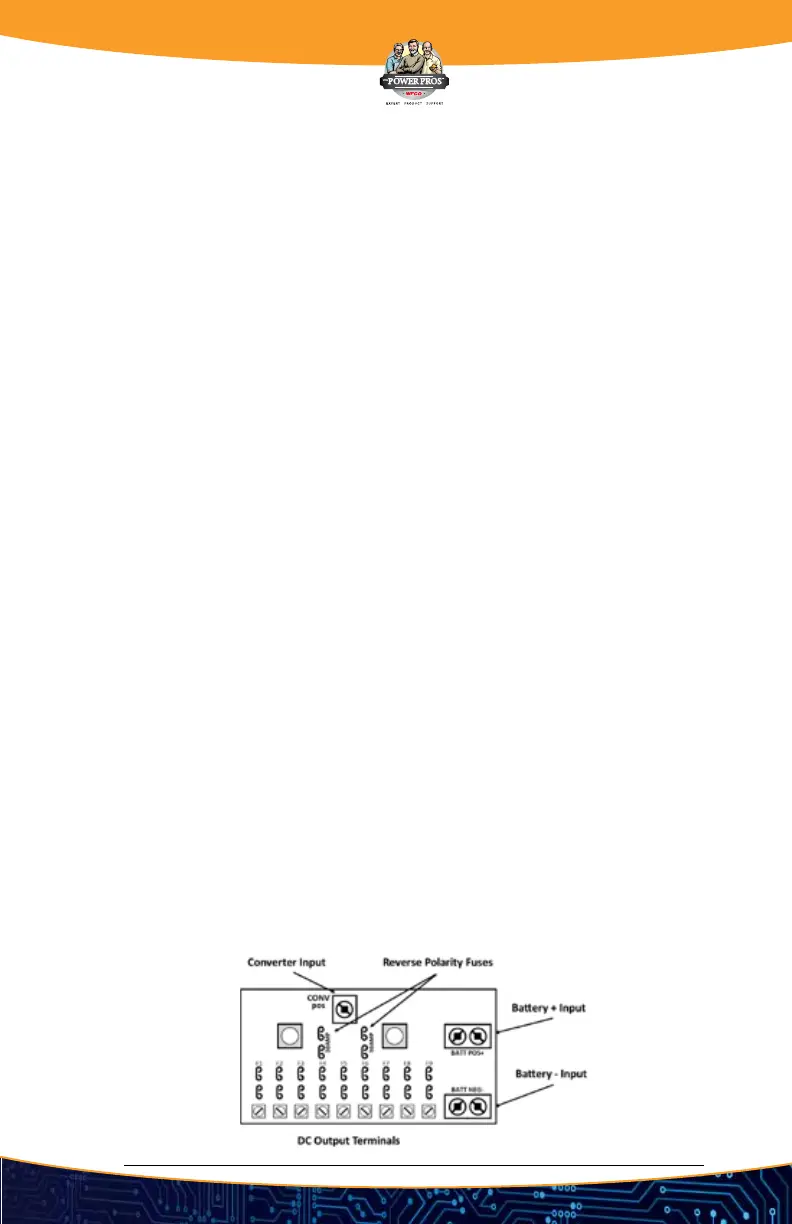
Figure 1
THE WF-8900-AD-REP DC FUSE BOARD
 Loading...