EN
7
User manual
TROUBLESHOOTING
The washing machine may sometimes not work properly for certain reasons. Before calling the After-sales service, it is recommended to check to
see if the problem can be easily resolved using the following list.
Problems:
Possible causes / Solution:
The washing machine does not turn
on and/ or programme does not start
•
The plug is not inserted into the electrical outlet, or not enough to make contact.
•
There has been a power failure.
• Lid is not properly closed.
•
The washing machine switched off automatically to save energy, before programme start or
•
after programme end. To switch on the washing machine, turn the programme selector first
•
to “Off/O” and then to the desired programme again.
The wash cycle does not start.
•
The “Start/Pause” button has not been pressed.
•
The water tap is not open.
Appliance stops during the
programme, and the “Start/
Pause” light blinks
•
“Rinse hold” option is activated.
•
Programme has been changed - reselect desired programme and press “Start/Pause” .
Appliance vibrates
• The washing machine is not level.
•
The transport bracket has not been removed; before using the washing machine, the
transport bracket must be removed.
Final spin results are poor.
The laundry is still very wet. “Spin”
indicator blinks, or the spin speed
indicator blinks after the end of the
programme - depending on the model
•
Unbalance of the laundry load during spinning prevented the spin phase to avoid damages
on the washing machine. This is why the laundry is still very wet. Reason for unbalance can
be: small laundry loads (consisting of only few quite big or absorbent items, e.g. towels), or
big/heavy laundry items.
• If possible avoid small laundry loads.
• “Spin” button has been set to a low spin speed.
“Call Service” indicator lights up
•
Shut off the machine, disconnect the plug from the outlet, and wait about 1 minute before
turning it back on.
•
If the problem persists, call the After-sales service.
“Water filter clogged” indicator
lights up
•
Waste water is not pumped out.
•
Clean the water filter.
“No water” indicator lights up
•
Appliance has no or insufficient water supply.
All lamps of the
Washing phase indicator lights up
•
Drum flaps open
•
Appliance stops during the programme. The drum flaps have not been closed properly. Push
the “Reset” button button for at least 3 seconds and wait until the “Lid open“ light
turns on. Open lid and close drum flaps, then select and start desired programme again. If
fault persists, contact our After-sales service.
TRANSPORT AND HANDLING
Pull out the mains plug, and close the water tap. Disconnect the inlet hose
from the water tap, and remove the drain hose from your draining point.
Remove all rest water from the hoses and washing machine and fix hoses
so that they cannot get damaged during transport. To facilitate moving the
machine, pull the mobility lever situated at the bottom front (if available on
your model) out a little by hand. Pull the washing machine out to the stop
with the foot. Afterwards push the mobility lever back into the original stable
position. Refit the transport bracket. Follow the instructions for removing the
transport bracket in the INSTALATION GUIDE in reverse order.
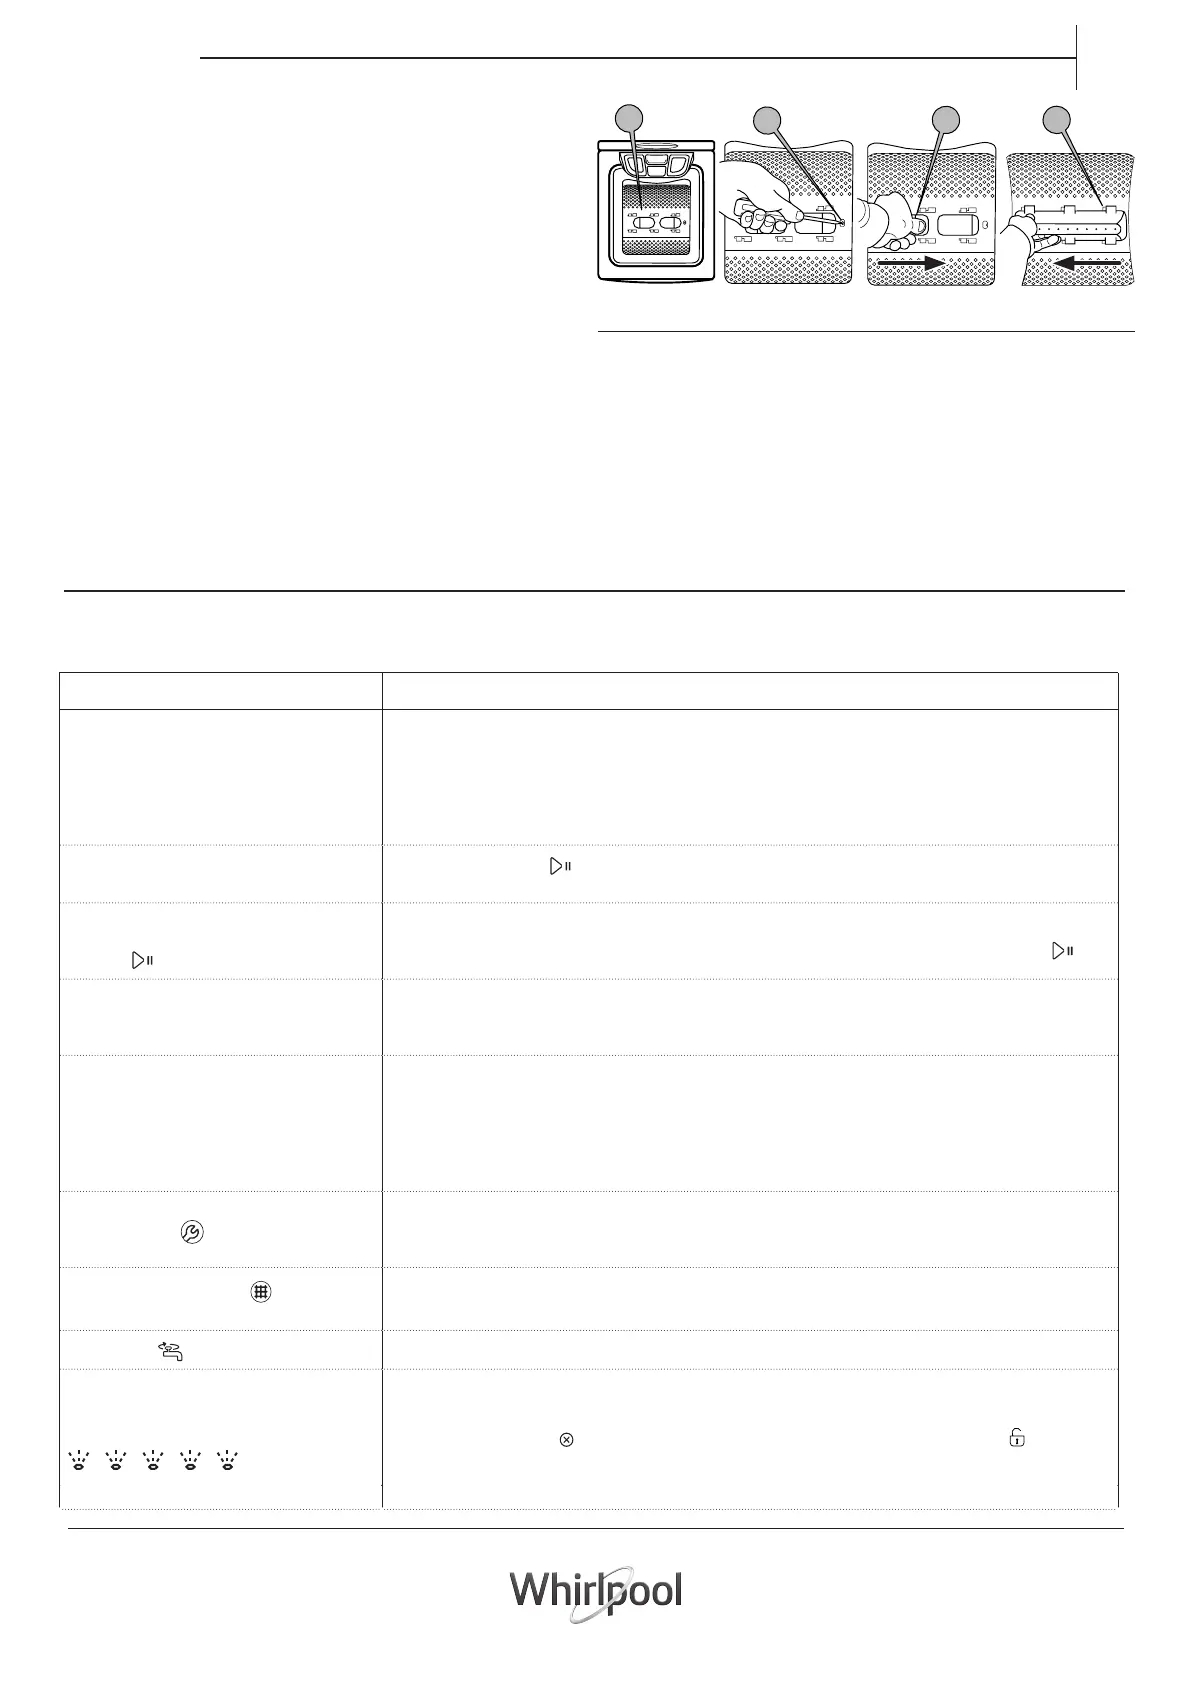
Recovering an object that falls between the drum and the tub
If an object accidentally falls between the drum and the tub, you can recover
it thanks to one of the removable drum lifters.
1. Unplug the washing machine. Remove the laundry from the drum.
2. Close the drum flaps and turn the drum a half-turn (picture a).
3. Using a screw-driver press on the plastic end, while sliding the lifter from
left to right (picture b,
c) by hand it will fall into the drum.
4. Open the drum. You can recover the object through the hole in the drum.
5. Refit the lifter from inside the drum: Position the plastic tip above the hole
on the right side of the drum (picture d). Then slide the plastic lifter from right
to left until it clips.
6. Close the drum flaps again, turn the drum through half a turn and check
the positioning of the blade at all its anchorage points.
7. Plug the washing machine in again.
a
b
c
d