5
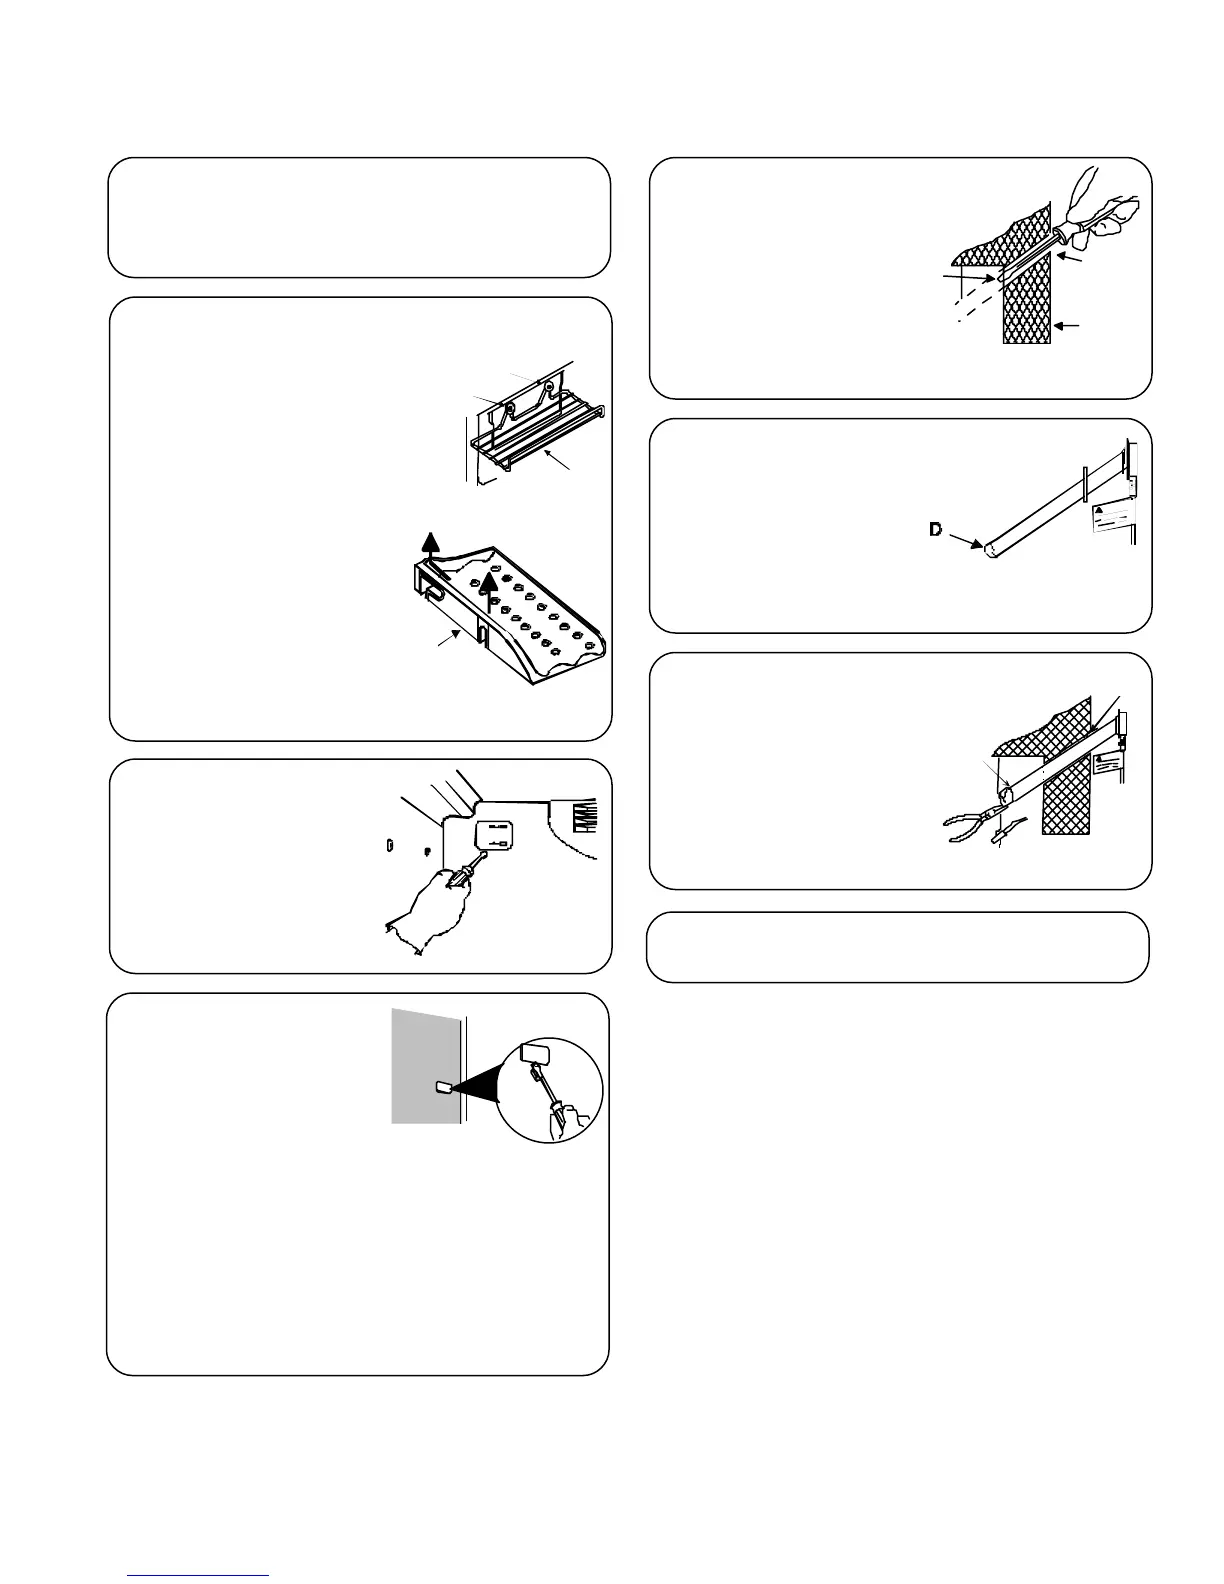
How to Prepare the Freezer Compartment
Installing Your Ice Maker
1
Remove freezer accessories, including all
baskets and shelves.
• See Owner’s Manual on instructions on
removal and replacement of freezer items.
5
From back of
refrigerator (A), use
screwdriver to pierce
interior
sealing tape (B)
that covers the hole
for the water fill tube
inlet (C).
B
A
C
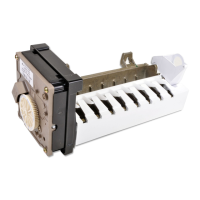
2
Remove the ice service rack
If you have a wire ice service
rack (A)
• Remove ice trays and
storage bin.
• Remove the two screws (B)
and discard screws and
washers (C).
or
if you have a plastic ice
service rack (D)
• Slide front portion of shelf
up off of front wall screw.
• Pull rack forward until
screw is stopped in L-shaped groove. Lift shelf
up off of rear wall screw.
4
7
Insert fill tube (D) into
water fill tube inlet
(C).
• If tube does not come
through the interior
freezer wall, use a pair
of needle-nose pliers to
pull tube through.
8
Remove tape or plastic bag from the end
of the fill tube.
A
B
C
6
Cover end of fill tube
with masking tape
(D) or small plastic
bag to avoid
insulation from
entering tube during insertion.
C
D
3
Pry water
connection cover off
using a flat blade
screwdriver. Water
connection cover is
located on back
freezer wall.
ICEMAKER
READY
If present, locate
white tube inlet cover
on back of unit, and
pry off using a flat-
blade screwdriver
with the blade
covered with masking tape.
• Discard cover
or
If present, locate tube inlet sticker and
remove. Cut through metallic tape under
the sticker.
D