- 9 -
Installation instruction
Tools and Parts
Gather the required tools and parts before starting
installation. Read and follow the instructions provided
with any tools listed here.
1. Tools needed
• Phillips screwdriver
• Saw
• Cordless drill and 1/8” bit
• Scissors
• Pencil
2. Parts Supplied
The company provides only one plan to install local air
conditioner. See “Install local Air Conditioner”.
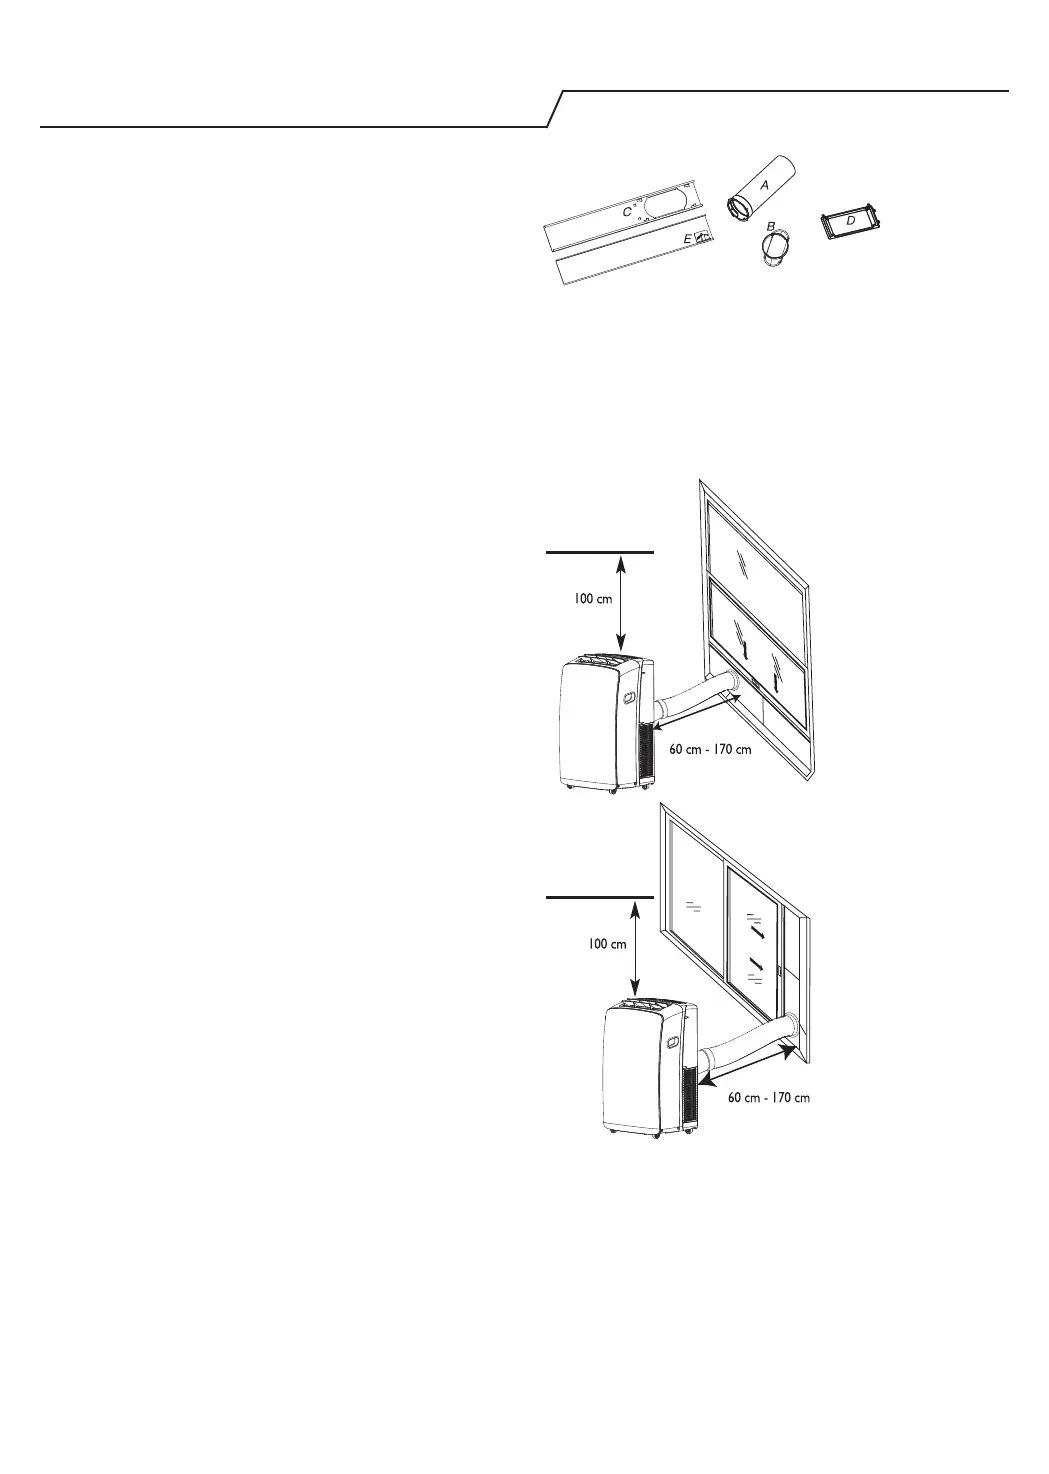
Location Requirements
NOTES:
• The exible exhaust hose allows placement of the air
conditioner between 23 1/2” and 67” (60 cm and 170
cm) from window or door.
The appliance with supplementary heater needs
to keep a minimum distance of 100 cm from the
combustible surfaces.
• Local air conditioners are designed as supplemental
cooling to local areas within a room.
• To ensure proper ventilation, keep the required
distance from the return air outlet to the wall or other
obstacles at least 23 1/2” (60 cm).
• Do not block air outlet.
• Provide easy access to grounded outlet.
Electrical Requirements
• The local air conditioner should be connected to a
220-240V / 50Hz, 20-amp fused grounded outlet.
• The use of a time-delay fuse or time-delay circuit
breaker is recommended.
• All wiring must comply with local and national
electrical regulations and be installed by a qualied
electrician. If you have any questions, contact a
qualied electrician.
Use your power supply cord:
Plug power supply cord into a grounded outlet.
NOTES:
• A damaged power supply cord must be replaced with
a new power supply cord obtained from the product
manufacturer and must not be repaired.
For detail installation information, please download from: docs.whirlpool.eu
A. Flexible exhaust hose
B. Window exhaust adapter
C. Outer slider section
D. Rain Cover
E. Inner slider section
Vertical
Silde Window
combustible surfaces
combustible surfaces
Horizontal
Silde Window