Finally to assemble the Chainstays (2) to the Seat-Stays (3), reference Figure 1, check that the shield washers are in place on
both sides of each Seat-stay leg (3) (see items 2 & 3 in Figure 5) and apply either SKF LGAF 3E or Castrol Optimol T anti-fret
paste to the contacting faces between those shield washers and the Chain-stays (2). Ensure that those shield washers are not
pushed out, as you lower the Seat-stays (3) into the Chain-stays (2). Pass an M15 x 28 long Flanged Screw (14) through each
Chain-stay (2) and Seat-stay leg (3). Using the 6 A/F Allen key, torque tighten those screws to the recommended torque set-
tings (refer to the Tightening torque settings in Section 10.0). Wipe off any excess grease from around the chain-stays (2) and
seat-stays (3).
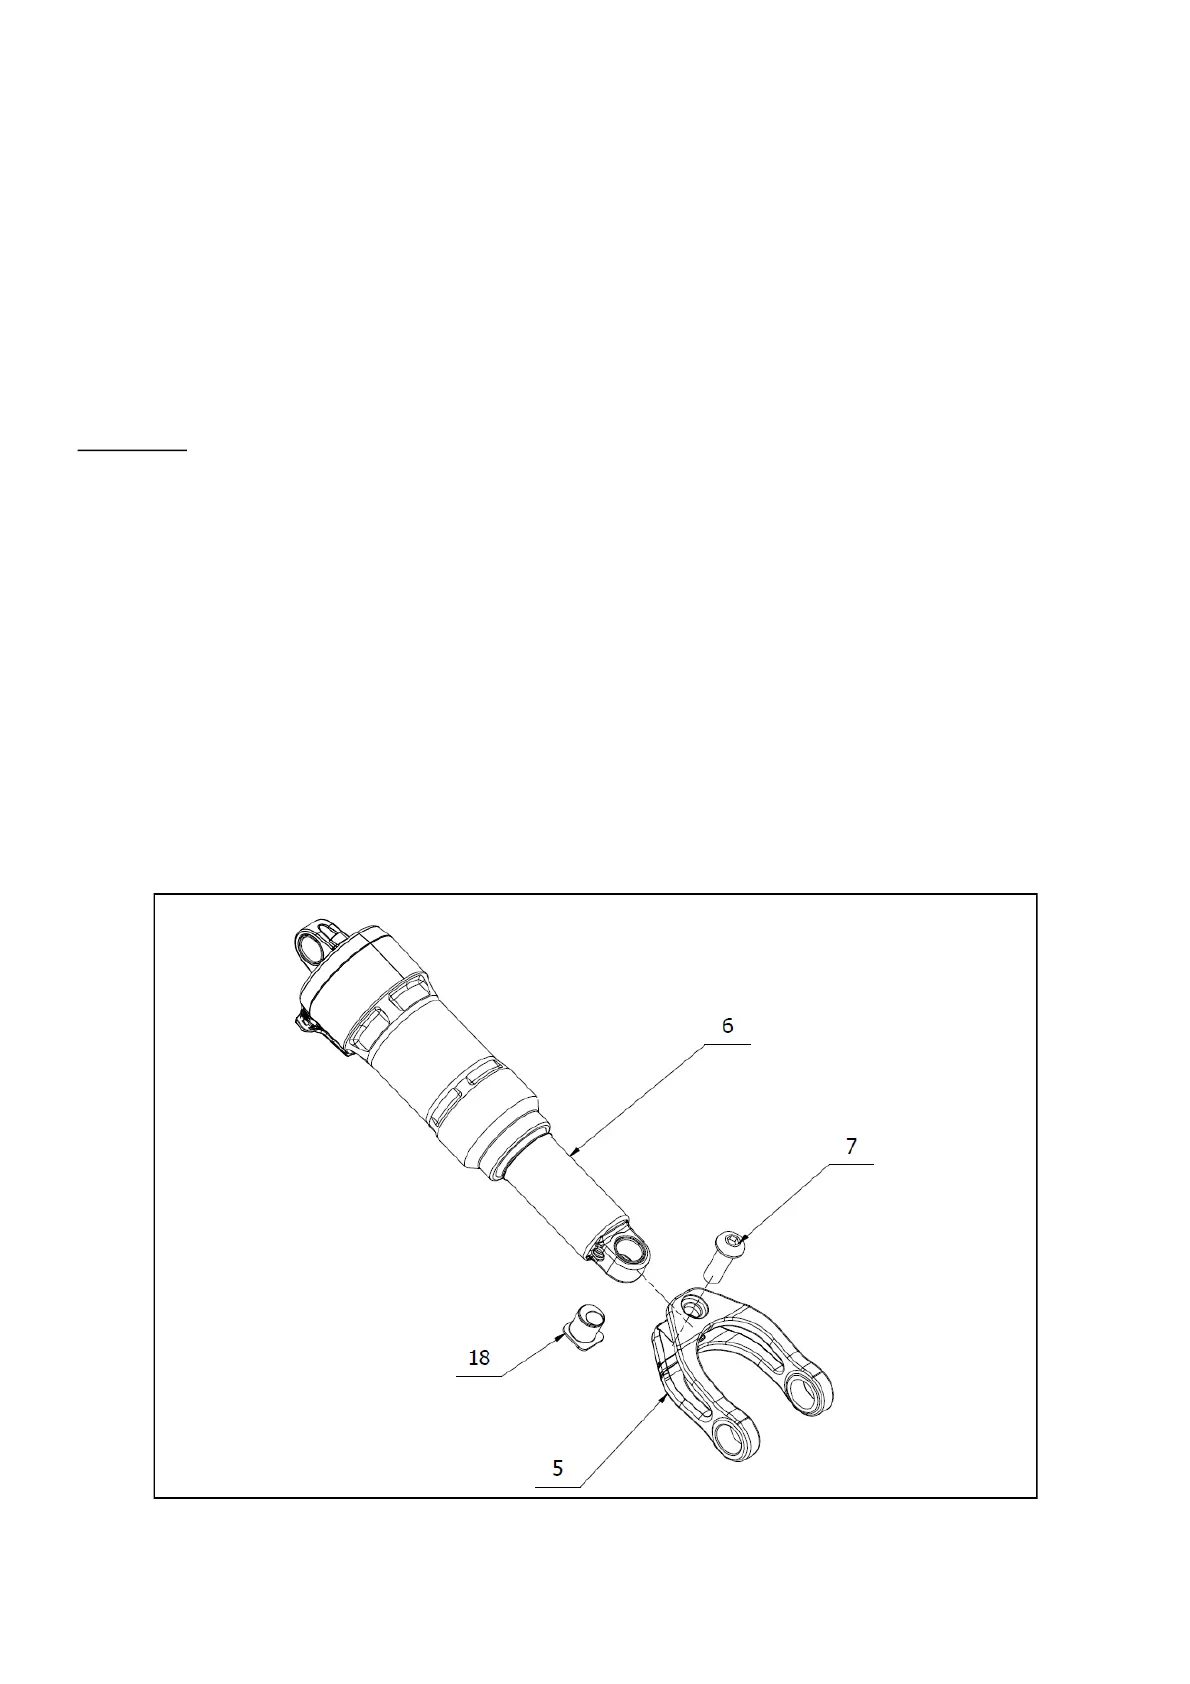
6.3.4 Re-Assembly of the Rear Shock onto the Frameset.
Reference figure 8. Take the Rear Shock Absorber (6) and apply either SKF LG/AF 3E or Castrol Optimol T anti-fret paste onto
the side faces of the shock bushes, that contact the Main Frame and Shape-It Link. Slide the front of the Rear Shock Absorber
(6) into the Main Frame (1) and Shape-It Link (5).
IMPORTANT. Ensure the Rear Shock (6) and the Shape-It Link (5) are the correct way up, with any dials and lev-
ers facing downwards and towards the front of the frameset, reference figure 8.
Reference Figure 1: Make sure that the Ø8mm holes in the Main Frame (1) and the front of the Rear Shock Absorber (6) are all
concentric with each other, and push the Ø8mm x 31mm long Hollow Pivot Pin (3) all the way through. Place a Collar (9) over
both ends of the Ø8mm x 31mm long Hollow Pivot Pin (8) and screw in an M5 x 16mm long Socket-head Cap-screw (10) into
both ends of the Pivot Pin (8). Using the T-25 Torx) Keys, torque tighten the M5 Cap-screws to the recommended torque
settings (refer to the Tightening torque settings in Section 10.0).
Next, make sure that the holes in the Shape-It Link (5) line up with the rear end of the Rear Shock Absorber (6). Insert the
M8 Socket Head Cap Screw (7). Using the 5mm AF Allen Key torque tighten to the recommended torque settings (refer to the
Tightening torque settings in Section 10.0). Wipe off any excess grease.
Figure 8: Correct Orientation: Shock & Shape-It Link
 Loading...