Page 10
Edge
Shoulder
1.
3
Angle is too narrow
move collar out.
Edge
Shoulder
4
Angle is too wide
move collar in
Shoulder
Marker Ink on Edge
1
Edge
Edge
Marker
Shoulder
2
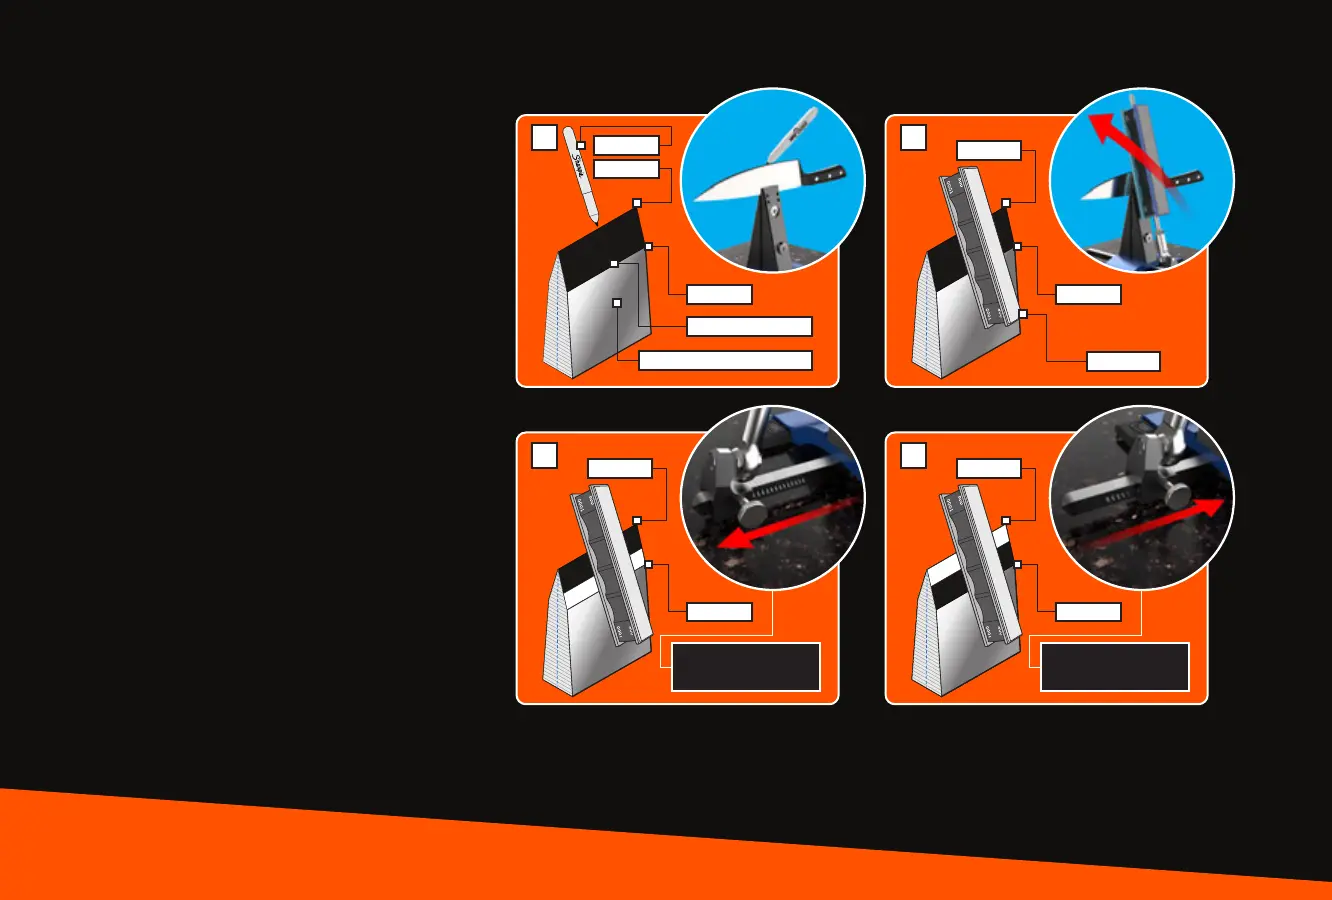
Blade Detail - (Not to Scale)
Fine Stone
12 • setting the angle • wickededgeusa.com
SETTING THE ANGLE
If you’re new to sharpening, we recommend
matching the existing angle of your knife. To
do this, use a Sharpie® marker to color in the
entire bevel on both sides. Your L-brackets
should be slightly loose on the Degree Bar and
free to slide in and out. Using one of your ne
stones, lightly rub your edge to test your angle.
If the marker is removed at the top of the bevel
and not the bottom, your angle is too wide. If
the marker is removed from the bottom of the
bevel and not the top, your angle is too
narrow. Find the angle where the marker is
removed evenly from the entire bevel. Then
tighten the bottom screw on your L-bracket to
secure your Guide Rod to the Degree Bar.
Repeat this step on the opposite side. Once
your angle is set on both sides, record it in your
knife log located at the back of these instruc-
tions.
For further assistance with angle selection,
consult your knife manufacturer's recommen-
dations, or visit the knife database on our
website under the Resources section.
Fig. 6-1 Fig. 6-2
Fig. 6-3 Fig. 6-4