30
EN
INSTRUCTION MANUAL · AIR CONDITIONER
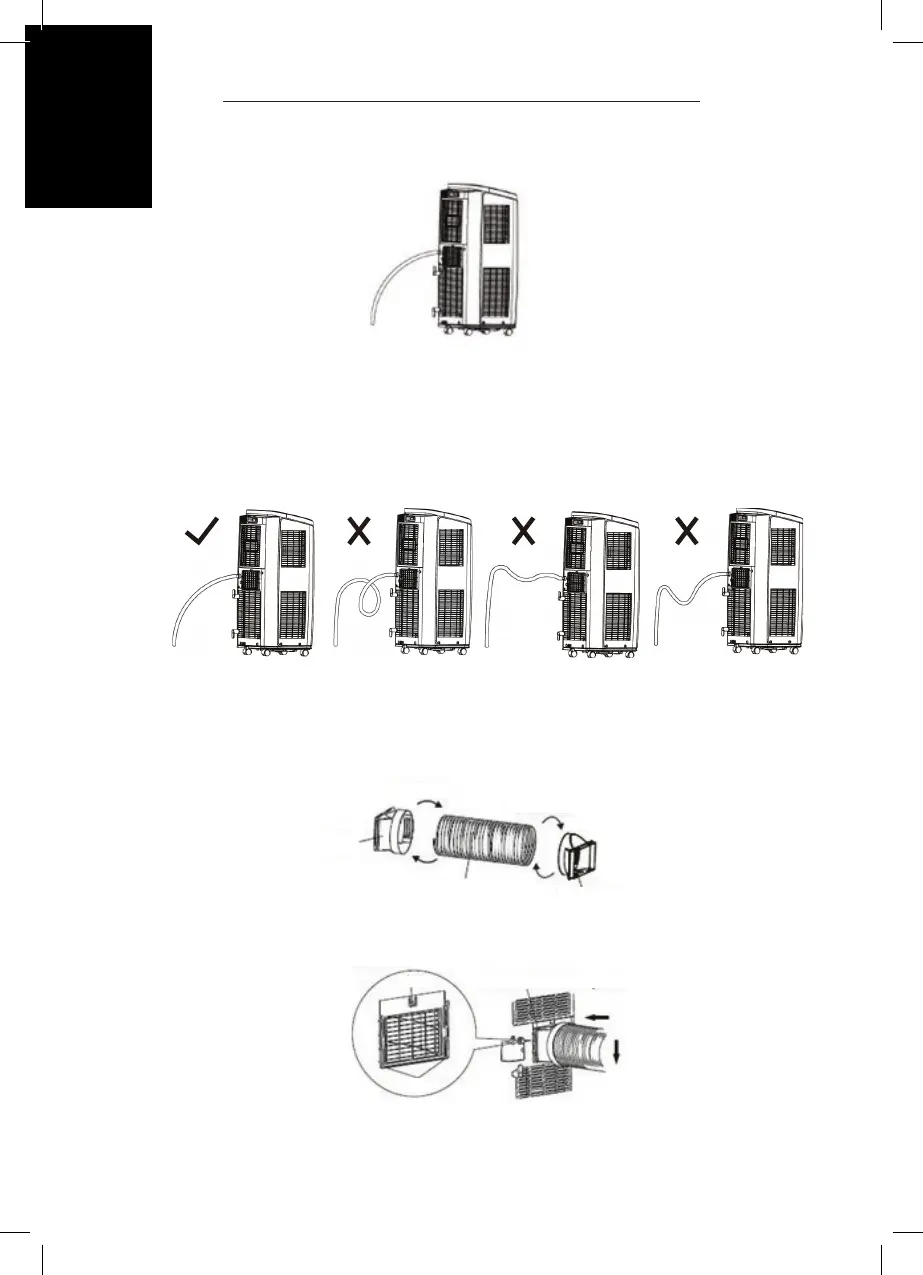
– Insert the drainage hose into the drain connector.
Note: When using continuous drainage option from the middle drainage port,
place portable on a level surface and make sure garden hose is clear of any
obstructions and is directed downward. Placing portable on an uneven surface or
improper hose installation may result in water lling up the chassis and causing
the unit to shut off. Empty water in the chassis if shut off occurs, then check
portable location and hose for proper setup.
INSTALLATION OF HEAT DISCHARGE PIPE
1. Rotate joint A and Rear clip clockwise into the two ends of heat discharge
pipe.
2. Insert joint A of heat discharge pipe into the groove until you hear a sound.
3. Lead the heat discharge pipe outdoors. For best effect, choose a window
Joint A
Clockwise
Clockwise
Heat discharge pipe
Rear clip
Clasp
Groove