Description en
Installation and operating instructions Wilo-RAIN3 31
General characteristics Wilo-RAIN3
Admissible fluid
PH 5 to 8
Motor protection
Integrated thermal protection probe
Admissible fluid temperature
+ 5 °C up to + 30 °C
Noise level
Up to 56 dB(A) (at 1 m from unit with wood plate wall in acoustic room)
Dimensions (LxWxH)
642 x 260 x 715
Break-tank volume
11 liters
Discharge connection
Rp 1″ threaded swivel-nut
Suction connection
Rp 1″ threaded swivel-nut
City main water connection
R 3/4″ (male)
Break-tank overflow
Install a drainage pipe Ø19-21 (to be provided by the customer). In case of a
very large leakage, an opening allows the water to flow freely according to EN
1717
Net weight (+/- 10 %)
30 kg
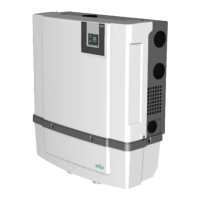
5.3 Dimensions
See Fig. 1
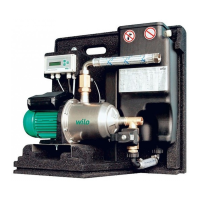
5.4 Scope of delivery
The Wilo-RAIN3 package includes:
See Fig. 2
ƒ System,
ƒ Level sensor,
ƒ Screw anchors,
ƒ Installation and operating instructions,
ƒ Stickers “No drinking water” and “Do not allow to freeze/do not expose to frost".
6 Description
6.1 Product description
The system features a self-priming centrifugal pump that delivers rainwater sucked
from a storage tank (Fig. 4, rep. 17) to the points of consumption trough installation
pipes (Fig. 4, rep. 16).
The controller (Fig. 3, rep. 2) simultaneously ensures:
ƒ The water continuity by switching the three-way valve (Fig. 3, rep. 6) to the mains
water network when the rainwater level in the rainwater storage tank is too low.
ƒ The automatic start and stop of the pump.
ƒ The pump’s dry-running protection in case of water shortage.
The 11-liters break-tank (Fig. 3, rep. 3.) is designed according to the EN1717 standard
(AB type disconnection) and ensures a separation of the rainwater from the mains net-
work by means of an air gap.
The break-tank is filled by city main water through a float valve (Fig. 3-4, rep. 4). In
case of failure, the water overflow goes freely to the drain. The hose collecting the
overflow (Fig. 3-4, rep. 9) is not included.
Fig. 3 and 4 legends
Black arrow: suction
White arrow: discharge
1. Pump set
2. Controller
3. Break-tank
4. Mains water network connection (G3/4″)
5. Level sensor to be installed inside the rainwater storage tank
6. Three-way valve
7. Discharge hose connection (G1″ swivel nut)
8. Suction hose connection (G1″ swivel nut)
9. Drainage connection towards wastewater (Ø19)
 Loading...