–8–
Gateway In Dome Mount Installation cont.
> If installing the Winegard Gateway now, please review the Winegard Gateway
installation manual followed by reviewing the Power Supply Installation on
page 9 of this manual.
> If installing the Gateway at a later time continue to Step 14.
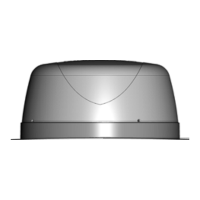
Step 14 – Replace the dome. Verify the dome holes align with the base holes.
Ensure the dome and gasket are completely tight and screw in the four
Phillips screws.
Step 15 – Connect the provided 20' coax cable to the coax cable that exits the
base of the Air 360
+
. Feed this cable through the hole drilled in Step 11 and
route the cable to where the antenna wall plate/power supply will be located.
If replacing an existing antenna, connect the coax cable that is already ran to
the coax cable that exits the base of the Air 360
+
.
Step 16 – It is recommended to use Butyl tape (not included) for extra
protection under the entire base flange before screwing to the roof. Reposition
the base of the antenna in the location you intend to mount with the flange
indicating FRONT facing the front of the vehicle. Screw in 6 mounting screws
into the 6 mounting holes around the flange of the base and into the roof.
Step 17 – Next, add approved sealant (check with RV Manufacturer)
completely around the base and over each screw.
WARNING: Ensure the gasket of the dome is complete sealed and that there
are NO gaps between the sealant and the base of the Air 360+. Failure to do
so could lead to water damage in the RV.
Continue to the Power Supply Installation section of this manual.
 Loading...