Setting up the Rear Cab Mount with Winegard Satellite AntennaPage 5
Insert a 5/16″ screw through each aligned hole. Thread a
5/16″ nyloc nut onto each screw.
Hand-tighten.
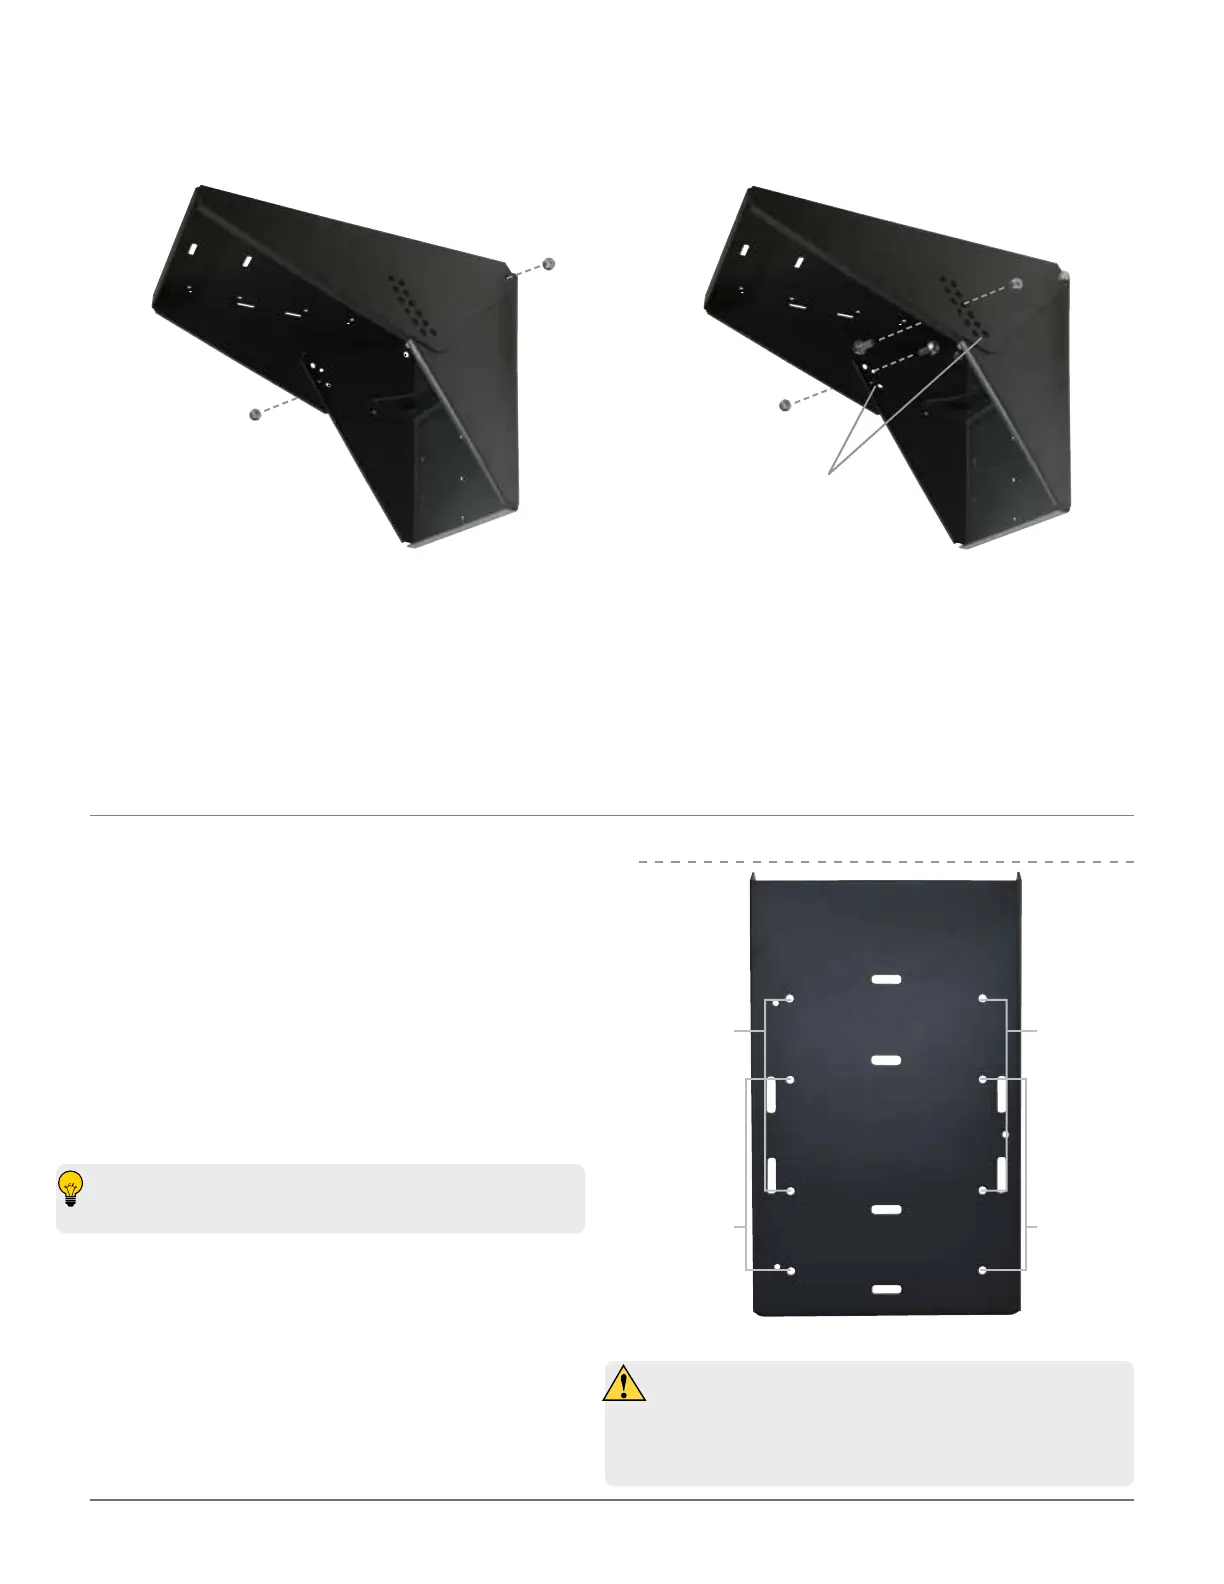
Adjust the pivot plate until level. For best performance,
the plate should be within three degrees of level.
Finely adjust the pivot plate until pivot holes align on the
rear cab mount base and pivot plate.
Insert a 5/16″ screw through the aligned pivot holes on
each side of the mount. Thread a 5/16″ nyloc nut onto
each screw.
Before tightening screws, verify that the pivot plate is
within three degrees of level. If not level, remove the
screws from the pivot holes, and adjust until level.
Tighten all four 5/16″ nyloc nuts.
Installing the Satellite TV Antenna on the Mount
Remove the existing six dome screws with a 5/16″ drive,
and replace with the six dome screws provided with the
rear cab mount. Tighten.
Using a Phillips screwdriver, remove the four 1/4″-20 screws
securing the feet to the bottom of the antenna, and remove
the feet. The feet will not be needed for installation on the
rear cab mount, but the 1/4″-20 screws will be used again.
Align the raised foot holes on the antenna base with either
the inner or outer position holes on the pivot plate.
Consider which direction cable connections should face,
and rotate the antenna accordingly.
Insert 1/4″-20 screws with lock washers through the aligned
holes in the bottom of the pivot plate and raised foot holes.
Tighten the four 1/4″-20 screws to 40 in*lbs (minimum)/60
in*lbs (maximum).
If installing the mount below the vehicle roof line,
Winegard recommends using the outer mount holes.
Ensure that the 1/4″-20 screws have been
properly tightened to 40 in*lbs (minimum)/60
in*lbs (maximum). Do not overtighten beyond the
maximum specification of 60 in*lbs.
9.
10.
11.
12.
13.
14.
1.
2.
3.
4.
5.
6.
Outer
Holes
Inner
Holes
Outer
Holes
Inner
Holes
Pivot Holes
 Loading...