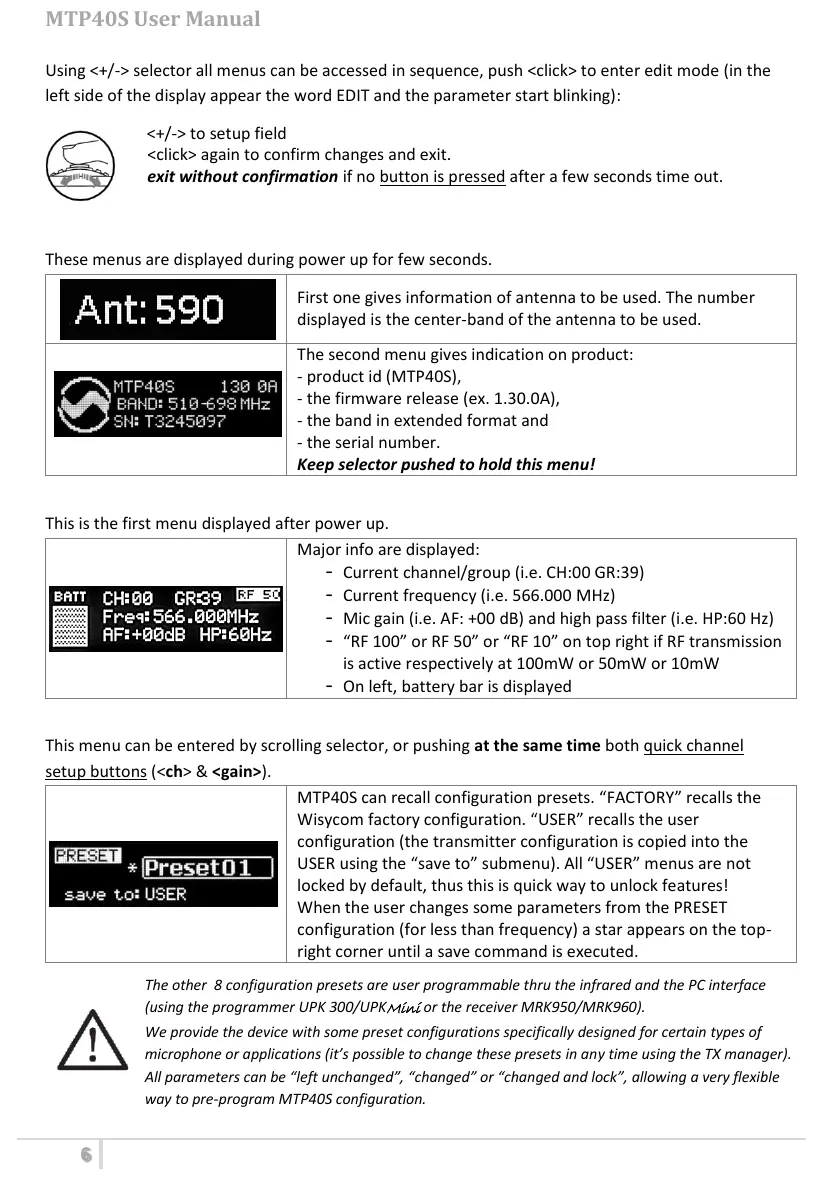
Using <+/-> selector all menus can be accessed in sequence, push <click> to enter edit mode (in the
left side of the display appear the word EDIT and the parameter start blinking):
<+/-> to setup field
<click> again to confirm changes and exit.
exit without confirmation if no button is pressed after a few seconds time out.
<START UP> menu
These menus are displayed during power up for few seconds.
First one gives information of antenna to be used. The number
displayed is the center-band of the antenna to be used.
The second menu gives indication on product:
- product id (MTP40S),
- the firmware release (ex. 1.30.0A),
- the band in extended format and
- the serial number.
Keep selector pushed to hold this menu!
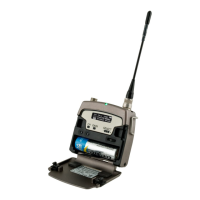
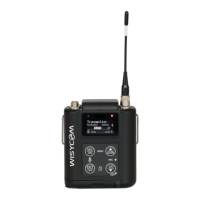
<STATUS> menu
This is the first menu displayed after power up.
Major info are displayed:
- Current channel/group (i.e. CH:00 GR:39)
- Current frequency (i.e. 566.000 MHz)
- Mic gain (i.e. AF: +00 dB) and high pass filter (i.e. HP:60 Hz)
- “RF 100” or RF 50” or “RF 10” on top right if RF transmission
is active respectively at 100mW or 50mW or 10mW
- On left, battery bar is displayed
<PRESET> menu
This menu can be entered by scrolling selector, or pushing at the same time both quick channel
setup buttons (<ch> & <gain>).
MTP40S can recall configuration presets. “FACTORY” recalls the
Wisycom factory configuration. “USER” recalls the user
configuration (the transmitter configuration is copied into the
USER using the “save to” submenu). All “USER” menus are not
locked by default, thus this is quick way to unlock features!
When the user changes some parameters from the PRESET
configuration (for less than frequency) a star appears on the top-
right corner until a save command is executed.
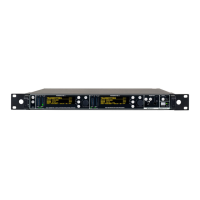
The other 8 configuration presets are user programmable thru the infrared and the PC interface
(using the programmer UPK 300/UPK
Mini
or the receiver MRK950/MRK960).
We provide the device with some preset configurations specifically designed for certain types of
microphone or applications (it’s possible to change these presets in any time using the TX manager).
All parameters can be “left unchanged”, “changed” or “changed and lock”, allowing a very flexible
way to pre-program MTP40S configuration.
ジョグダイヤル式セレクターですべてのメニューに順番にアクセスできます
ジョグダイヤル式セレクターを押すとそのメニューが編集モードになります
変更できる設定が点滅します
ジョグダイヤル式セレクターの<+/->で設定もしくは変更するメニューを表示させ、
ジョグダイヤル式セレクターを押すと変更内容が確定し終了します
何もボタンを押さないで数秒が経過すると変更した設定は確定せずに終了します
この画面は使用すべきアンテナの情報が表示されます
表示される数字は使用対象アンテナの中心周波数です
(日本仕様のB型は”808”と表示されます)
この画面では製品に関する以下の情報が表示されます
-製品型番(MTP40S-JB/MTP41S-JB)
-ファームウェアの番号(例:1.30.0A)
-拡張形式による送信周波数
-シリアル番号
ジョグダイヤル式セレクターを押し続けるとこの表示を維持できます
以下の主要情報が表示されます
-設定されているチャンネル/グループ(例:ch:00 GR:39)
-設定されている周波数(例:556.000MHz)
-設定されているマイクゲイン(例:+00dB)
-設定されているハイパスフィルター(60Hz)
-設定されている送信モード(RF 10もしくはRF L10)
-バッテリーの残量を示すバッテリーバー
MTP40S-JB/MTP41S-JBは設定したプリセットを呼び出すことができます。
”FACTORY”はWISYCOMの工場出荷時の設定です。
”USER”は”USER”に保存した設定を呼び出すことができます。
”USER”はサブメニューで”save to”に合わせて”ON/SEL”を押すと
現在の設定を保存することができます。
プリセットより設定が変更された(チャンネル/グループの変更は除く)場合はア
スタリスクマークが表示されます。
アスタリスクマークは変更した設定を現在選択しているプリセットに保存するま
で表示されます。
PRESET1~PRESET8の設定はプログラムキットのUPK300/UPKMiniもしくは使用した
赤外線にて変更可能です。
MTP40S-JB/MTP41S-JB User Manual
 Loading...