40
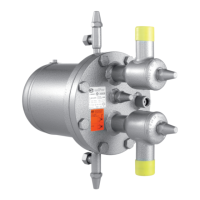
HR4 et HS50 (cf. vues en coupe 2b et 2d)
HR4 and HS50 (see also sectional drawings 2b and 2d)
• Afin de pouvoir ôter la bride de couvercle, pos. 11,
il faut d’abord enlever le capuchon protecteur, pos.
72, ainsi que la garniture presse-étoupe, pos. 74,
du levier.
• Dévisser les vis M16x50, pos. 21, et retirer la bride
de couvercle.
• En dévissant les deux vis à six pans creux (de
manière analogique à pos. 25, fig. 16b), l’unité de
commande peut être retirée et remplacée.
• Lors de l’assemblage, remplacez le joint de l’unité
de commande (de manière analogique (analogue)
à pos. 32, fig. 16b) ainsi que le joint du couvercle,
pos. 31.
Procédez selon le chap. 9.
In order to take the cover flange, pos. 11 off, you need
to first remove the protective cap, pos. 72 and unscrew
the gland, pos. 74 of the lever.
• Remove the cover plate hexagon screws, pos. 21 and
take the cover off
• Remove the two hexagon socket screw (similar to pos.
25 of fig. 16b) and you can take the entire control unit
out and exchange it.
• Always replace the gasket of the control unit (similar
pos. 32 of fig, 16b) und the cover-gasket during re-
assembly.
Proceed per chapter 9.
Fig. 16 c Fig. 16 d
cf. fig. 2c, 2e et 16 c, 16 d)
HS30 – HS40/ WPHR (see fig. 2c, 2e and fig. 16c, 16d)
• Ôtez la bride de couvercle, pos. 11, en dévissant
les vis pos. 21.
• Ce faisant, le levier destiné au contrôle du
fonctionnement est desserré du couplage.
• En dévissant les vis cylindriques, pos. 25,
l’ensemble de l’unité de commande peut être
retiré et remplacé.
• Remplacez les joints de l’unité de commande
pos. 37 ainsi que de la bride de couvercle, pos.
31, lors de l’assemblage du détendeur.
Procédez selon le chap. 9
Take the cover flange, pos 11, off by removing screws,
pos 21.
• When removing the cover flange, the lever will be
removed from the coupling
• Remove the two hexagon socket screws, pos. 25 and
you ran remove and exchange the entire control unit
• Always replace the gasket of the control unit, pos. 37
and the gasket of the cover flange, pos. 31 when re-
assembling the regulator
Proceed per chapter 9
11.3 REMPLACEMENT DE LA GARNITURE DE
LEVIER
11.3 REPLACING THE LEVER PACKING
Avant de remplacer la garniture, assurez-vous
que le boîtier du détendeur est hors pression.
Please make sure the regulator housing is
depressurised before replacing the packing.
Cette garniture peut être remplacée sans ouvrir le boîtier
du détendeur.
• Pour cela, après avoir ôté le capuchon
protecteur, pos. 72, retirer le presse-étoupe, pos.
74, en dévissant et remplacer la garniture, pos.
35.
• Ensuite, revisser le presse-étoupe, pos. 74, et
contrôler l’étanchéité.
You can replace the lever packing without opening the
regulator housing.
• After removal of the protective cap, pos. 72, unscrew
the gland, Pos. 74 and replace the packing Pos. 35.
• Re-assemble the gland, Pos. 74 and check for
leakages
11.4 REMPLACEMENT DE LA GARNITURE DE
SOUPAPE
11.4 REPLACEMENT OF THE VALVE PACKING
 Loading...