Prepare for operation
7
Greenstar 8000 + – 6721890764 (2024/06)
3.2.1 Checking the system pressure
If the pressure is too low (Ǽ 0.2 bar) the system is out of operation and a
warning notification stays on the screen. Fill the water until indicator is
in green zone.
Your installer will advise you of the optimum operating pressure.
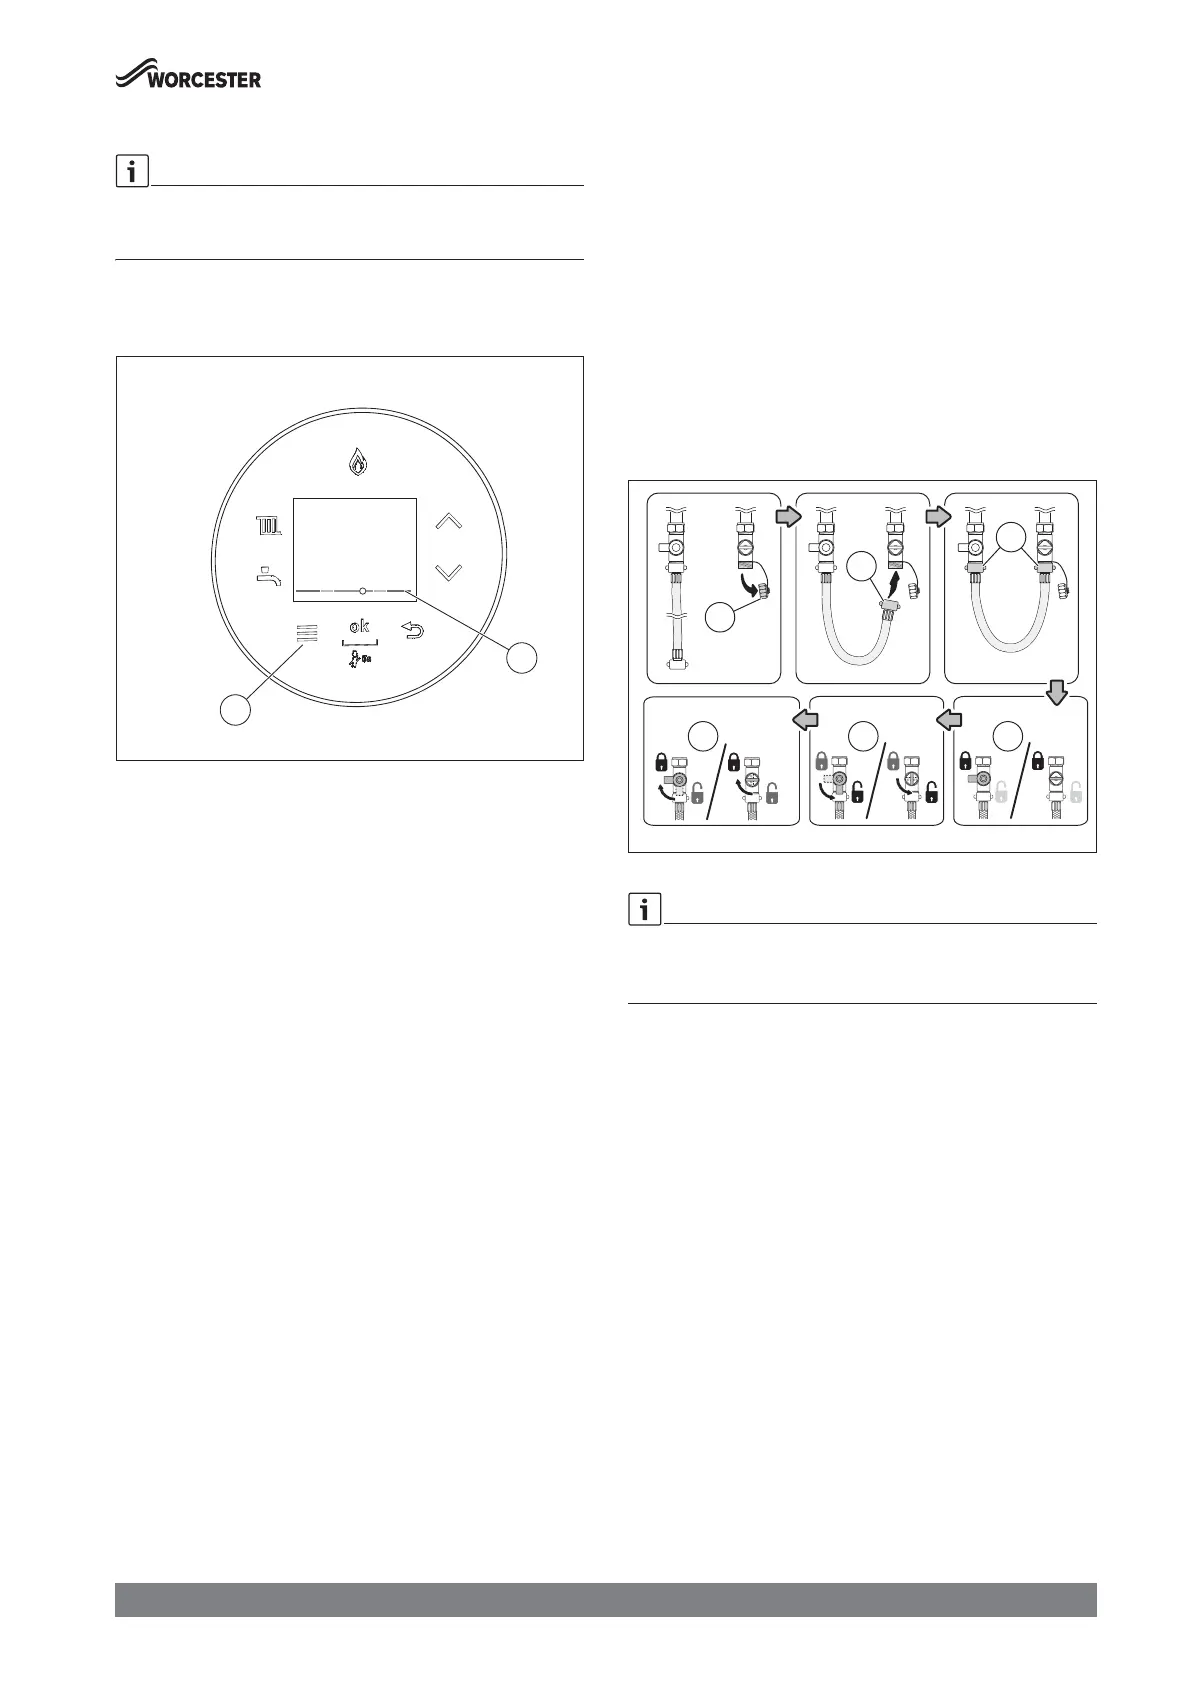
Ā Press the menu key [1]. Select and confirm Boiler status.
The screen Boiler status with a pressure indicator [2] appears.
Fig. 2 Pressure indicator for checking the operating pressure
Ā Check the system pressure at the display.
– Indicator in red zone: pressure is too low or too high.
– Indicator in yellow zone: pressure is low or slightly too high.
– Indicator in green zone: pressure is normal.
Ā Top up the heating water, if the pressure is low or too low.
3.2.2 Constantly re-pressurising the system
Constantly having to re-pressurise the heating system should be
investigated as it is an indicator of potential leaks and the concentration
of inhibitor protection in the system will be reduced; this can result in
corrosion within the heating system, reducing efficiency and increasing
contaminates.
Ā Check for leaks on heating system (pipework and radiator valves).
Ā Contact your installer or maintenance engineer if a recurring
significant decrease or increase in pressure is shown on the pressure
indicator (pressure gauge or pressure display).
System pressure increasing:
Ā If the system pressure repeatedly increases and you need to vent air
from the radiators, refer to Æ section 3.3 "Topping up the system
pressure", page 7.
3.3 Topping up the system pressure
External filling loop
Once the external filling loop and the external pressure gauge have been
located, follow the instructions for re-pressurising the system.
Ā Unscrew the blanking cap [1].
Ā Attach the hose [2] to the valve.
– Usually one end of the hose is already connected to one of the
system fill isolation valves.
Ā Ensure both ends [3] of the hose are screwed on hand tight.
Ā Monitor the pressure via the external pressure gauge.
– The system fill isolation valves [4] are in a closed position (the
handle/screwdriver slot is across the valve).
Ā Turn the handle/screwdriver slot through 90° to open valves and
slowly fill the system.
– The system fill isolation valves [5] are opened (the handle/
screwdriver slot is in-line with the valve).
– The pressure at the display will start to rise.
Ā Set the pressure between 1 and 1.5 bar pressure.
Ā Turn the handles/screwdriver slots back, through 90°, to close the
valves.
– The system fill isolation valves [6] are in a closed position (the
handle/screwdriver slot is across the valve).
Ā Top up the system pressure, if as a result of the air bleeding the
pressure drops off.
Once the pressure has settled between 1 and 1.5 bar.
Ā Ensure the valves are closed.
Ā Remove the hose [2] and replace the blanking cap [1].
Fig. 3
If the pressure reads more than 1.5 bar as a result of over filling:
Ā Bleed one radiator until the pressure gauge returns to between 1 and
1.5 bar.