18
18
AFTER SALES SUPPORT
1300 889 028 (toll free)
e-mail:
MODEL No.:
info.aldi@positecgroup.com
AG36 • 8290 • 06/2019
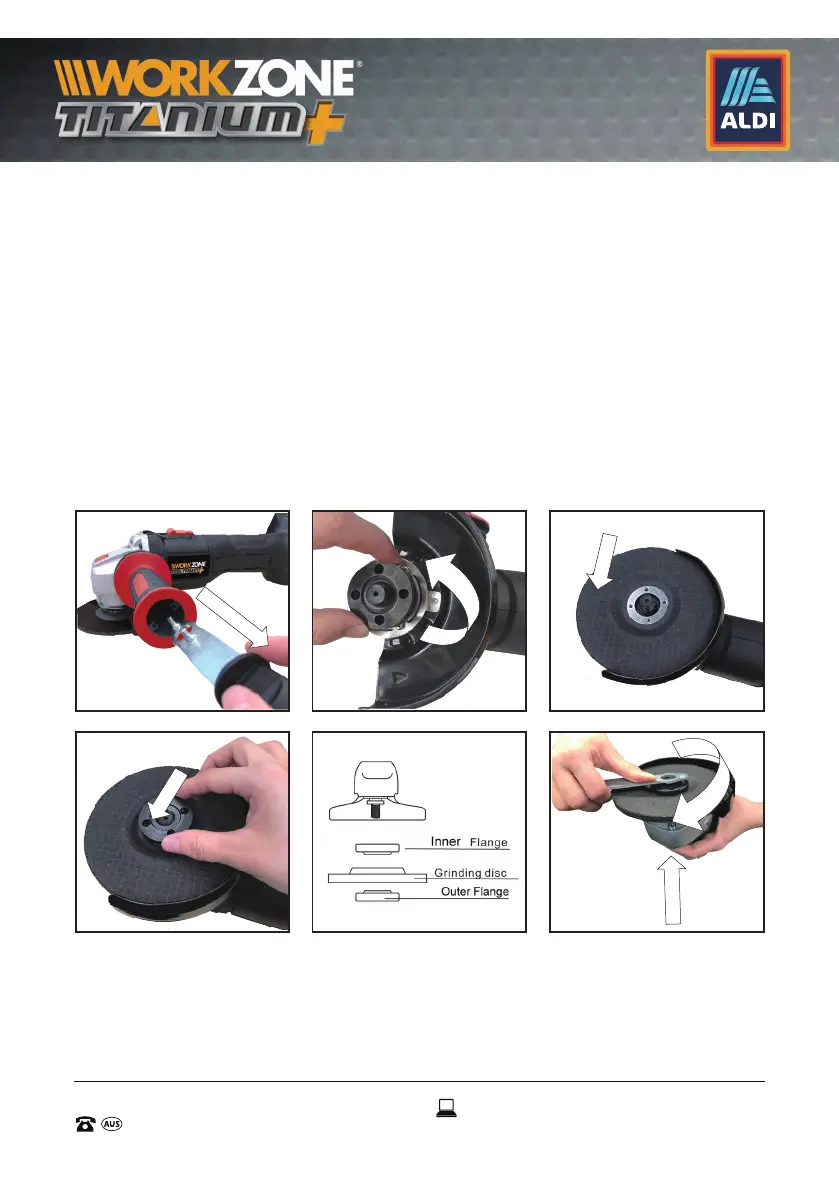
direction.
3) Place the grinding disc (9) onto the inner flange (12).
4) Place the outer flange (11) onto the grinding disc (9).
NOTE: Fit the threaded outer flange (11) making sure it is facing in
the correct direction. For grinding discs, the flange is fitted with the
raised portion facing towards the disc. See Fig. B5 for reference.
5) Rotate the outer flange (11) in a clockwise direction until it is
secure by hand. To further fully secure the outer flange, press
in and engage the spindle lock button (1) then use the pin
wrench (8) on the outer flange (11) holes and further secure in a
clockwise direction.
B1
B4
B2 B3
B6
B5