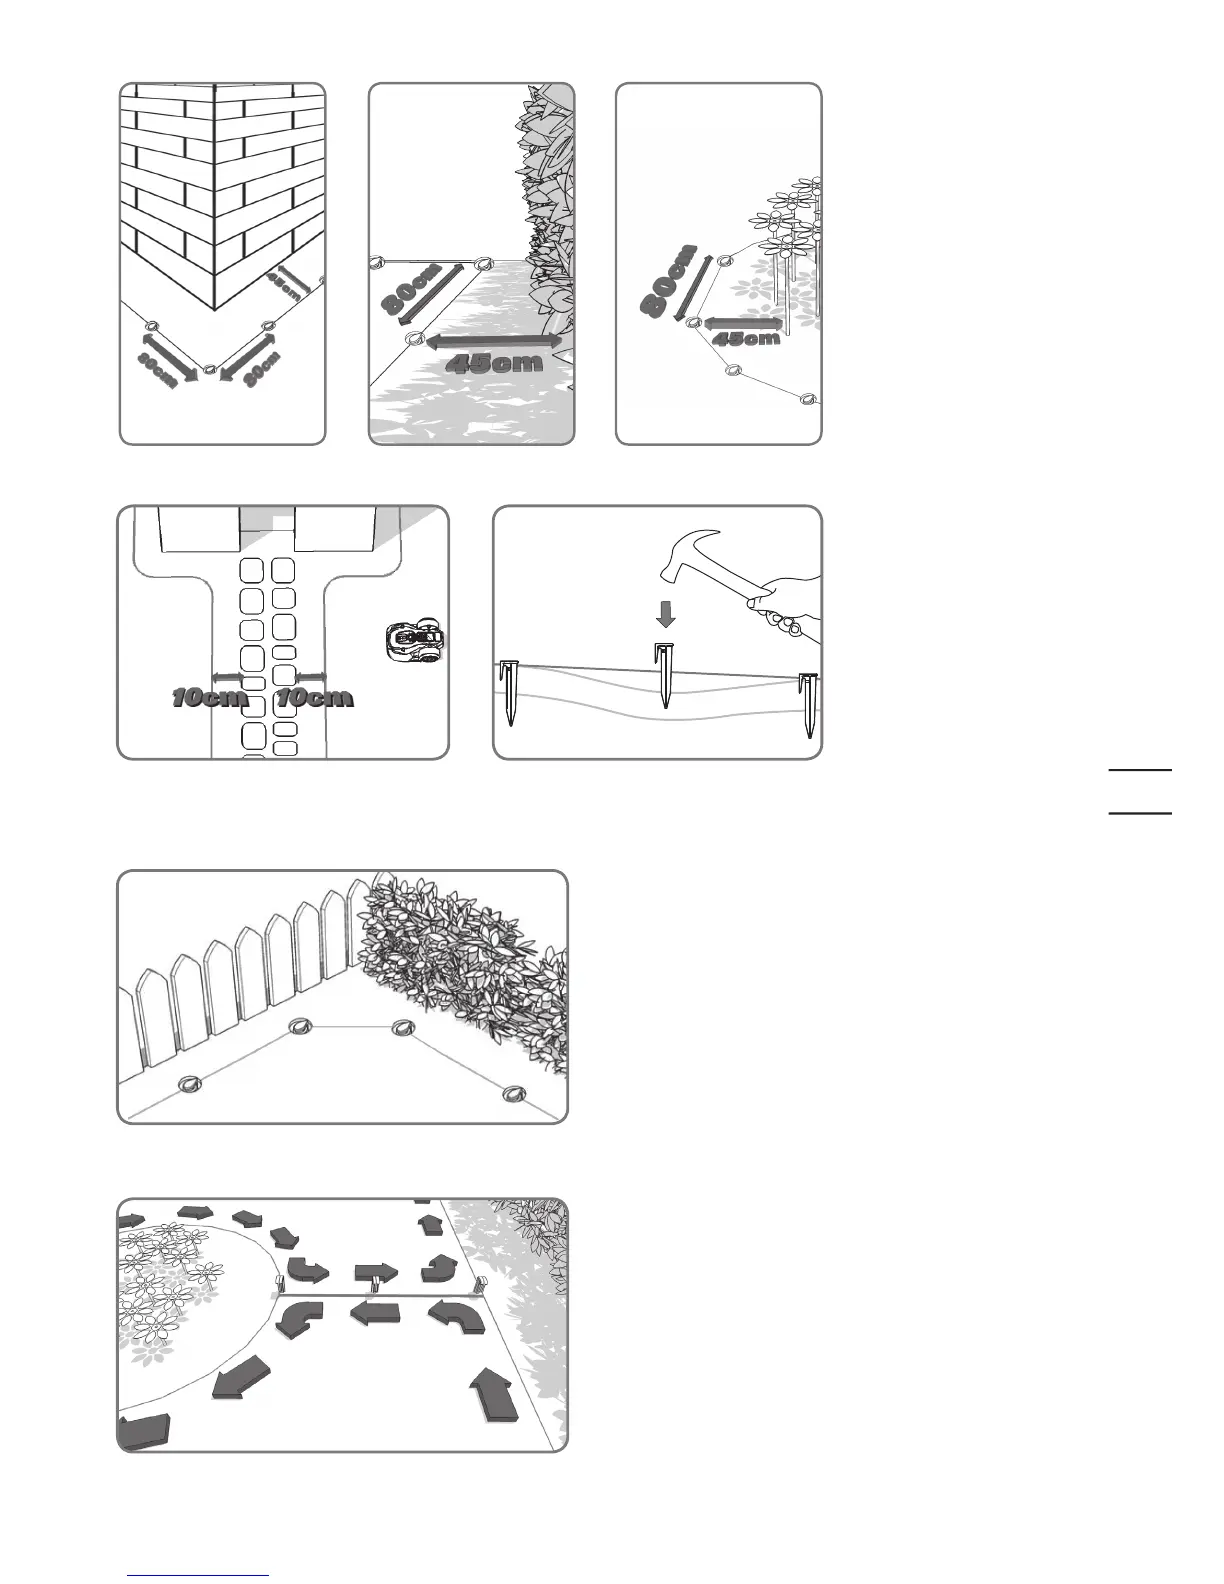
When laying the boundary wire,
use the distance gauge to keep a
45cm* space between the wire
and the boundary. However, in
the case of an obstacle that is
level with ground and safe for the
Landroid
®
L to run over, such as a
driveway or sidewalk, then only a
10cm* space is needed.
Each boundary peg should be
placed around 80cm apart.
Knock the boundary pegs tight to
the ground with the help of the
hammer, although avoid putting
too much pressure on the wire.
Keep the boundary wire straight
and tight between the pegs,
there should not be any slack
wire.
* This is the recommended
distance. Use the provided
distance gauge to ensure proper
installation.
4
When making an island with the boundary wire, follow the path
as shown. The wire should run from the perimeter to outline the
defined island and then return back to the perimeter. The boundary
wire in between the island and perimeter should be laid close
together and held in place by the same boundary peg. During
operation, the Landroid
®
L will be able to freely pass over this part of
the wire.
Ensure the Boundary Wire is perfectly straight in each corner.
6
5

 Loading...