12
5. Always keep the battery connect with the
charger and the charger is powered on.
After the battery is fully charged, the green
light will turn on and the charger will stop
charging, but when the capacity is lower
than 90%, the charger will automatically
recharge to make sure the capacity stays
above 90%.
NOTE: if the battery is Defective, the red
light will Flash.
BATTERY CARE
The battery in your cordless lawnmower is a
24-volt sealed lead acid system. The mower
can be stored in any position without fear of
leakage.
• For optimal battery life and performance
the battery should be fully charged every 2
months during storage
• For optimal battery life and performance
the battery should be fully charged after
each use
• Store the battery in a cool dry location.
• The battery can be safely stored down to
14°F (-10°C).
• The battery does not need to be fully
discharged before recharging.
• Initially 2 to 3 charging cycles may
be required after purchase to achieve
maximum run time capacity.
ADDITIONAL BATTERIES can be obtained
from the Customer Helpline.
ASSEMBLY
IMPORTANT! Before you assemble
the lawn mower, check the accessories
according above information, make sure the
accessories are completed.
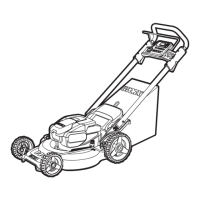
1. FITTING THE HANDLE
(See Fig. B1, B2, B3)
1) Remove the screws(x 2) on the both side
of deck. (See Fig. B1)
2) Insert the lower handle (8) into the holes on
the deck provided.
3) Secure with the screws provided.
(See Fig. B1)
4) Attach the upper handle (1) with the bolts
and Handle knobs (7) to the lower handle
(8). (See Fig. B2)
5) Screw on the two Handle knobs. Check that
the handle is FULLY secured.
NOTE: Ensure the bolts are fully inserted
through the handles before fitting the
handle knobs.
6) Attach the cable clips (3) provided, to the
upper and lower handle. Insert the cable
into the clips ensuring there is enough
cable slack. (See Fig. B3)
2. GRASS COLLECTION BAG ASSEMBLY
Connect the grass box handle to the box top
as shown in Fig C1-C4.
Step 1) Press the front of the handle briefly.
(See Fig. C2)
Step 2) Then push it forward. (See Fig. C2)
Step 3) Push down the back of the handle.
(See Fig. C2)
Step 4) Clip the plastic clips over the metal
frame. (See Fig. C3)
WARNING: Don’t fit the handle in
reversed direction. Fit the handle as
shown in Fig C1.
3. GRASS BAG FITTING
(See Fig D1, D2, D3)
1) Turn the mower off, wait until blade stops
and remove safety key (6).
2) Raise the safety flap (9) and hold it up,
ensure that the mulching insert has been
removed.
3) Pick up the grass bag by the handle, and
position grass bag on the lower hooks (a)
on the mower deck. (See Fig. D2)
4) Release the safety guard to lock the grass
bag into position. Ensure the grass bag is
installed securely. (See Fig. D3)
NOTE: Depress the grass bag slightly to
ensure that it is completely installed.
4. REMOVING/EMPTYING
Hold the grass bag, lift the safety flap (9) and
hold up. Remove grass bag (5).
WARNING! Always check the safety
flap can close the discharge outlet
tightly before using. Never lift the safety

 Loading...